Andromeda Build Guide
Pages
Andromeda Build Guide - Page 5
Assembling the internals
-
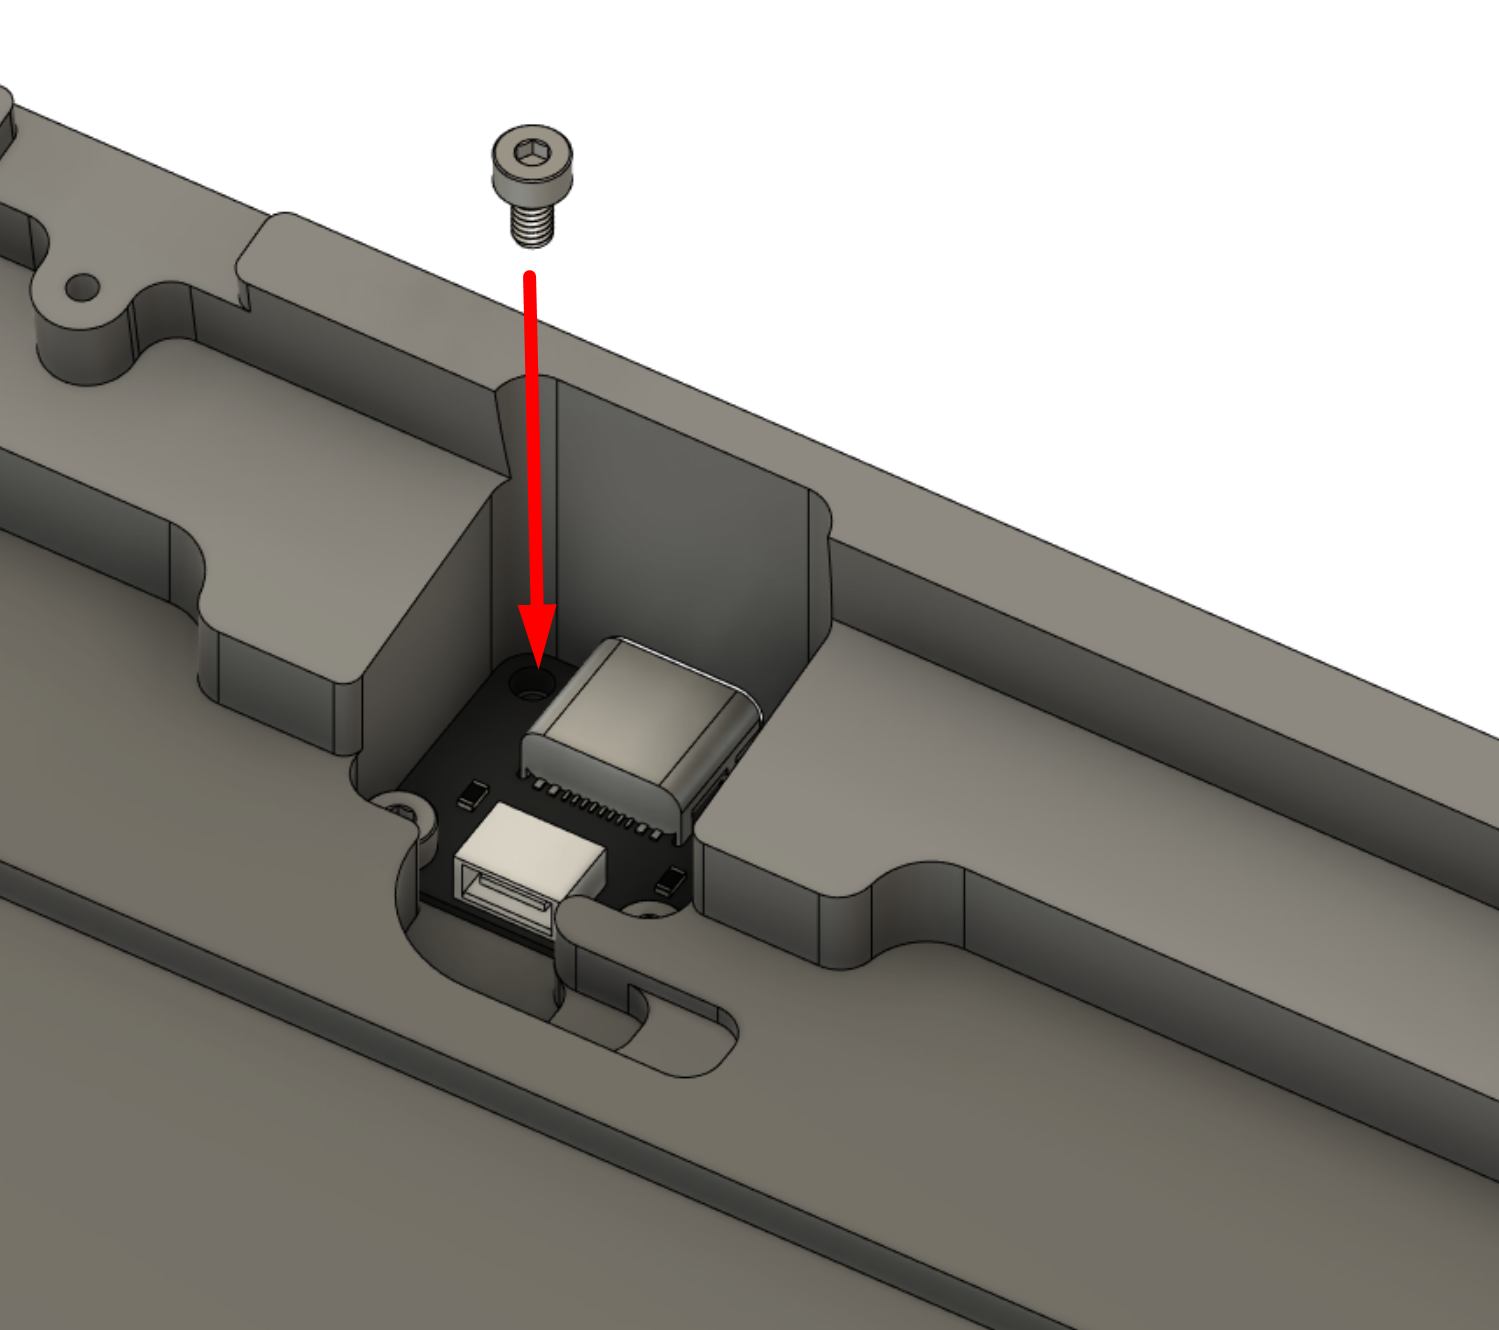
Connect the daughterboard cable into the USB daughterboard if not already connected together.
Insert the daughterboard-cable assembly into the area shown, and screw it into place using the four short daughterboard screws.
Note: Due to limitations of the 3D model, the cable will not be displayed in the step diagrams.
-
Prepare the prepared top-plate-PCB-switch assembly from the end of the previous page.
Double-check that the temporary plate retention screws have been removed.
Place the two case halves rear-to-rear.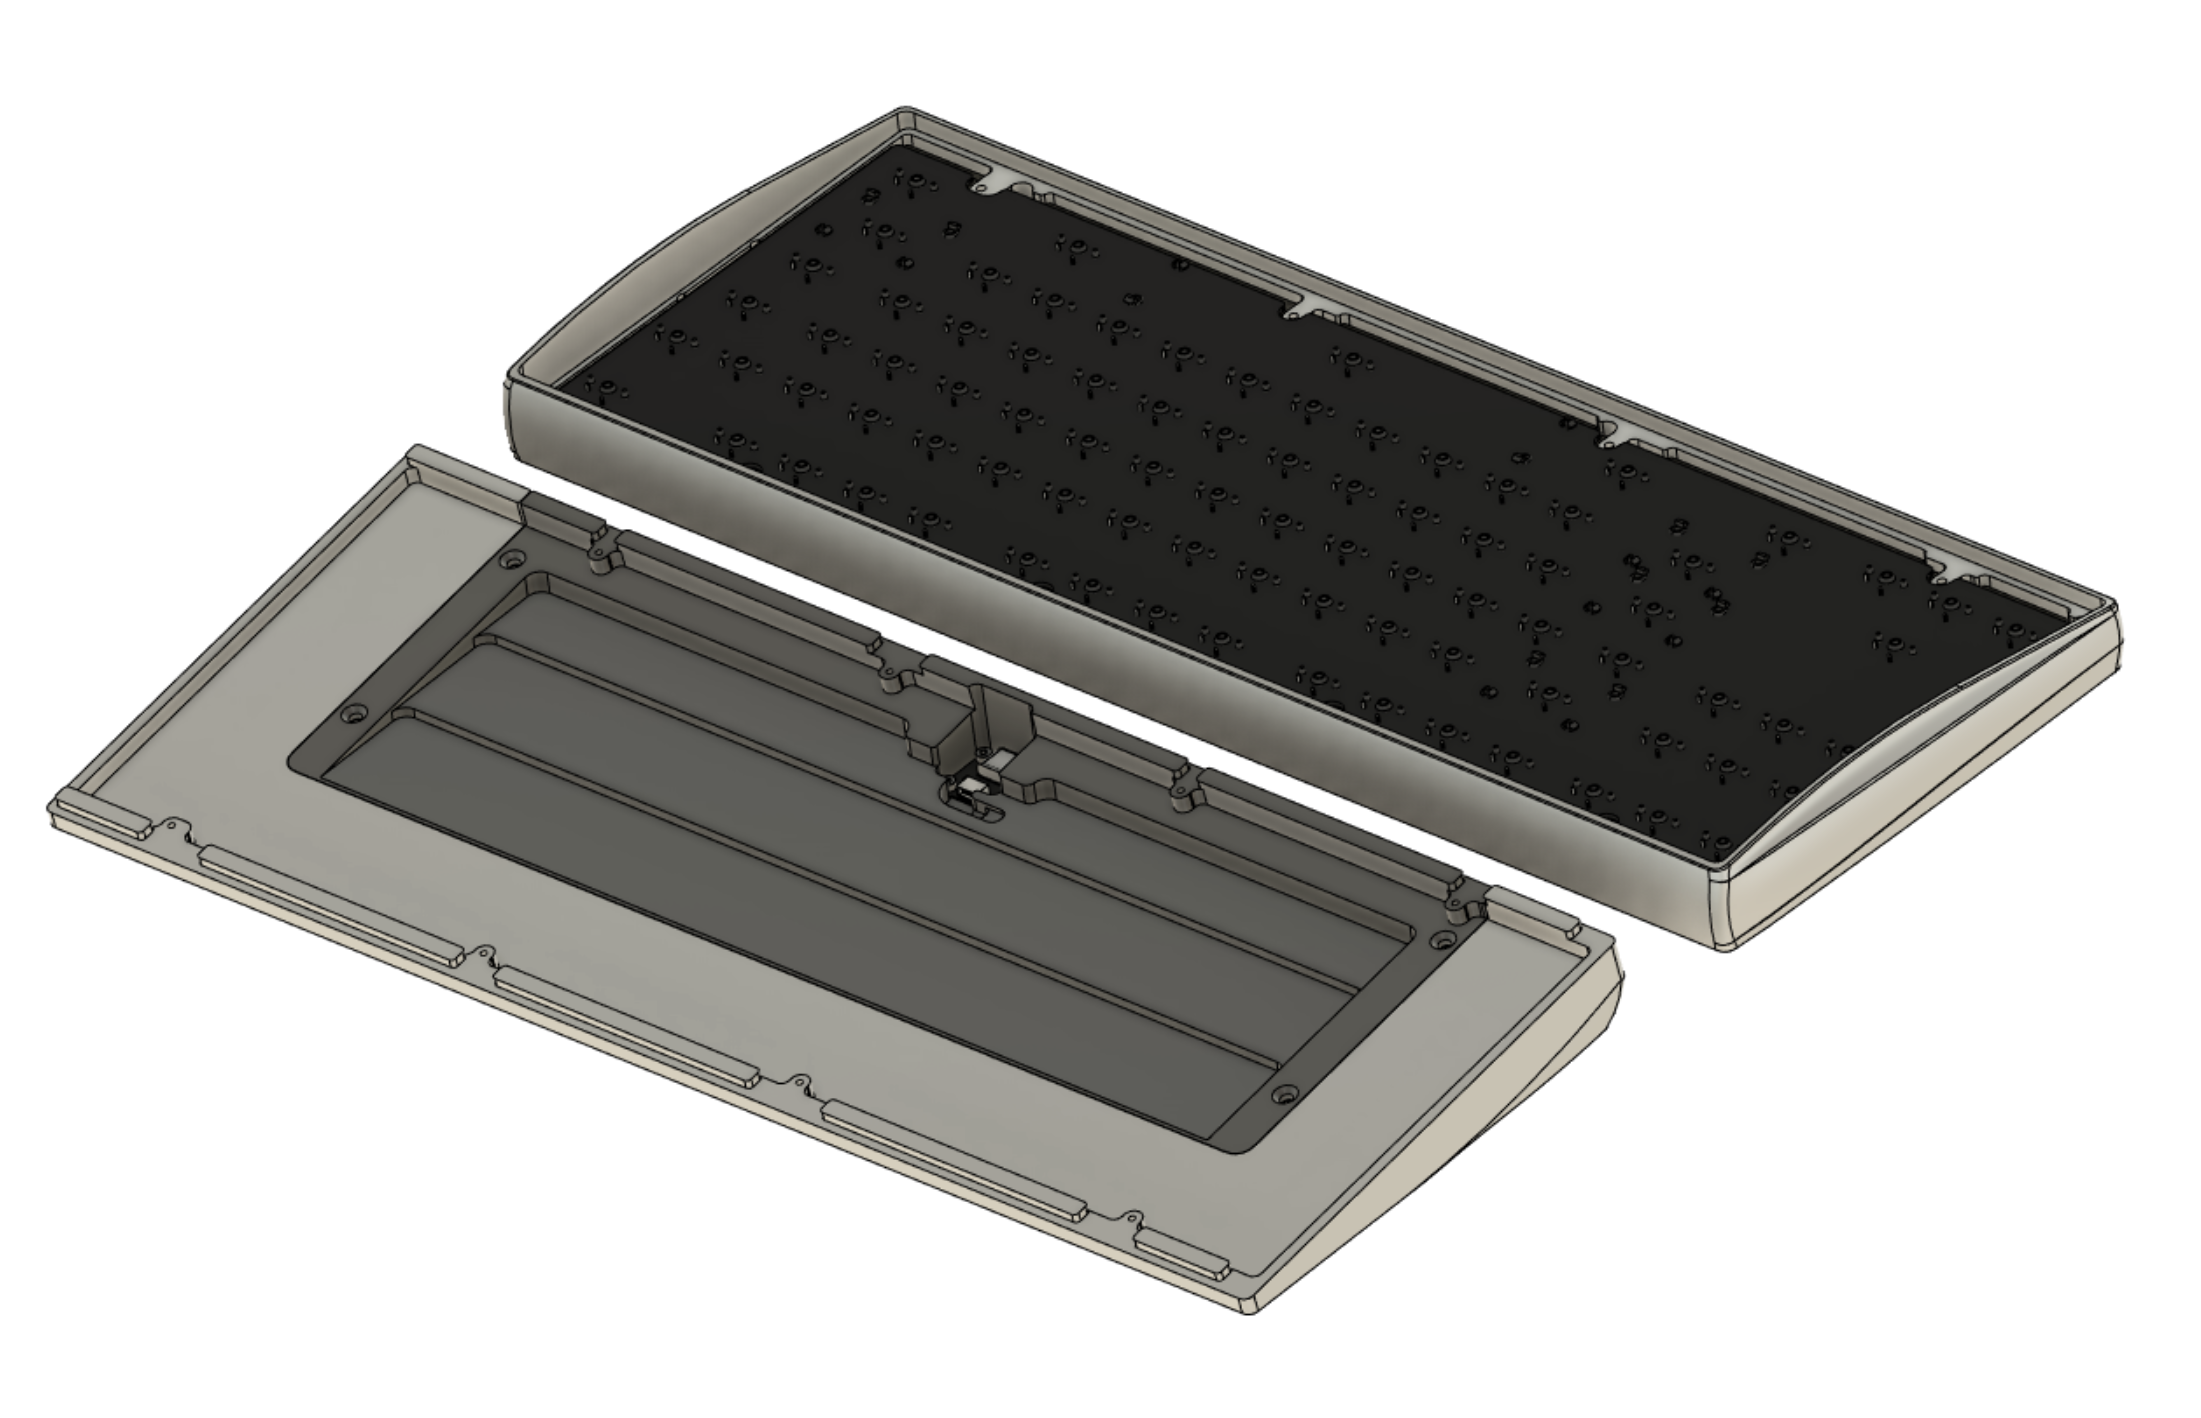
-
If you are planning on using the below-PCB foam layer, install it at this stage into the bottom case half.
We recommend using it if you prefer a maximally muted/damped sound at the tradeoff of firmer typing feel; for a more expansive sound and/or softer typing feel, we recommend leaving it out. -
Connect the daughterboard cable into the main PCB.
You may have to reposition the halves for the cable to reach safely; be careful not to dent the two case halves together to avoid damage.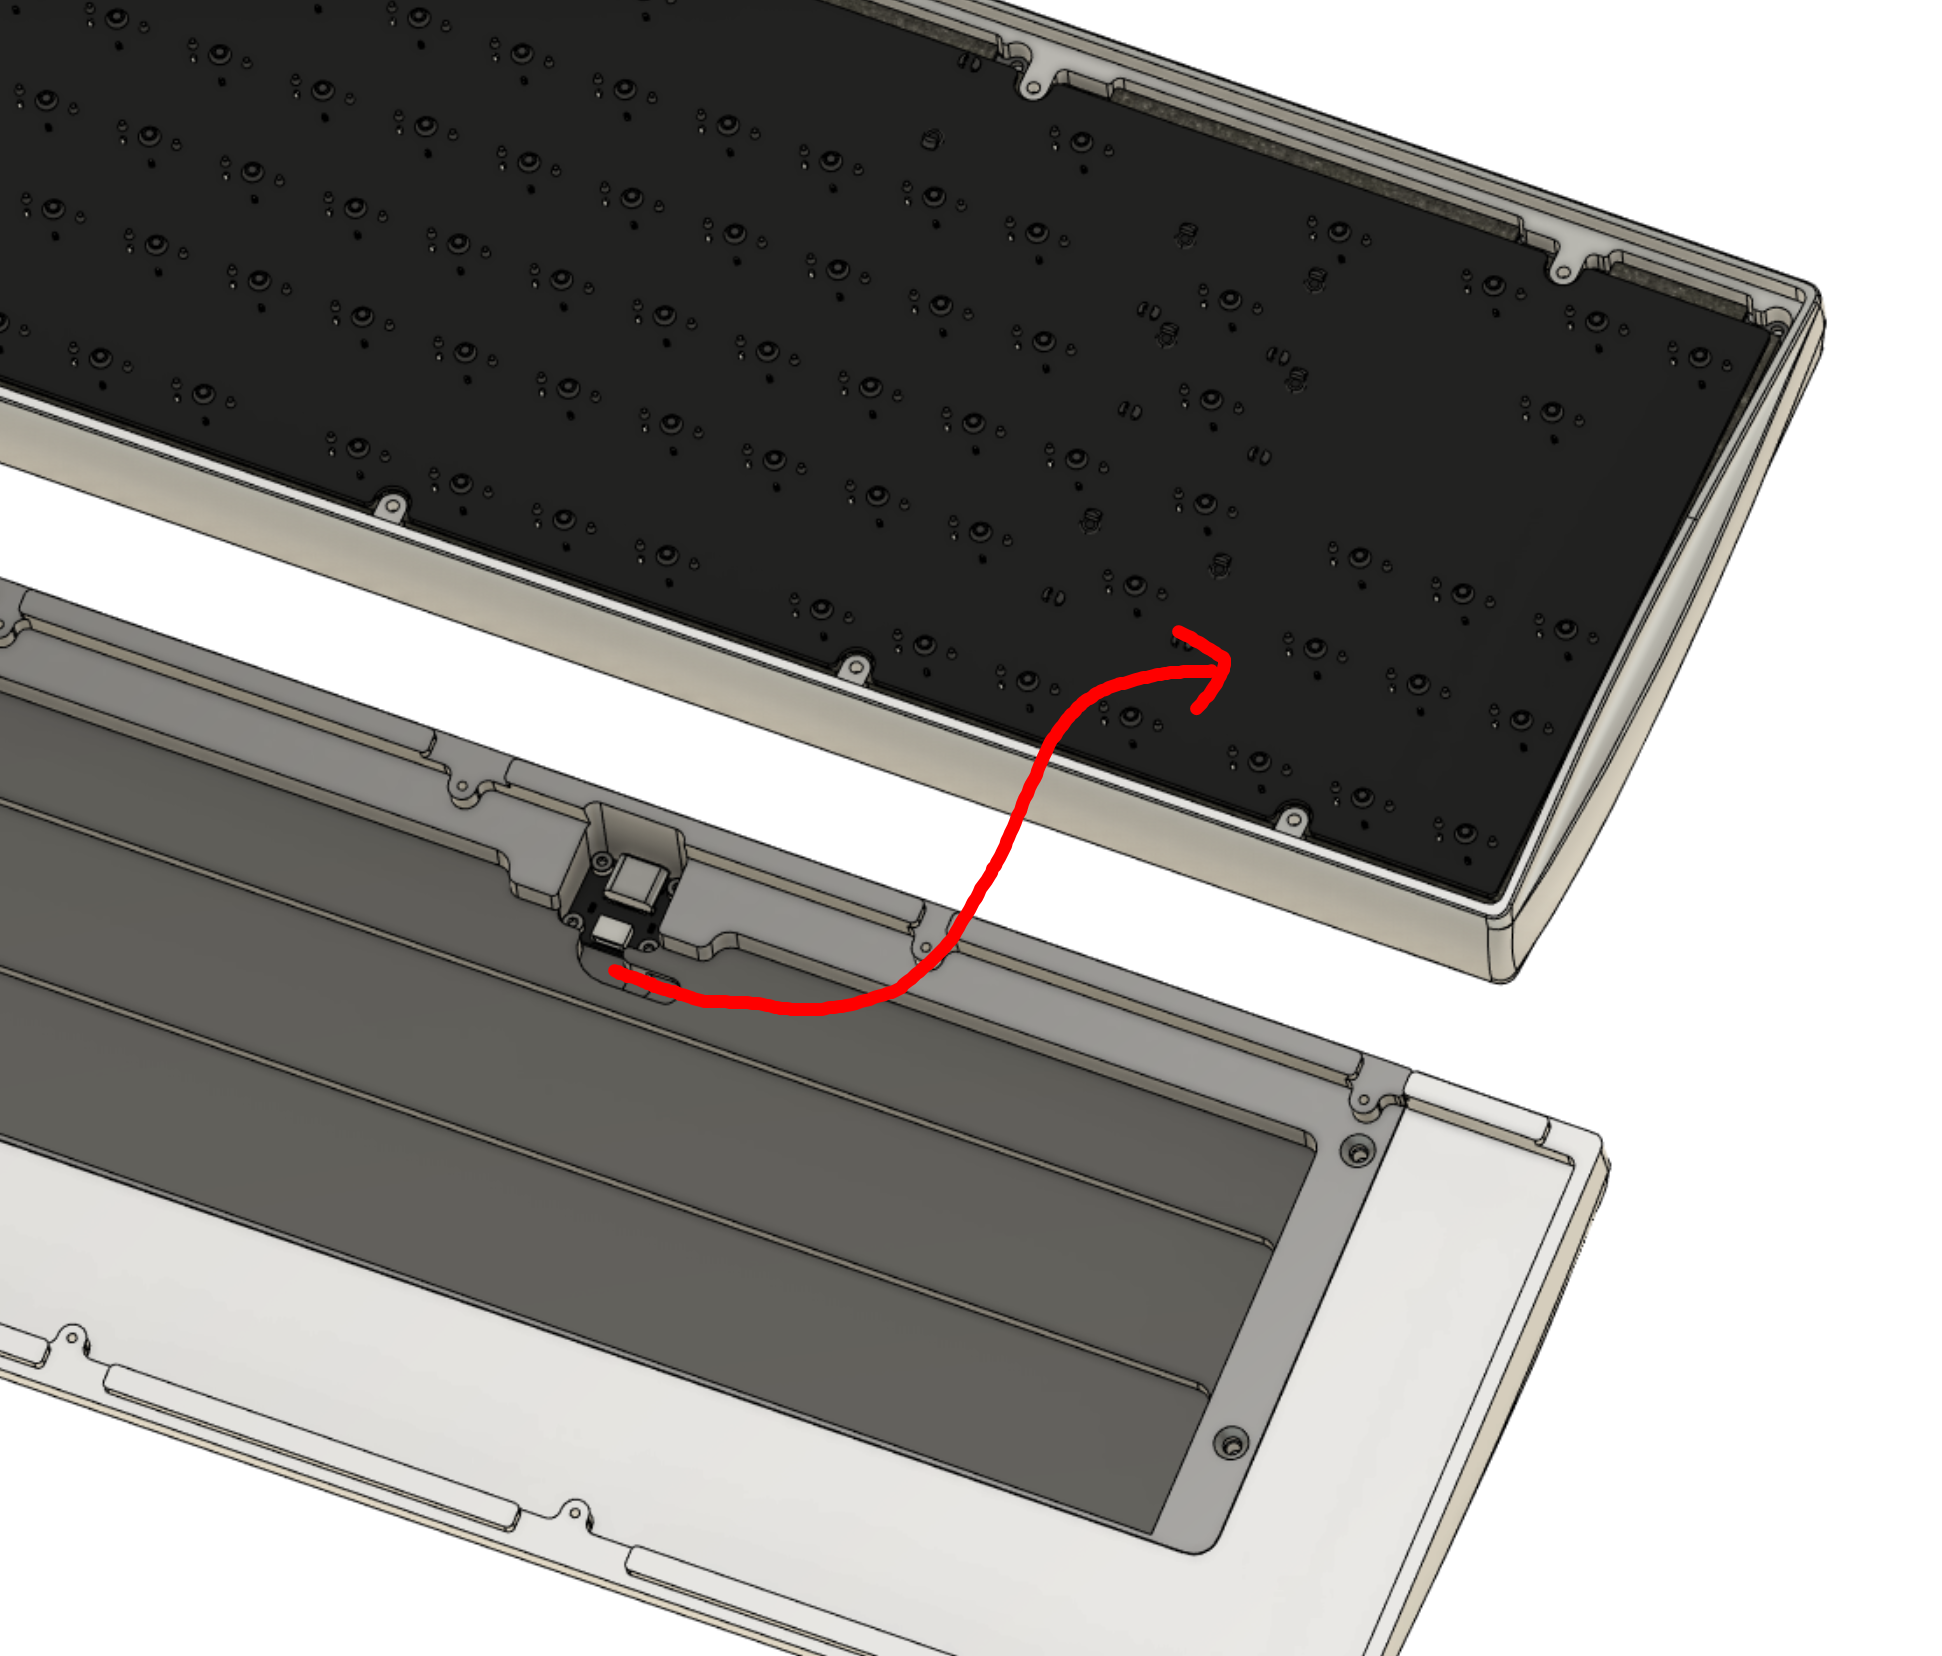
-
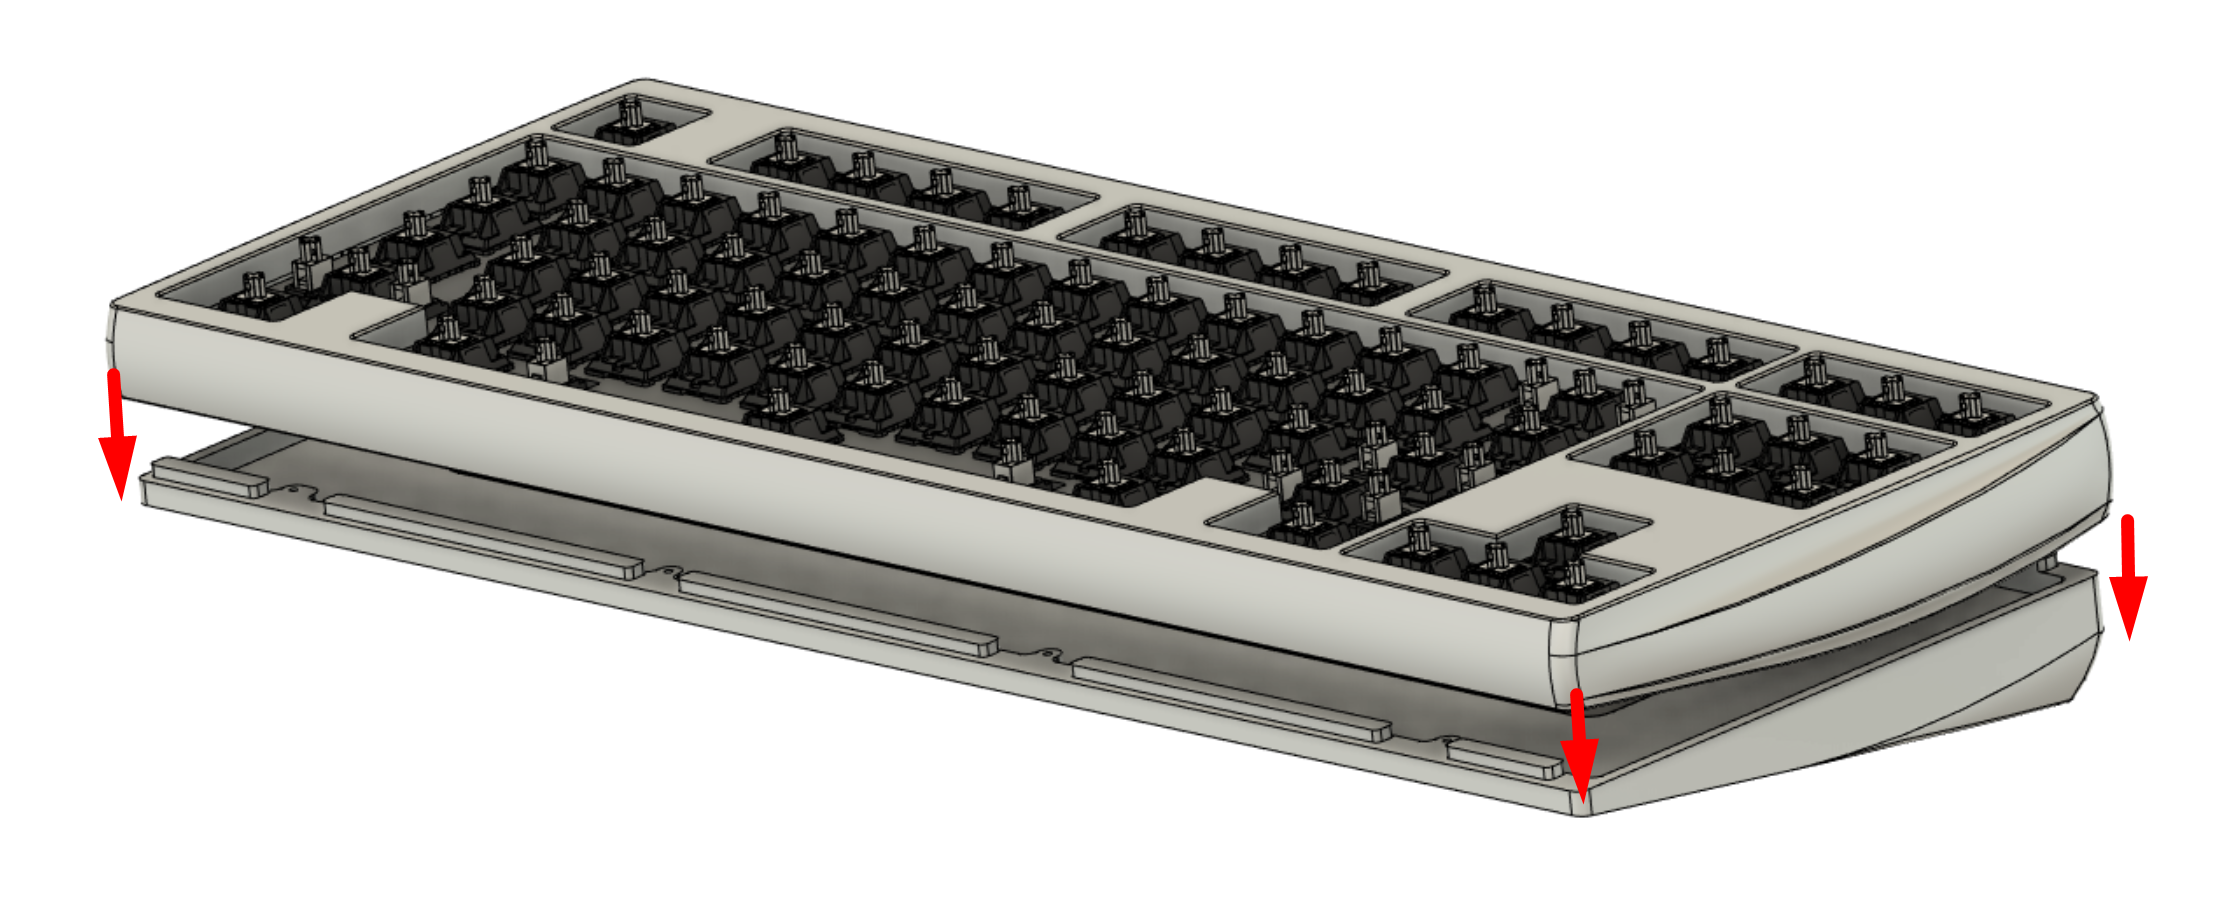
Flip the upper half right-side-up and close it onto the bottom case half. Take care to avoid straining the daughterboard cable as well as to avoid denting the two case halves together.
-
Install the case screws.

-
Install the keycaps of your choice, connect to a computer, and verify that it works.
Congratulations! You have fully assembled the Andromeda.
Now you are ready for the keymap editing and final steps.