Altair (5-row) Learning Guide - Page 2
The basics
Let’s begin with the simple stuff.
First, place the two halves of your Altair at a slight outwards angle.
A good starting point would be pointing the columns roughly towards your shoulders.
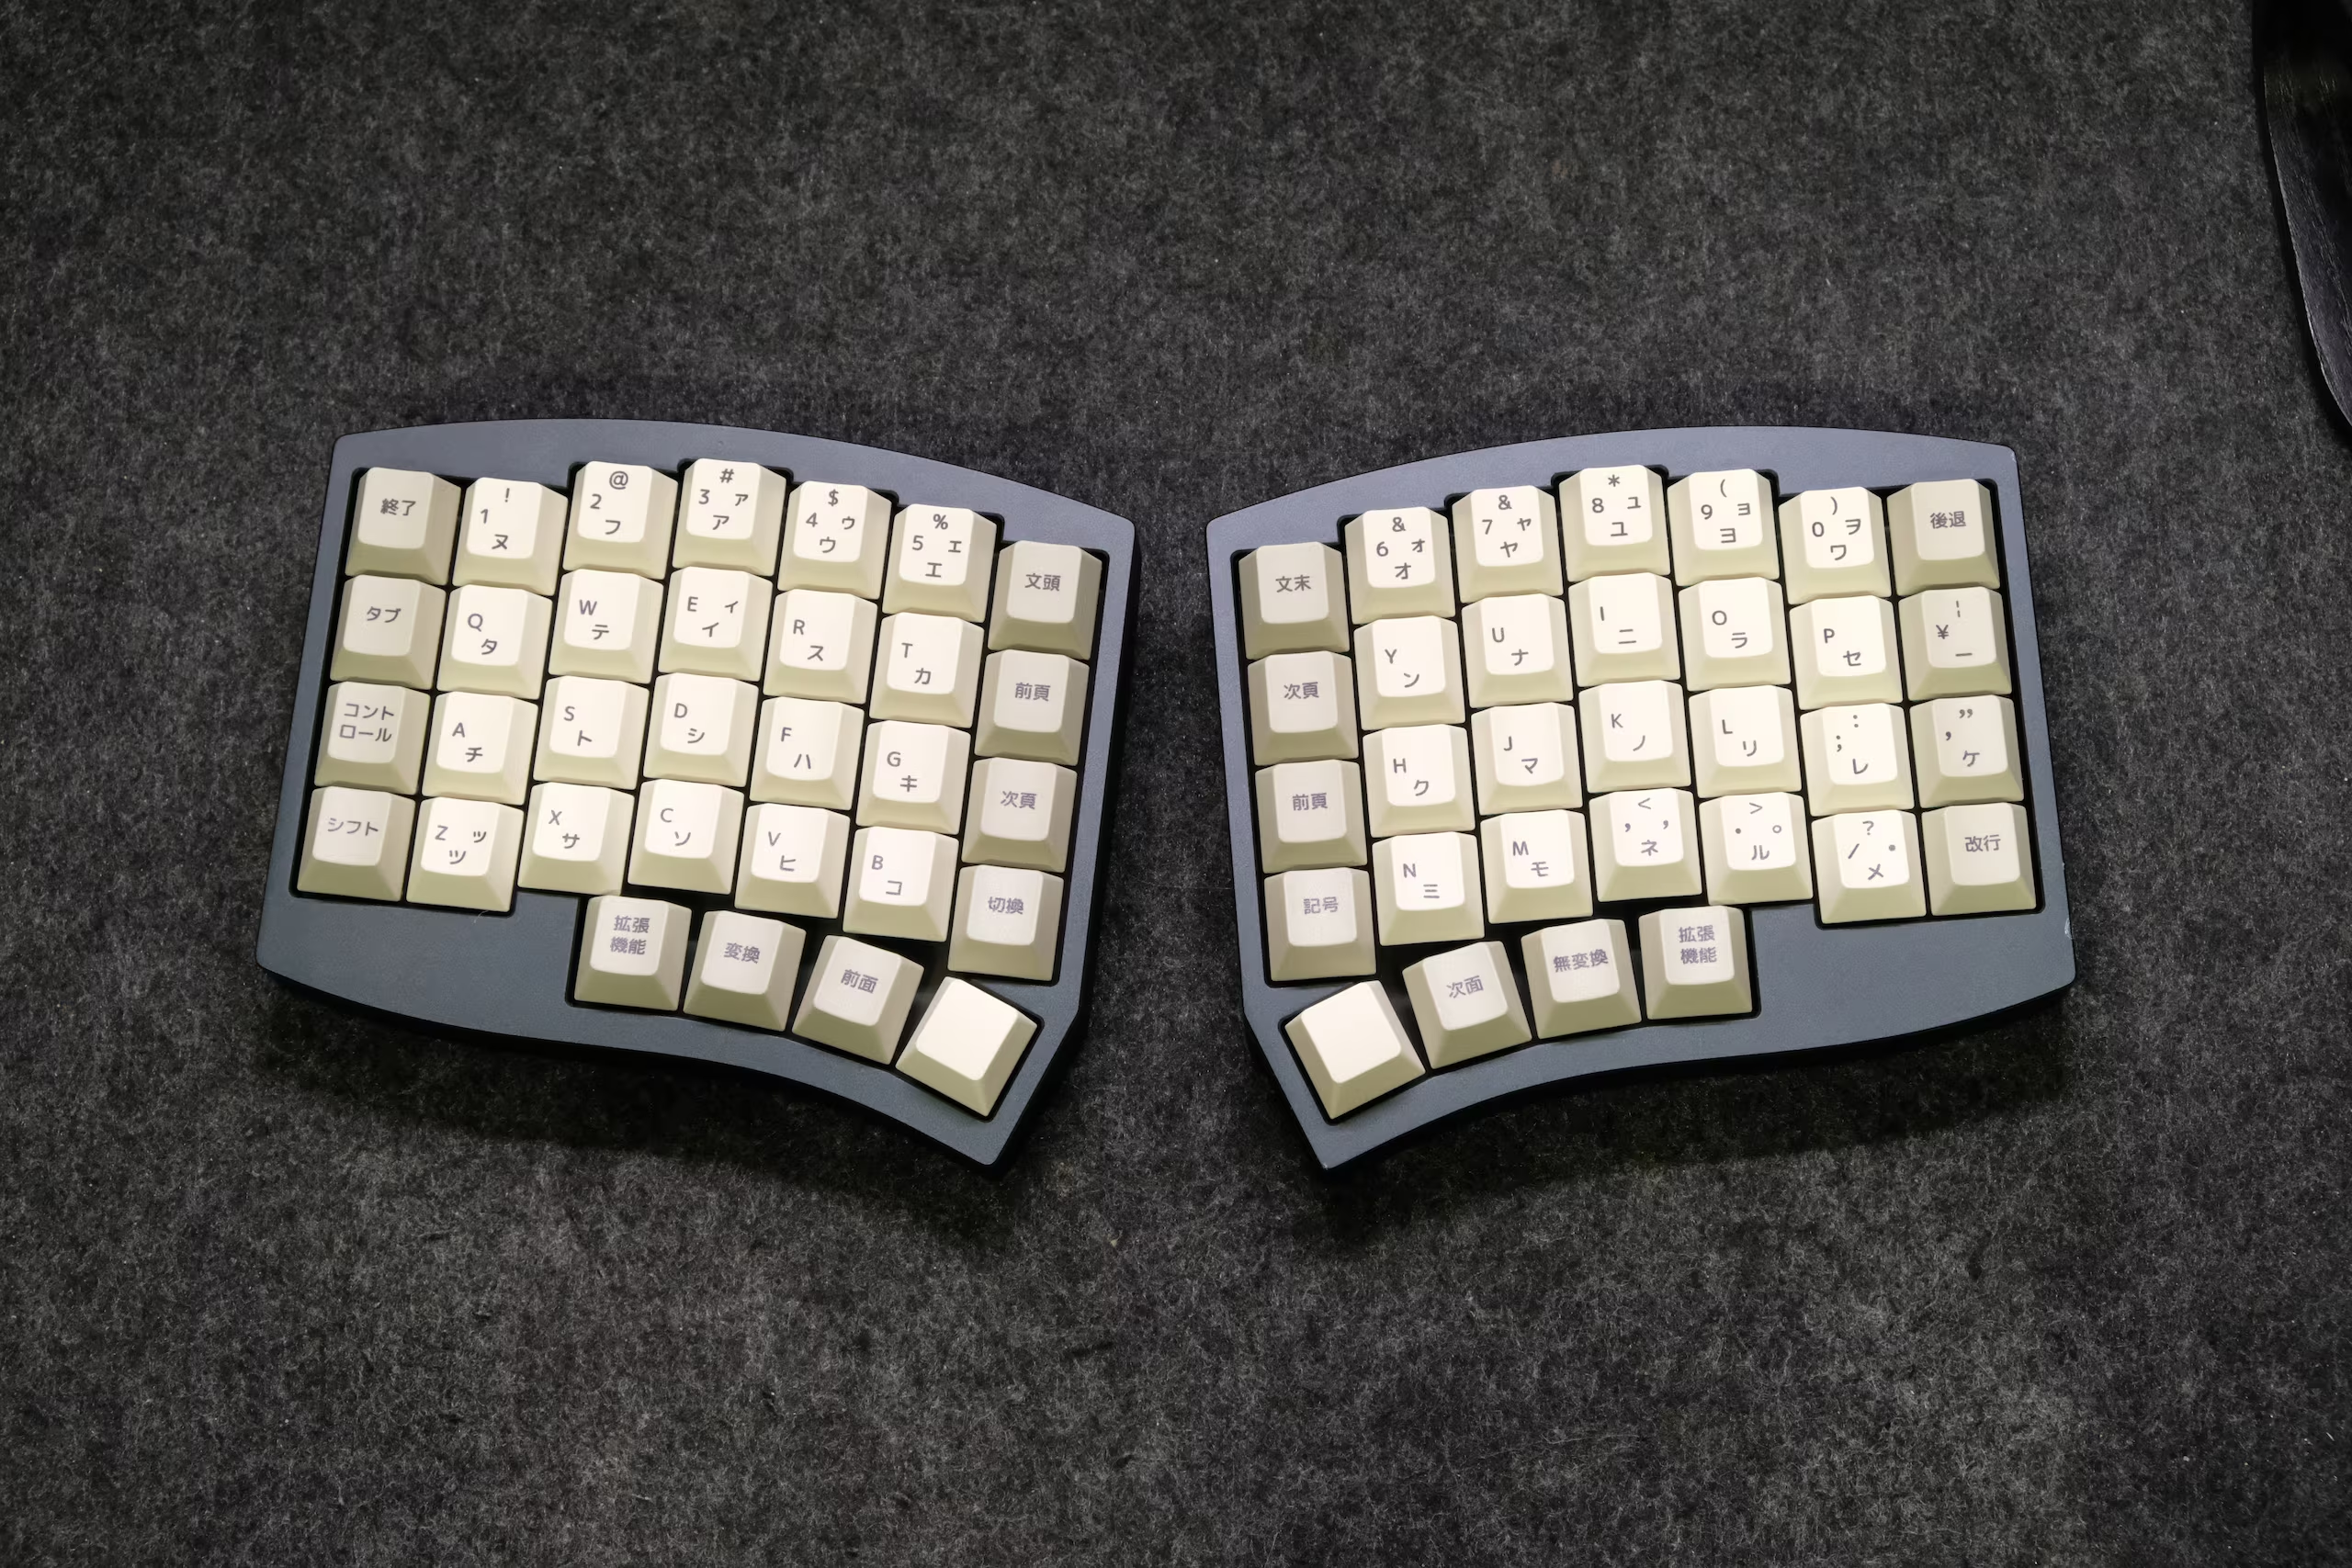
You’ll likely end up placing them further out once you get used to it - but for a first time learning, placing the halves close enough can help ease the transition from an un-split keyboard.
Place one of your hands over the Altair with fingers uncurled, with the fingers roughly parallel with the columns.
Then, move the hand up or down until the thumb is comfortably over the spacebar without hitting the key above.
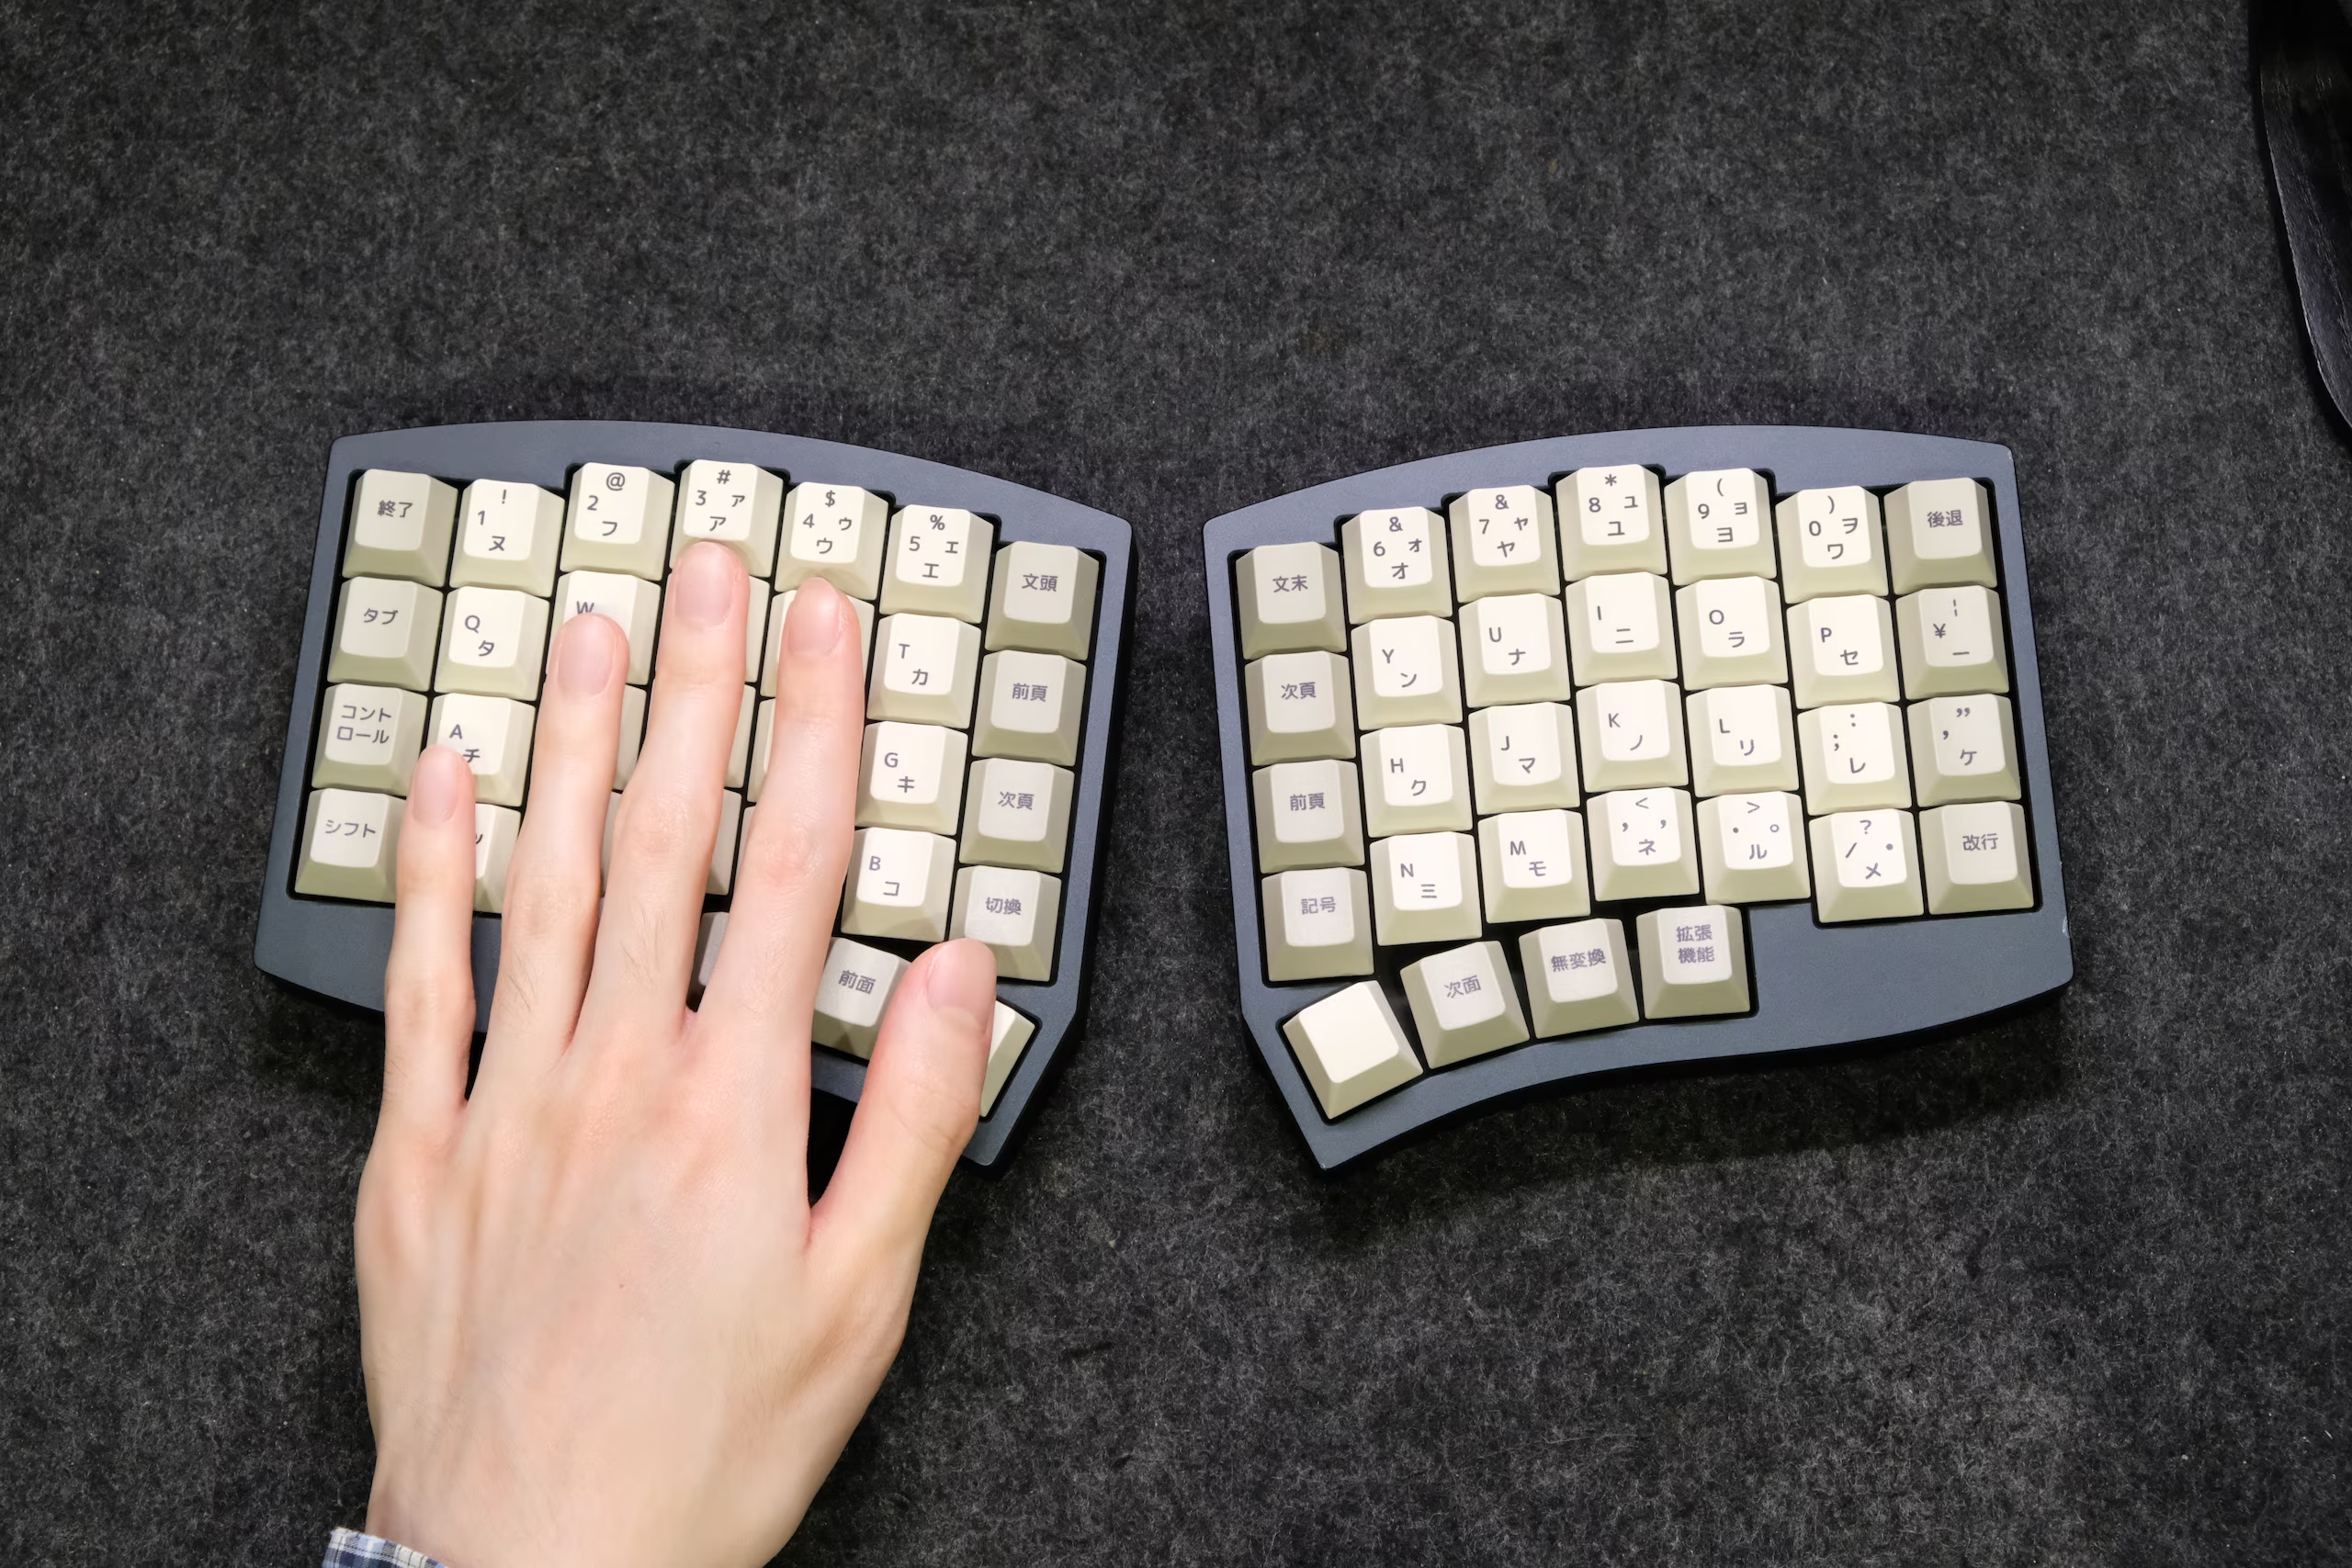
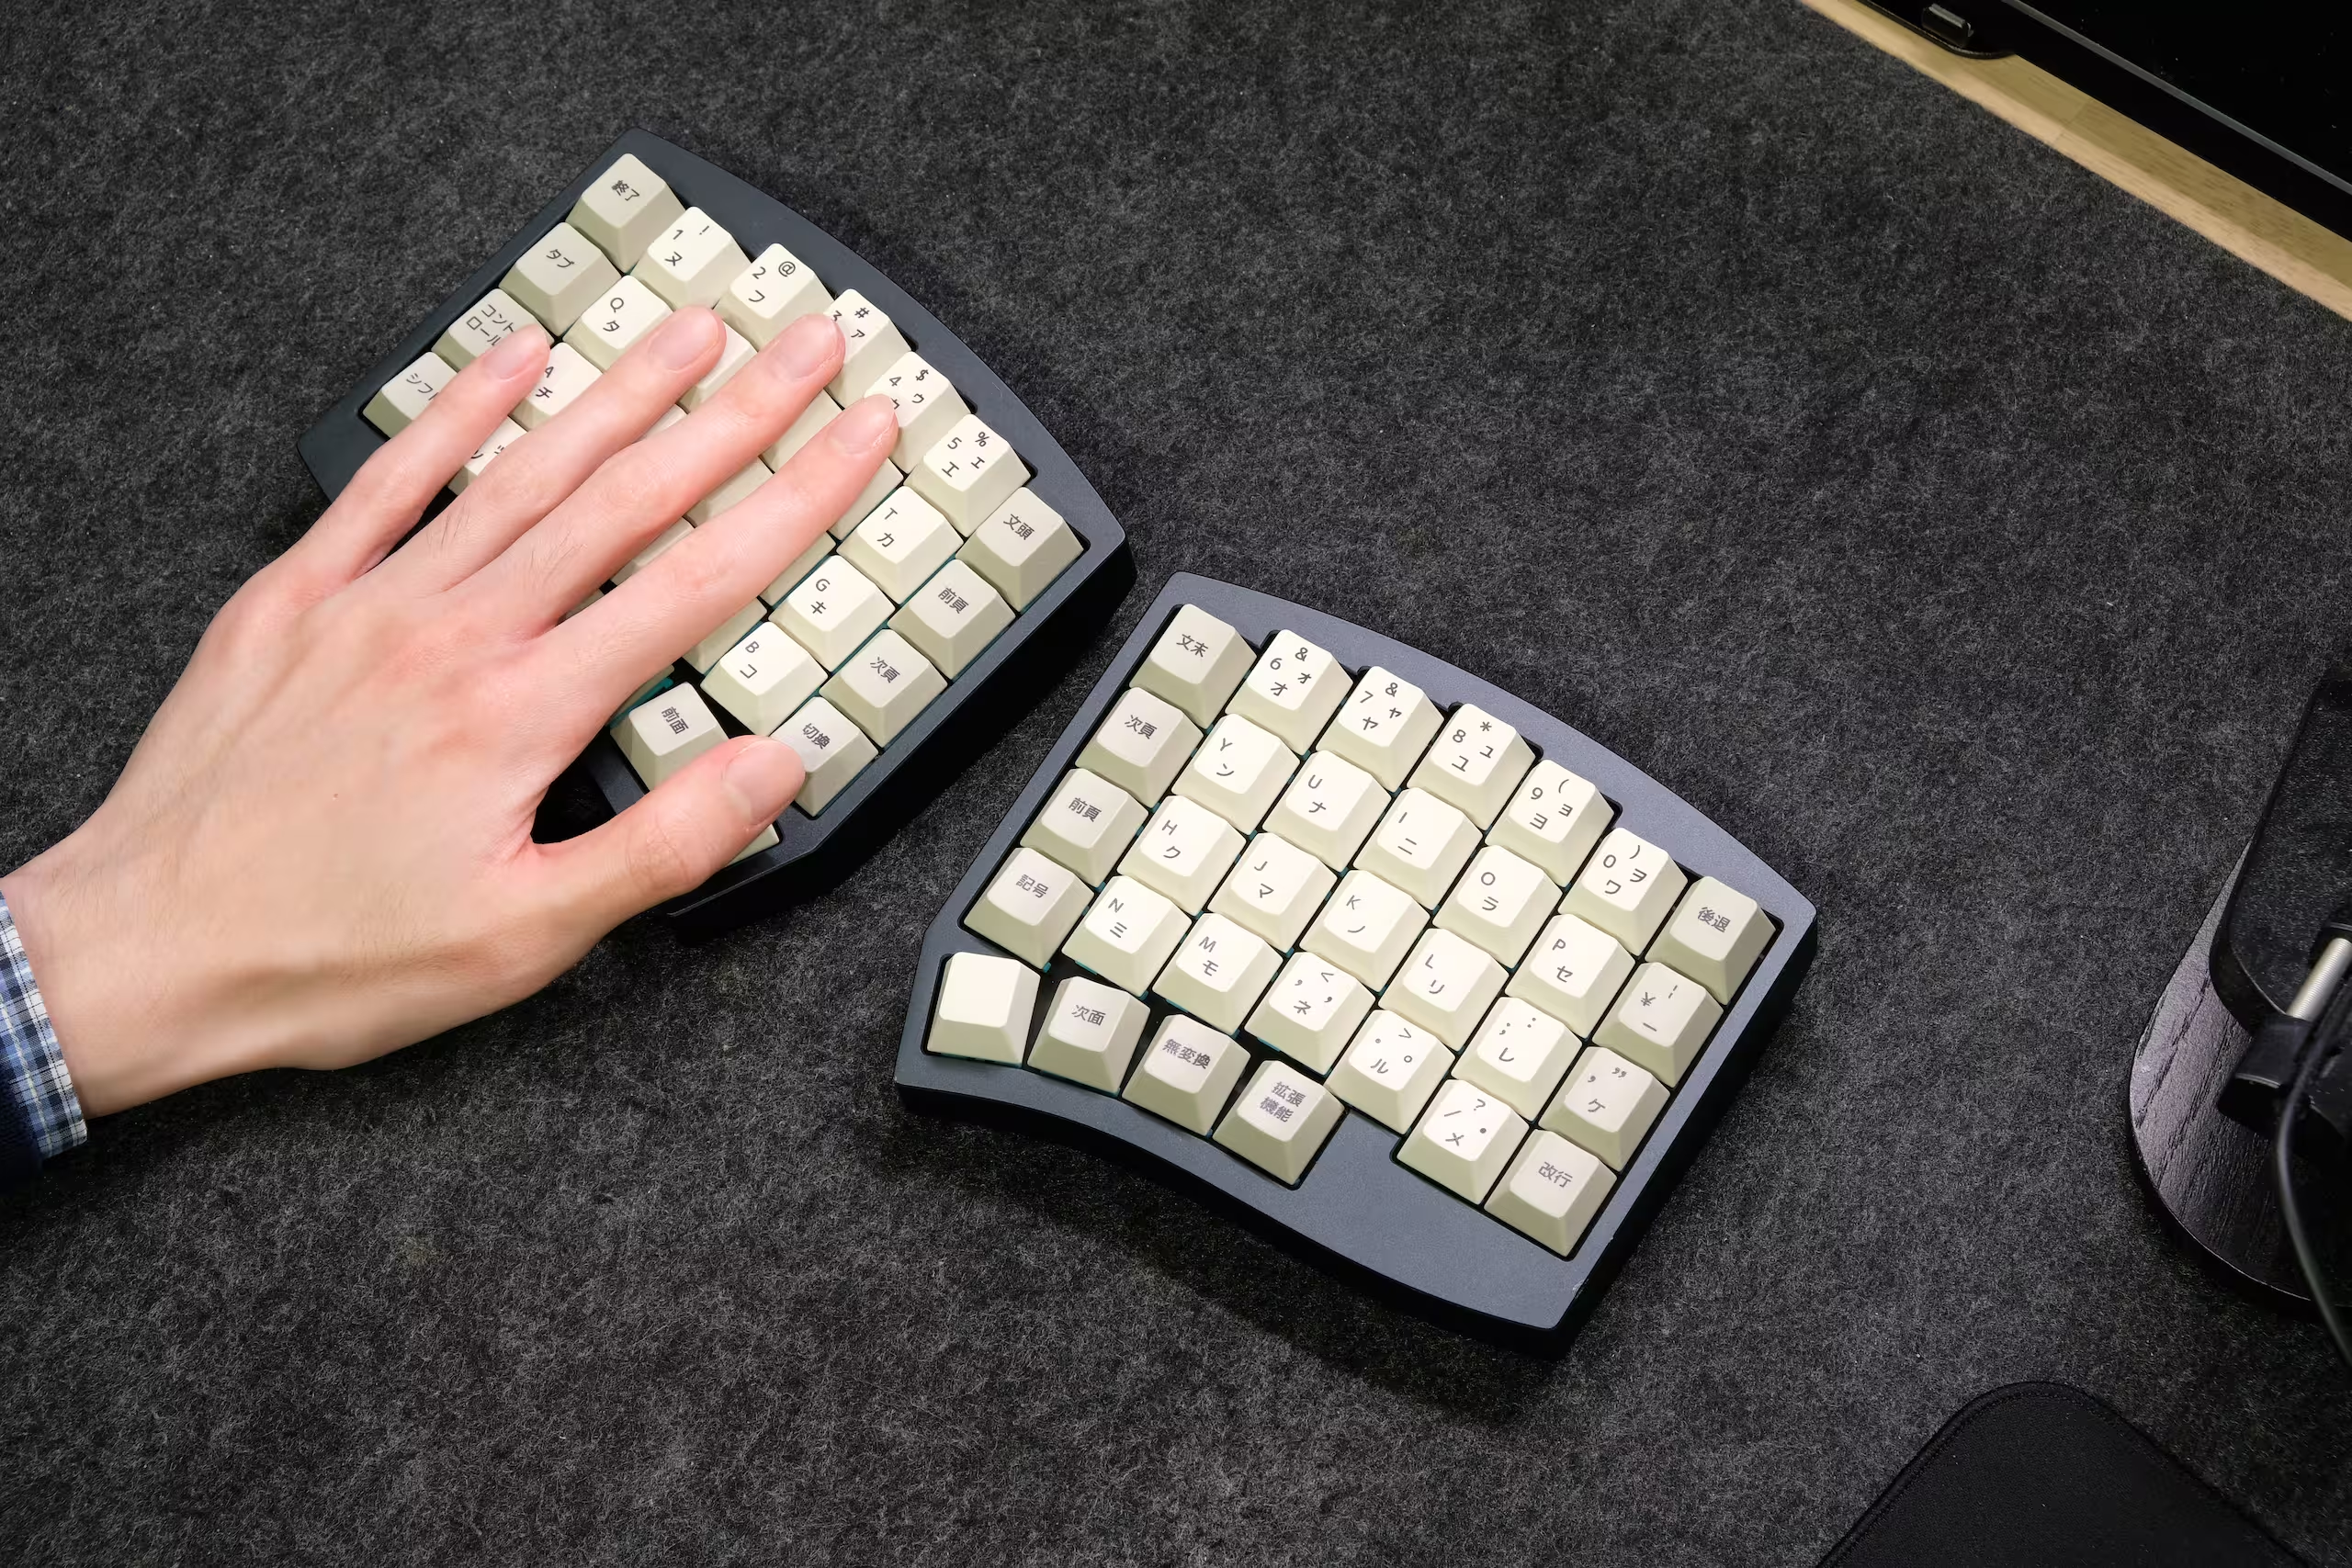
Then, gently curl your fingers in until they rest comfortably at home position.
Note: Make sure your hands are now resting at home position - it’s shifted “outwards” by one column compared to a regular keyboard due to the inner macro key column.
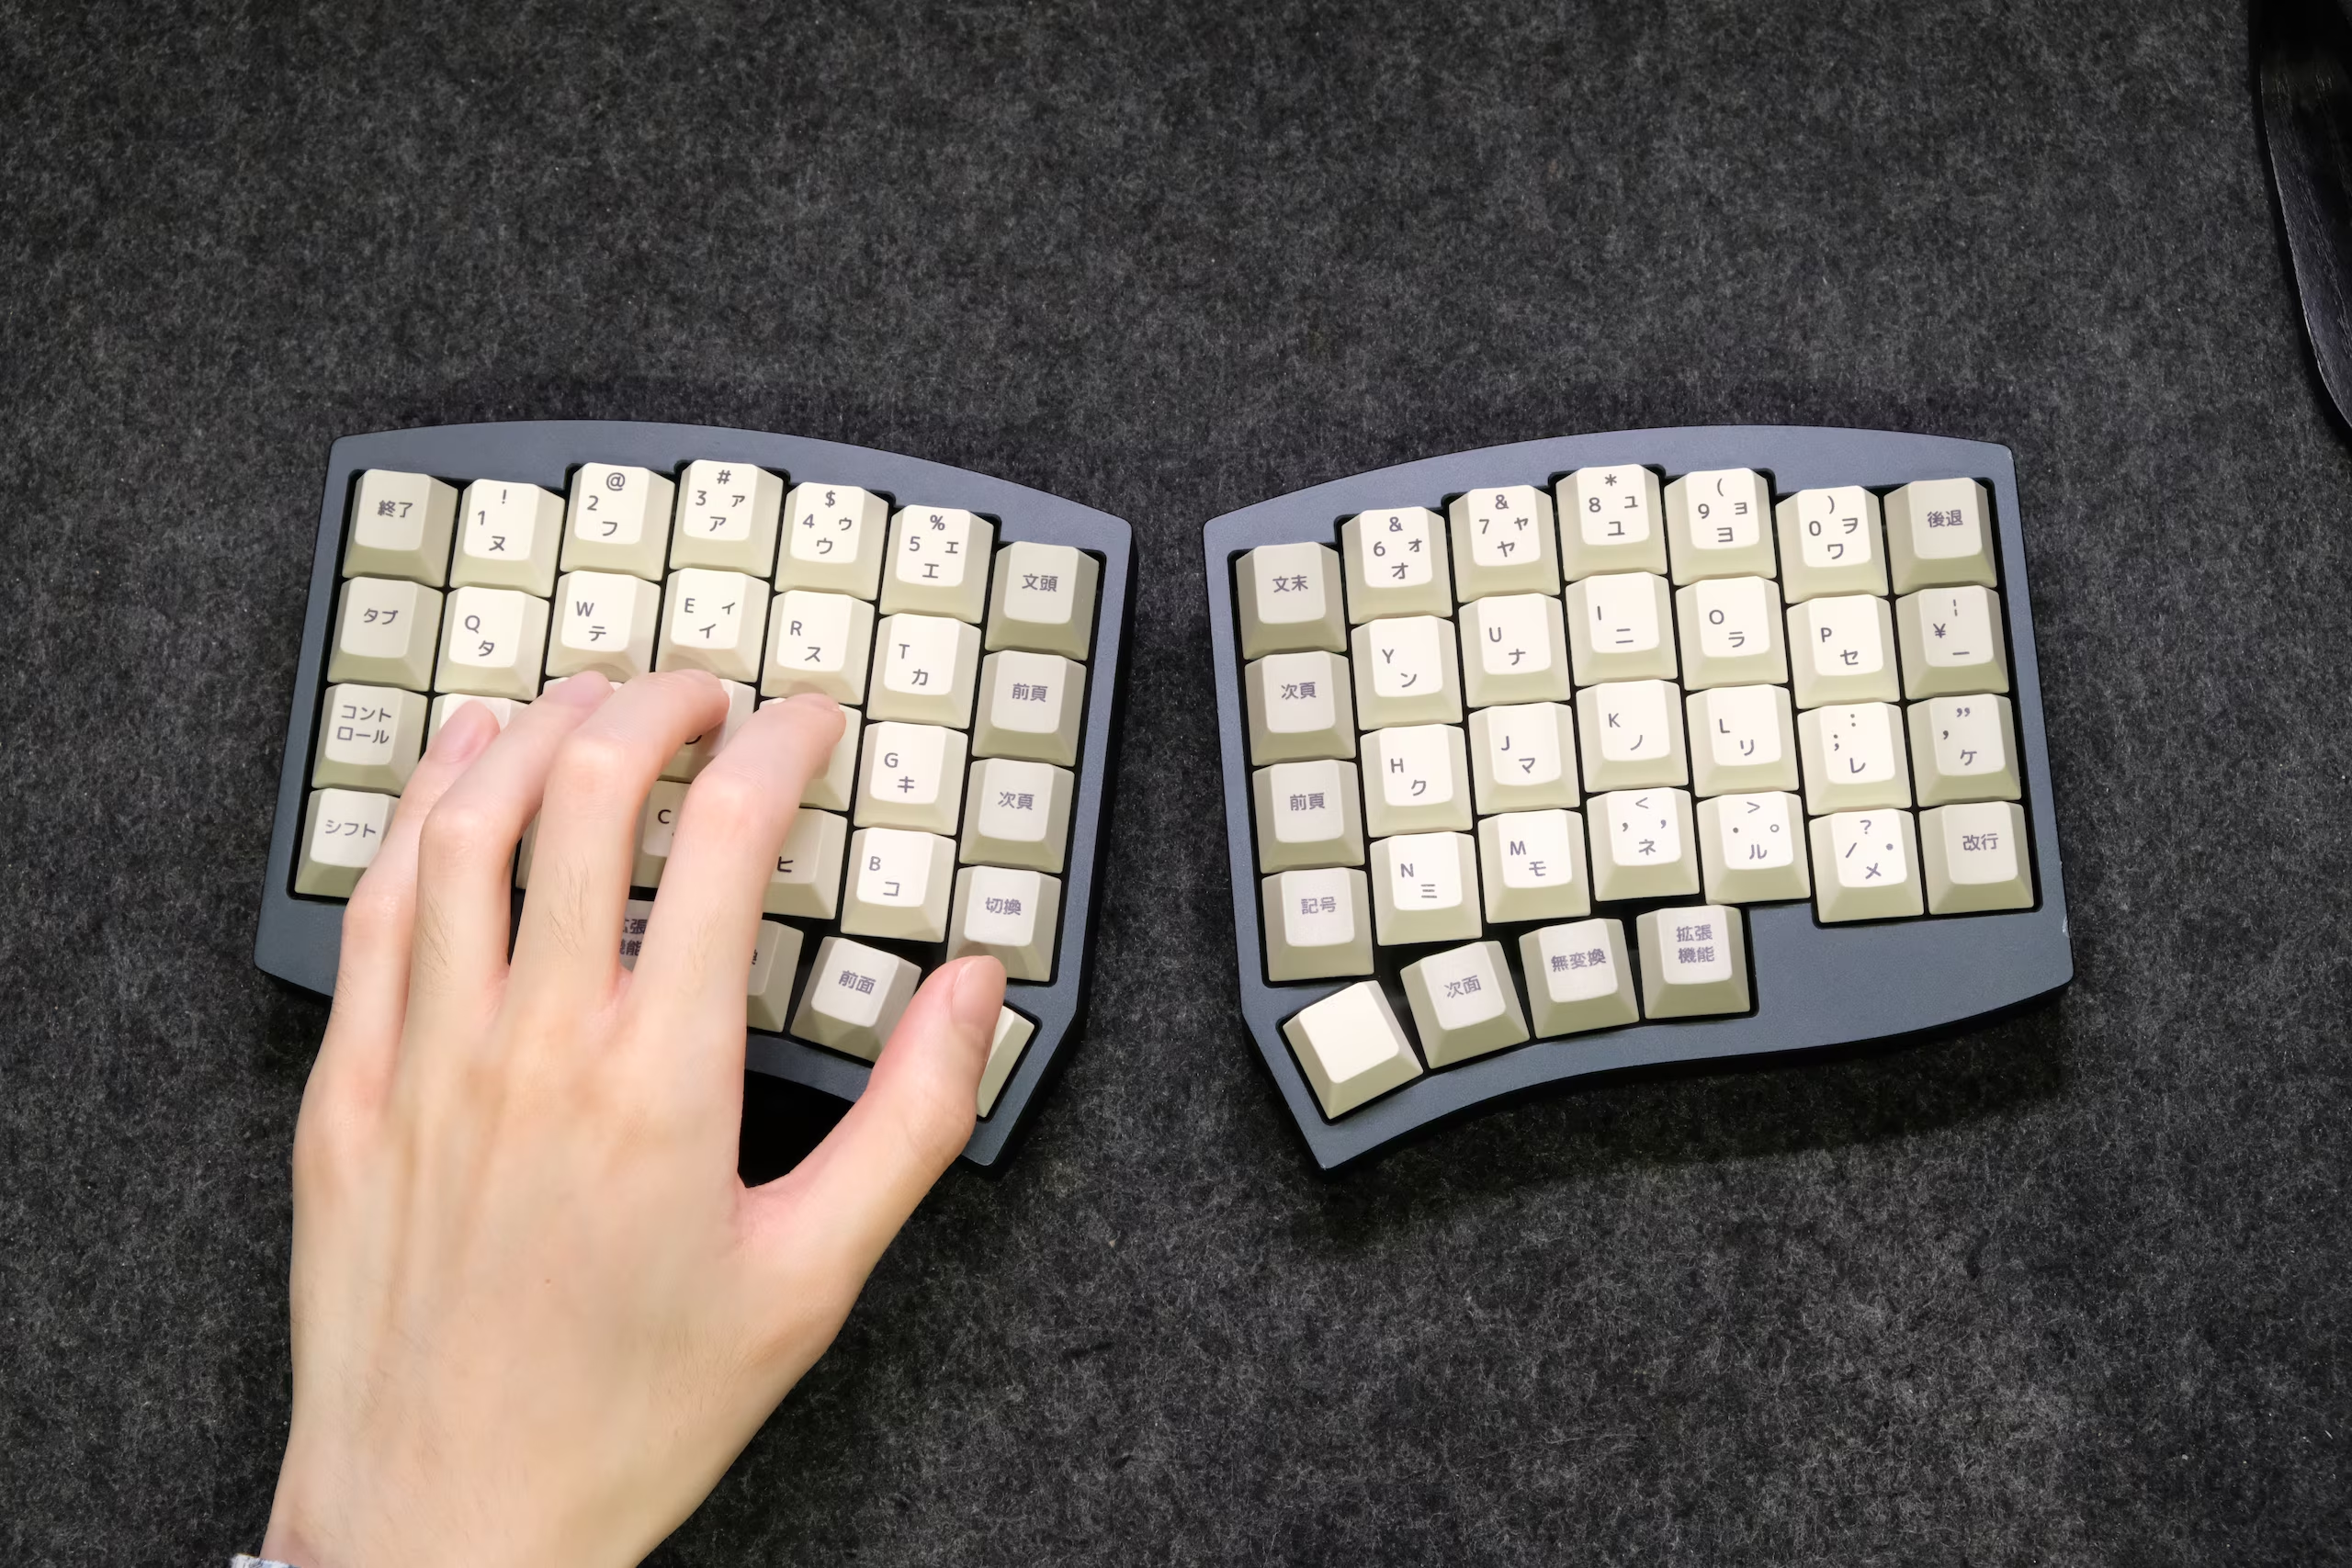
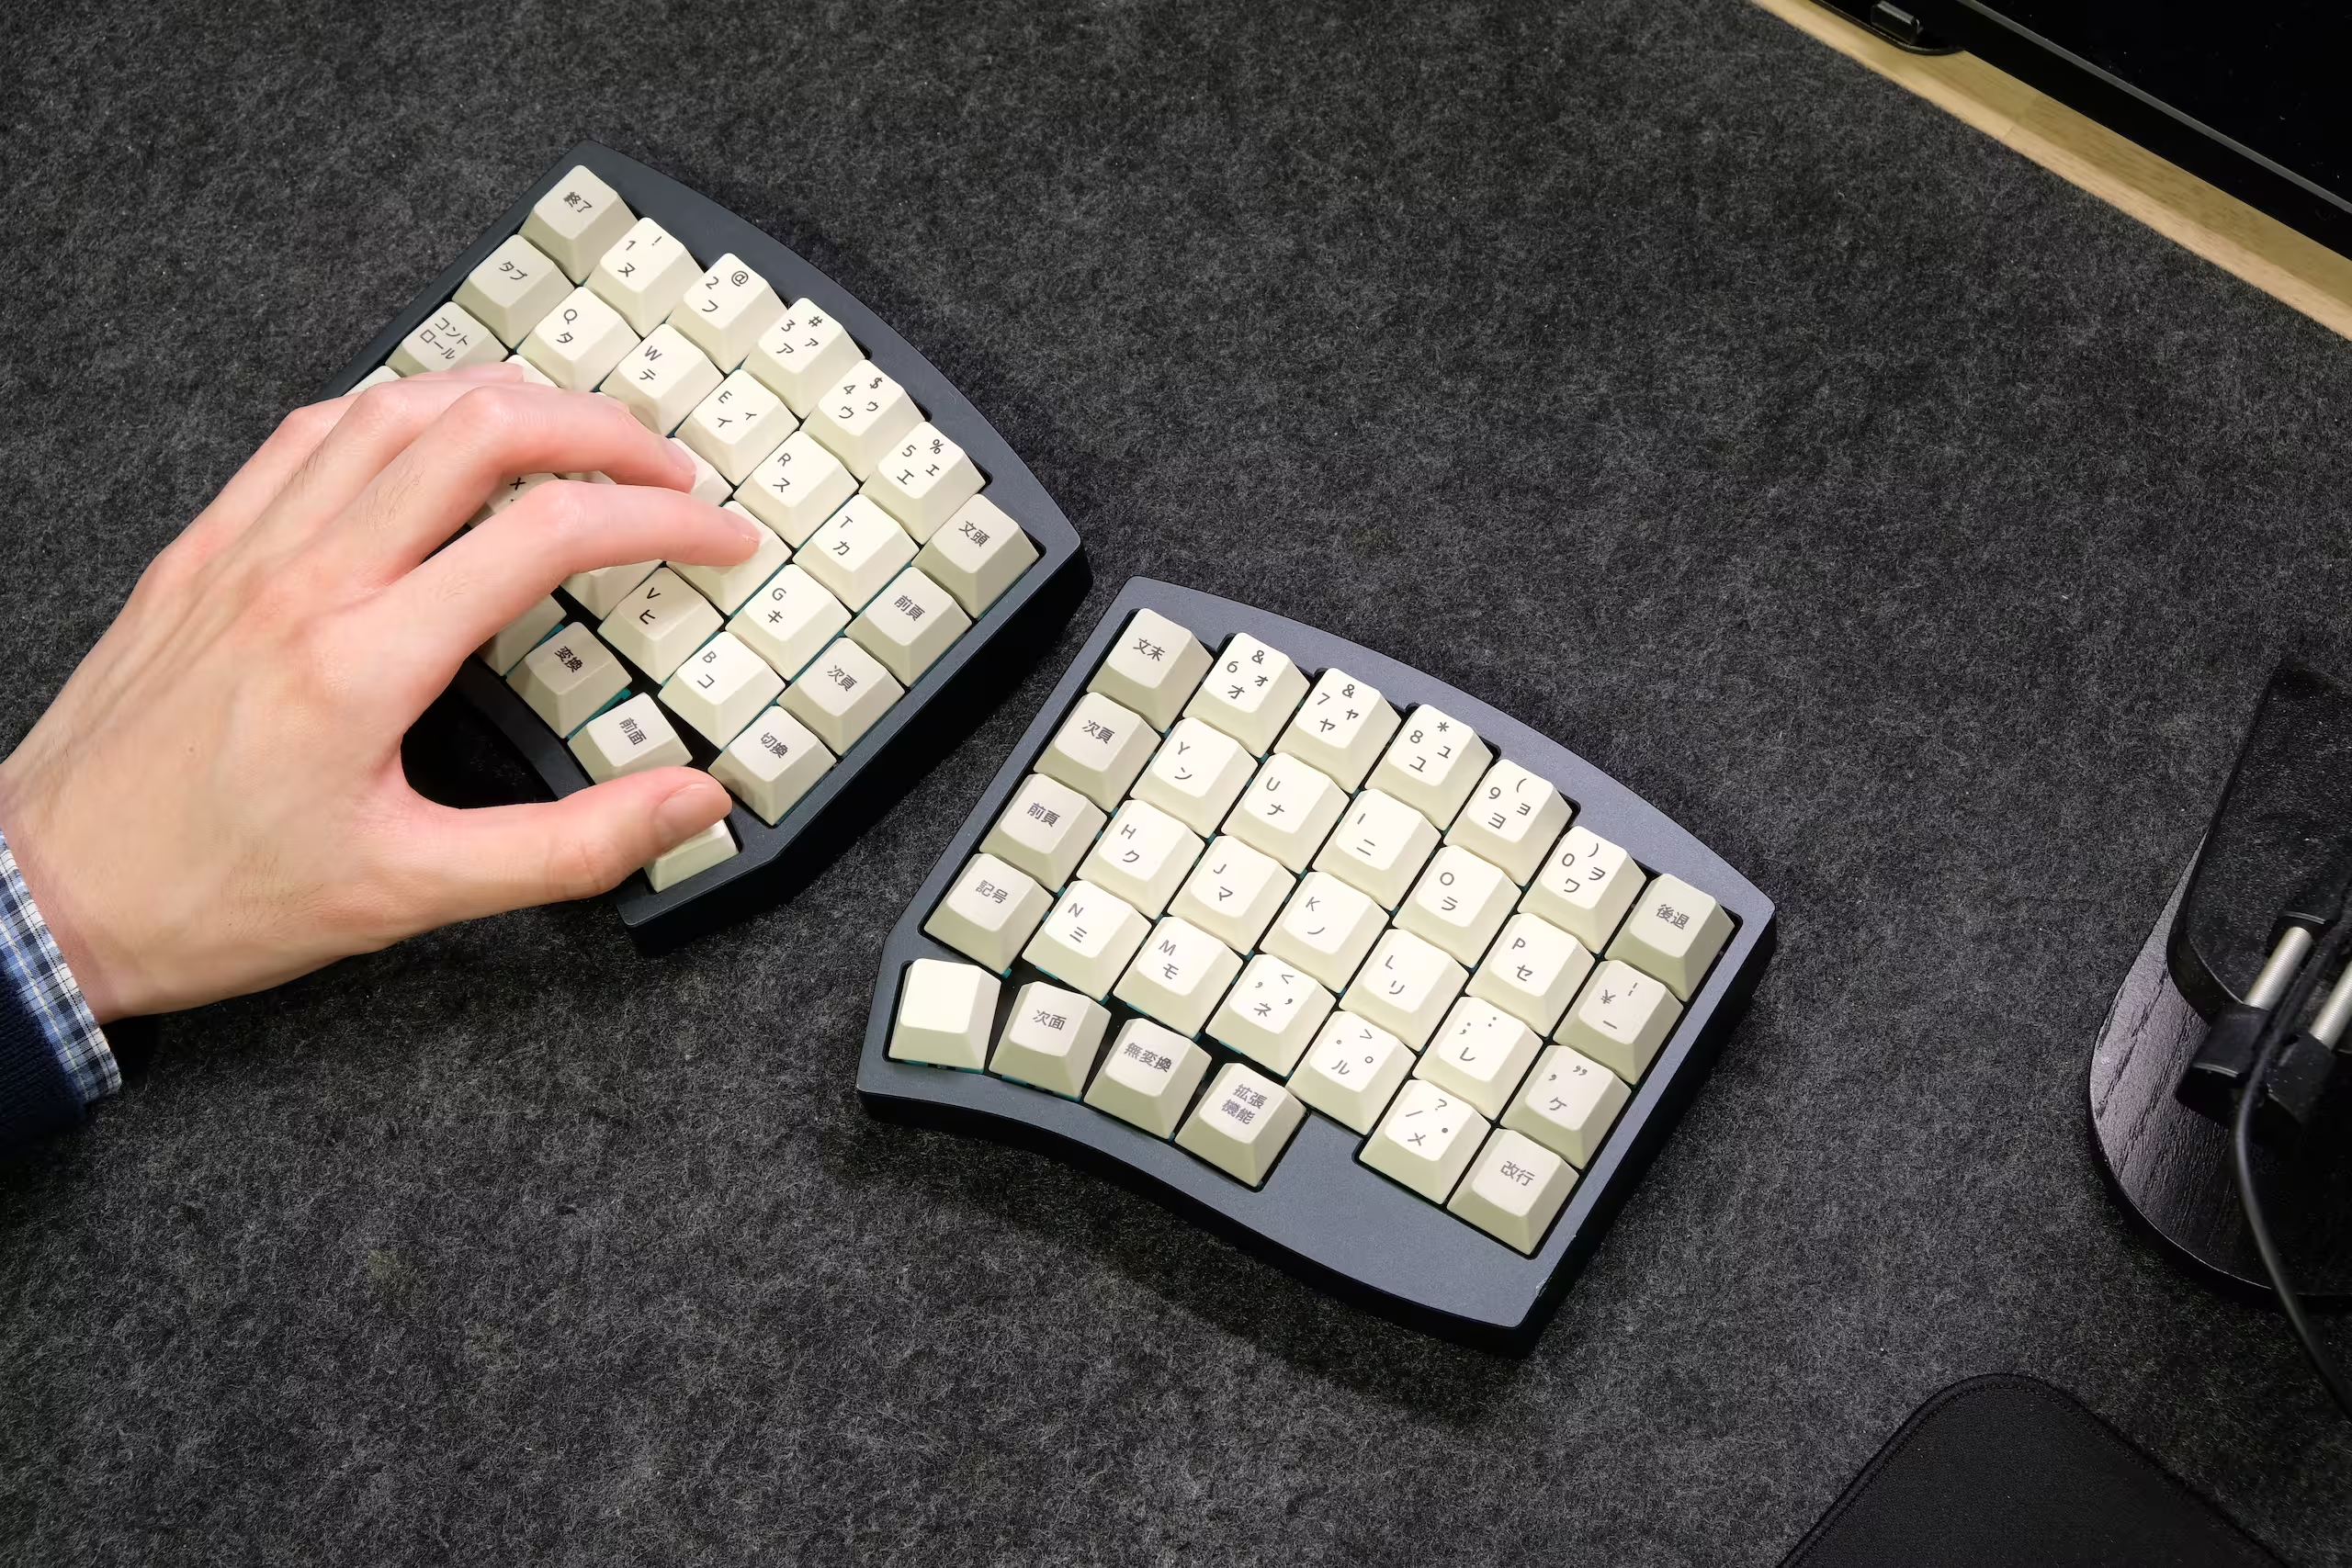
Repeat with the other hand.
First, lay the fingers over the columns uncurled so that they’re parallel, and adjust so the thumb is comfortably over the spacebar…
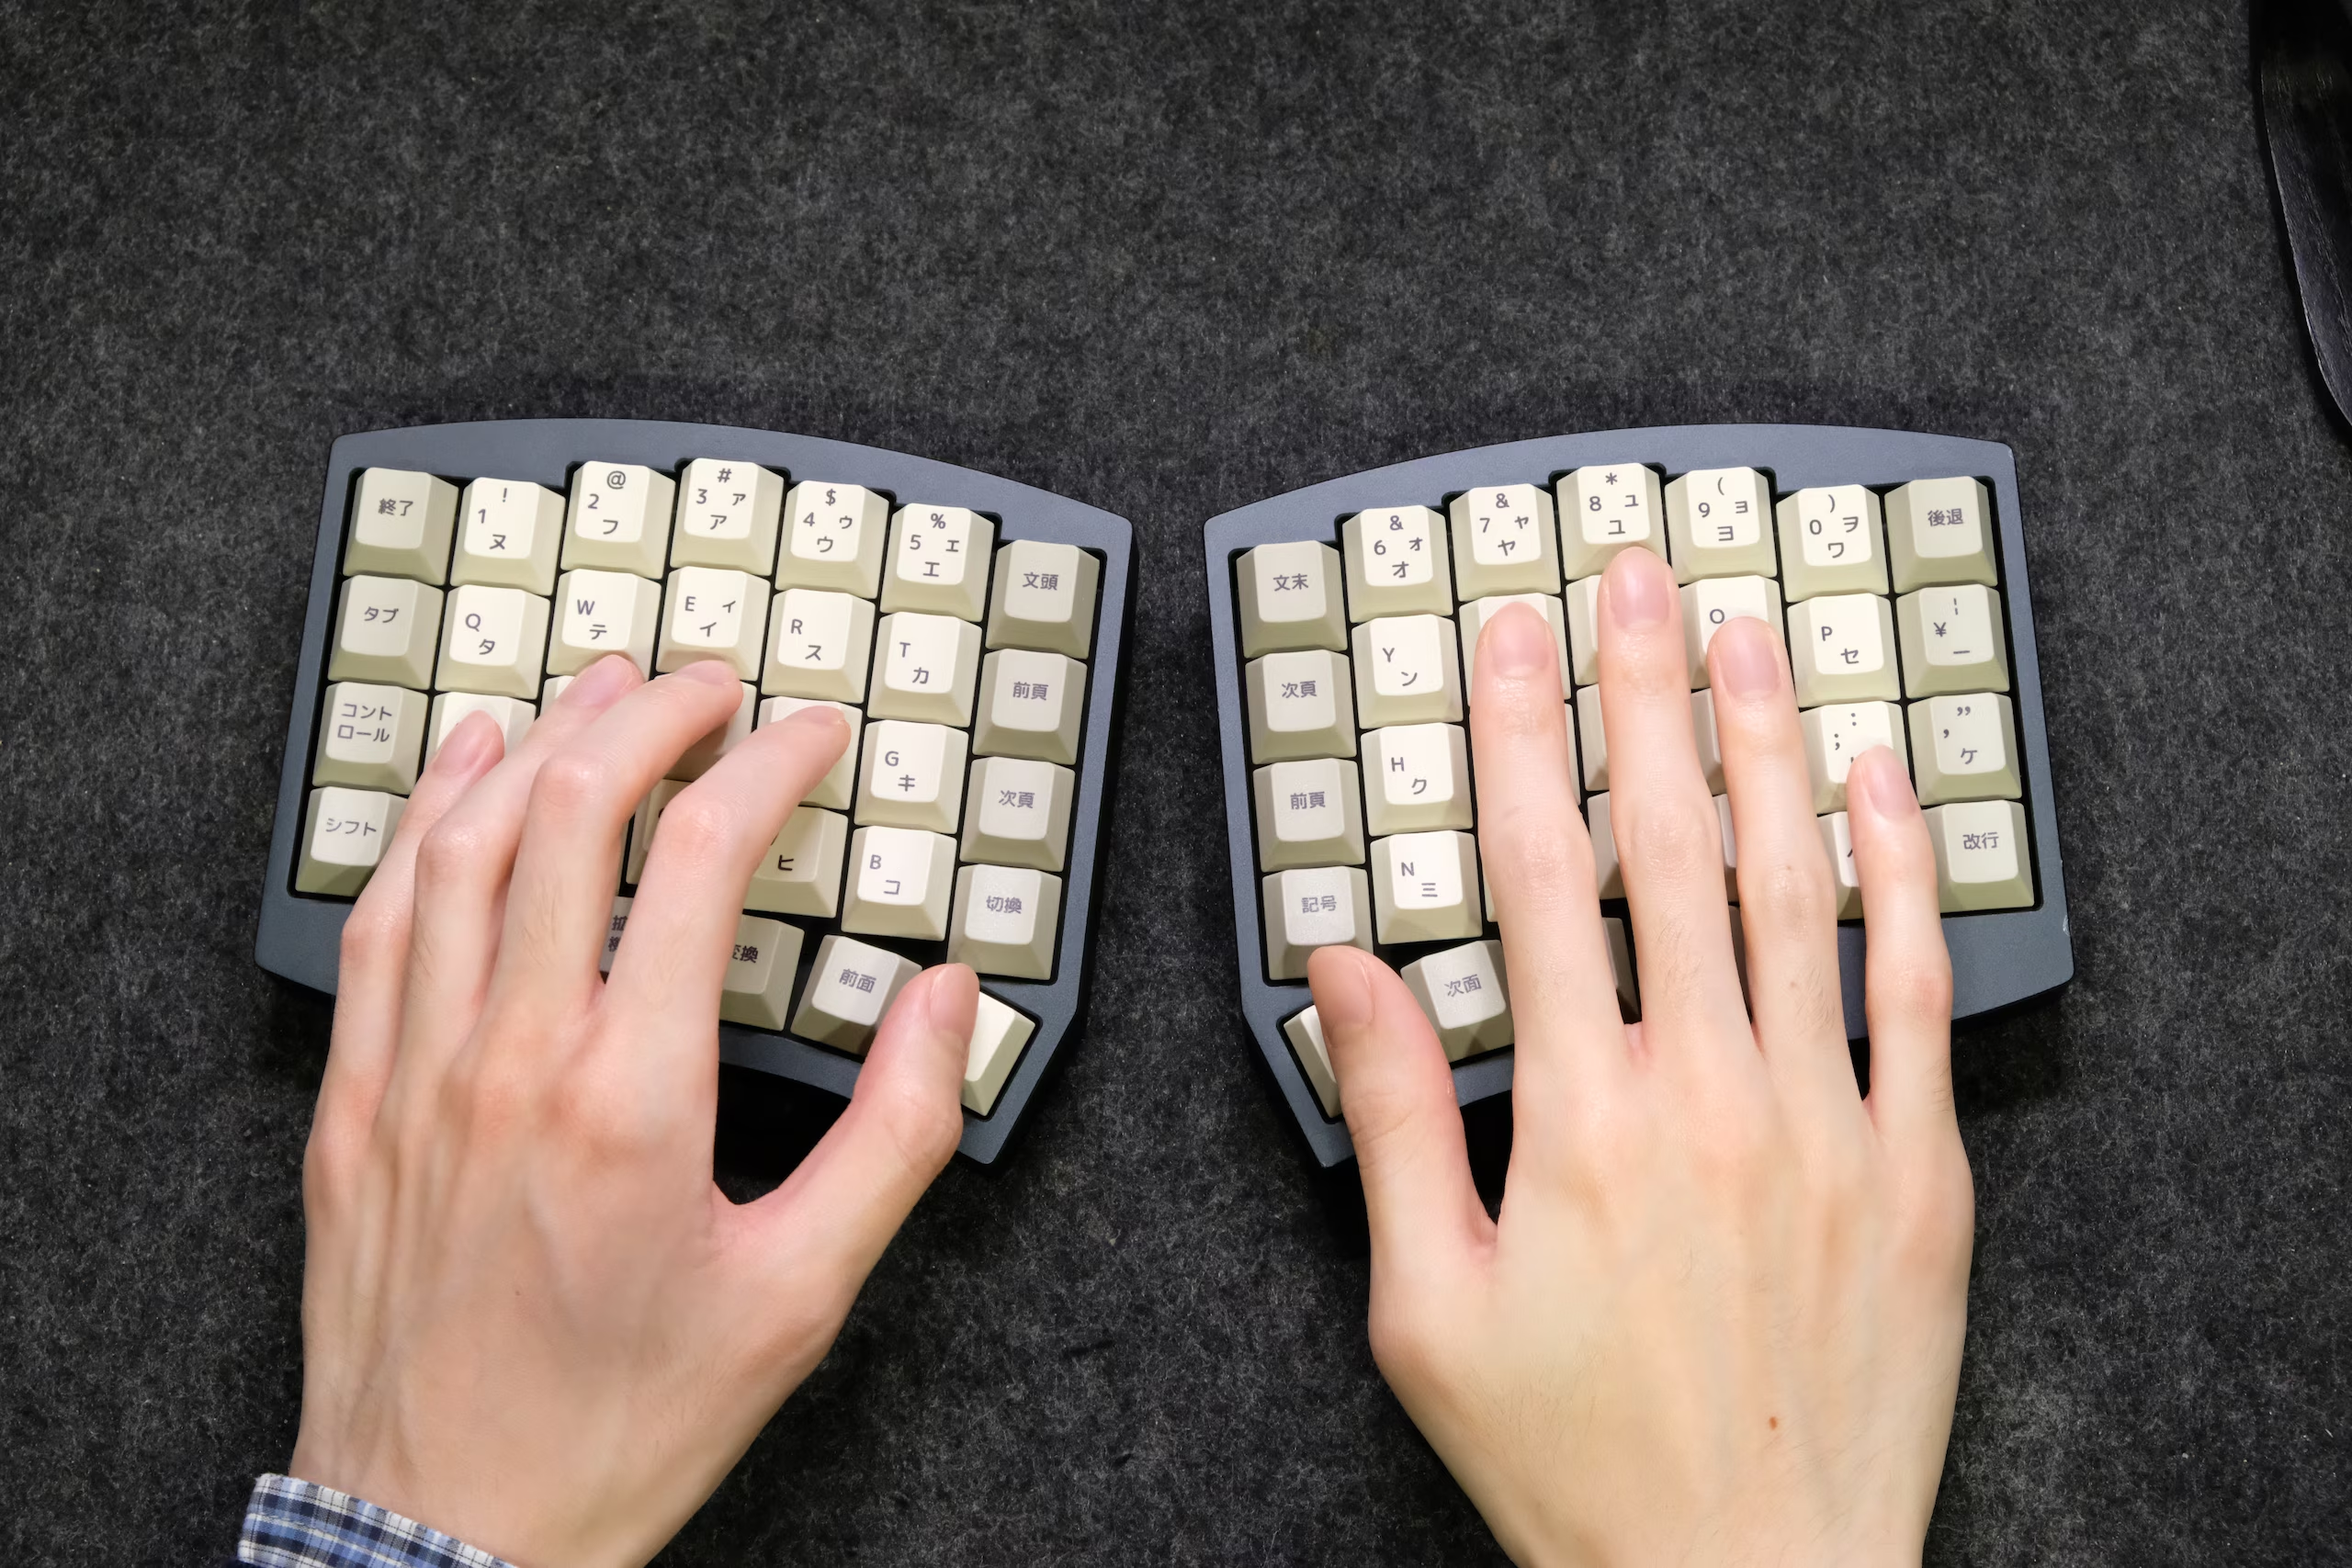
…then uncurl until they rest naturally at home position as well.
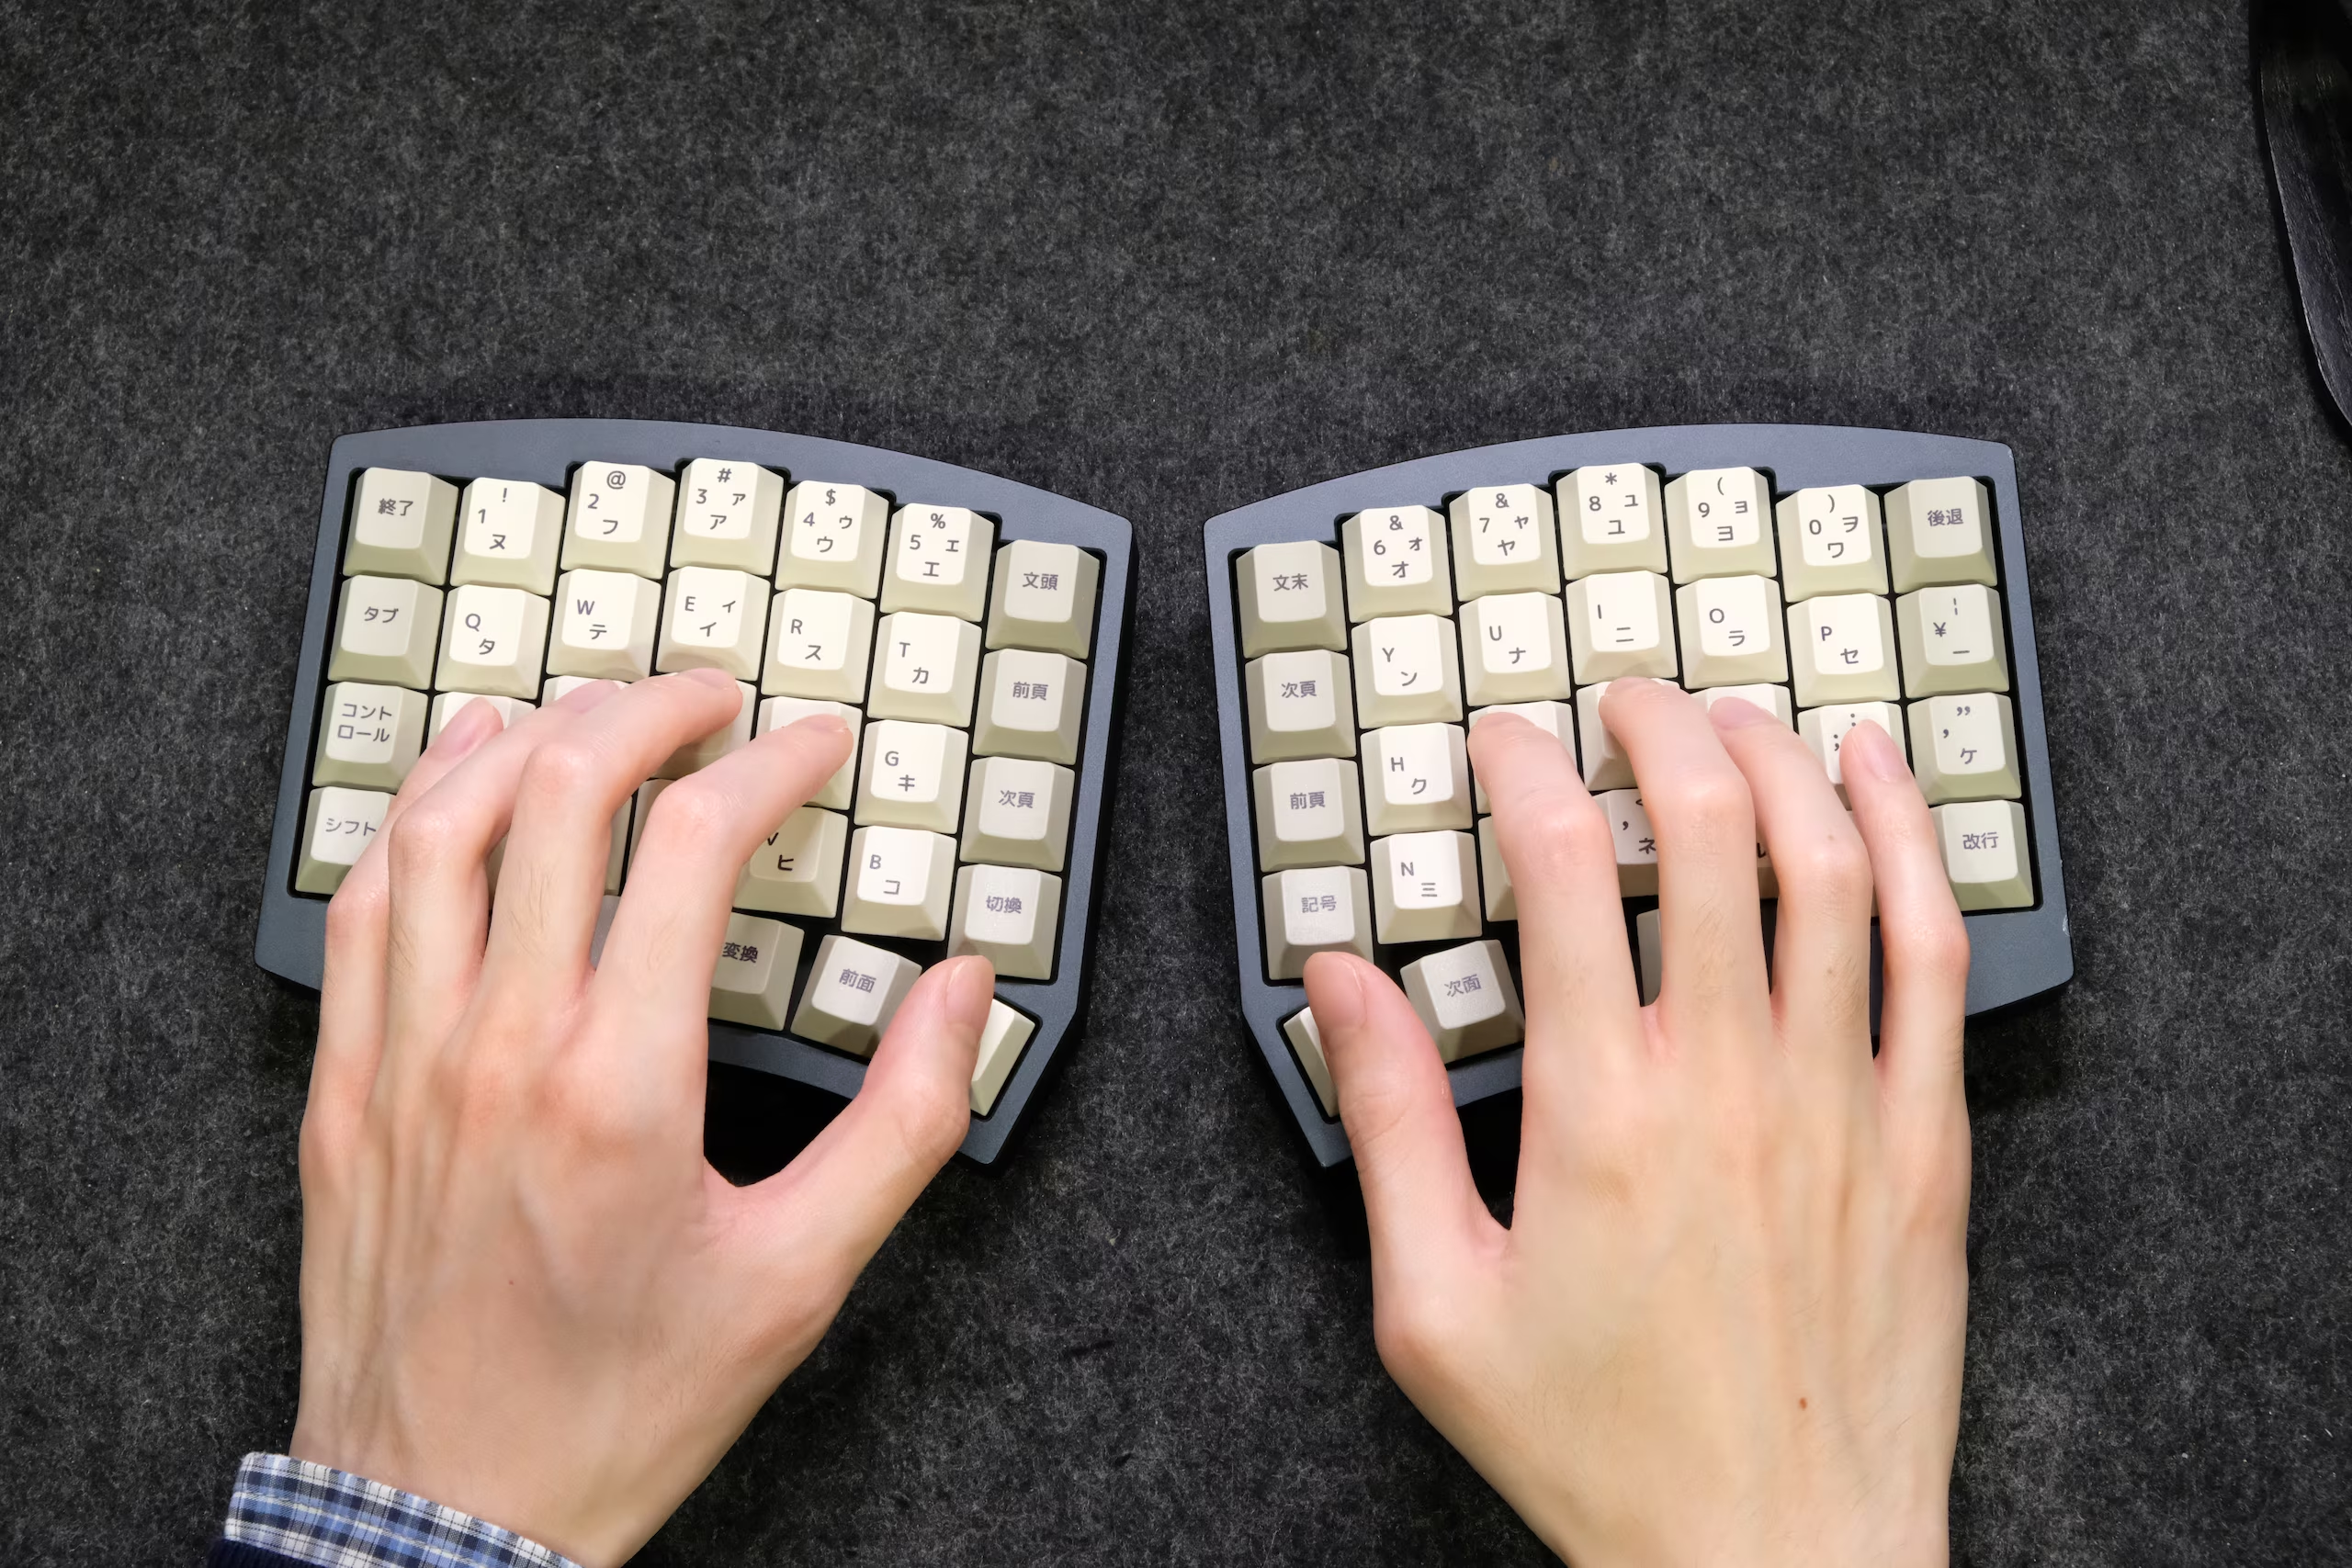
Now, depending on your hand size, let’s decide on where the spacebar will go.
The two outer thumb keys are usually where the thumb lands - one will be used for space, and the other will be held for “layer” (more on that later).
In general you want both to be readily and comfortably accessible, so decide which of the two keys is more comfortable to tap (spacebar), and which is more comfortable to hold (layer).

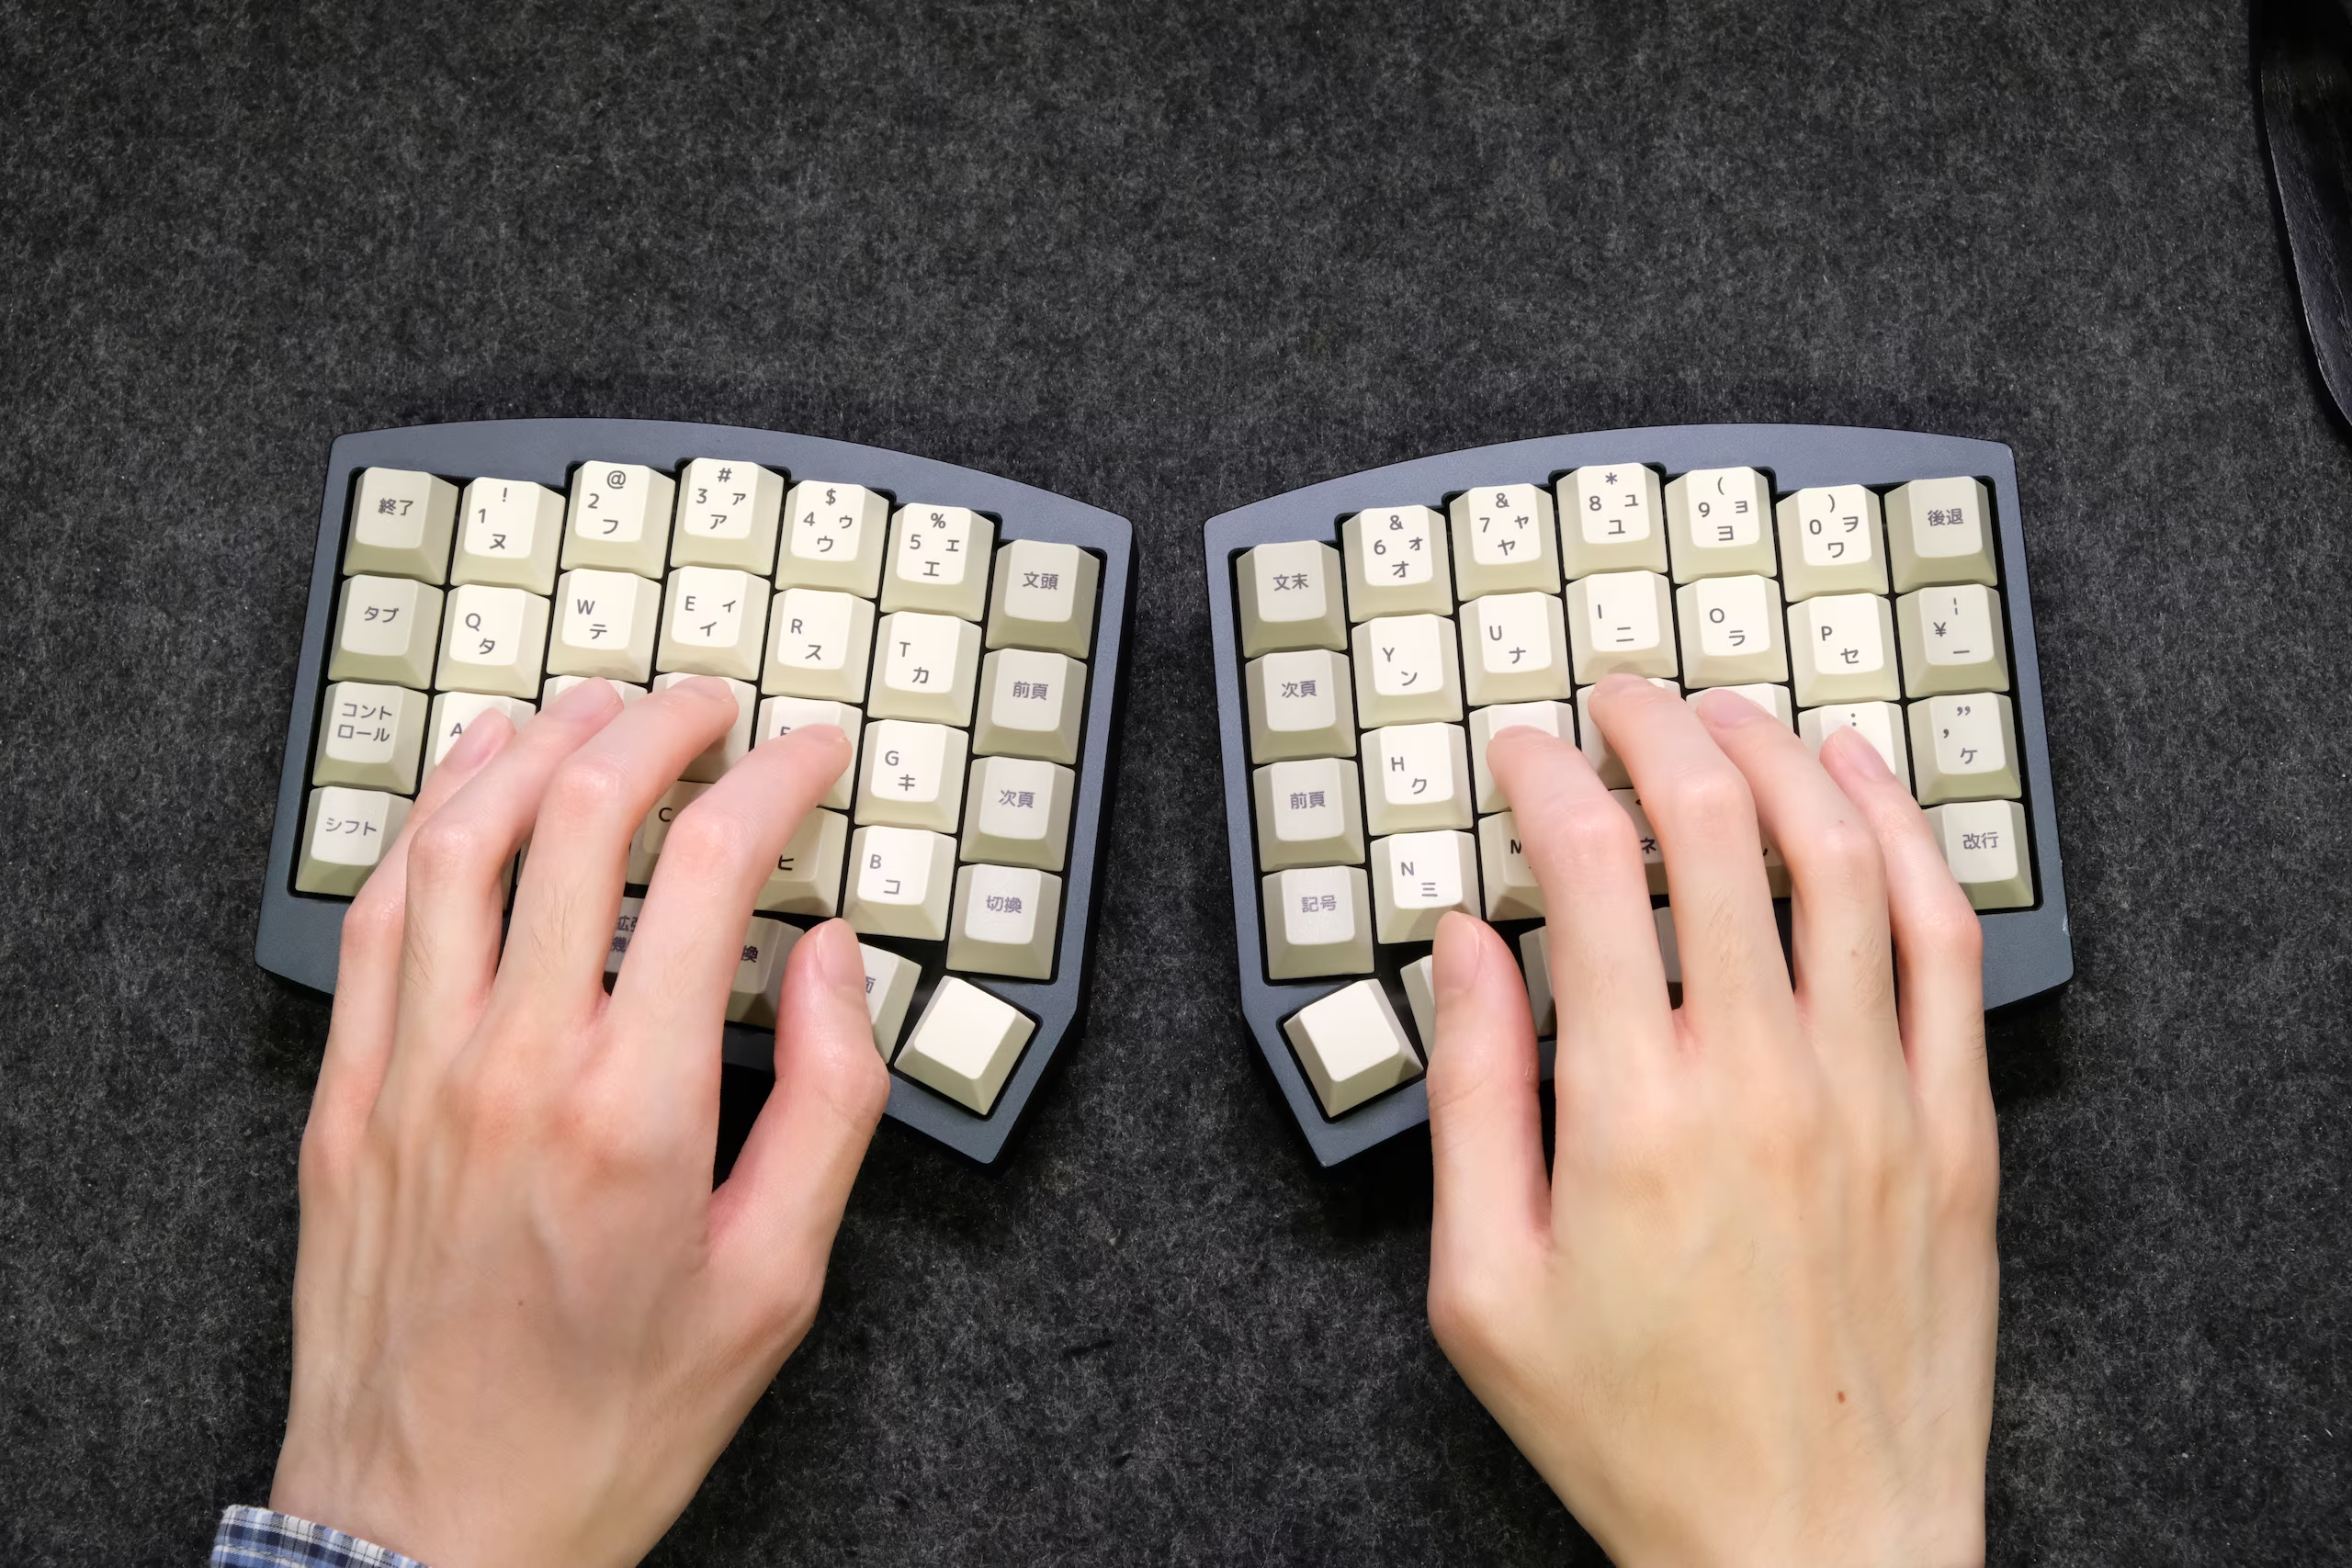
My personal recommendation: if your hands are roughly average-sized or larger, start with the default of outer spacebar and inner layer.
Now let’s type the first letters - starting with the left hand.
First, simply press the fingers down at home position to enter the home position keys - ASDF and so forth.
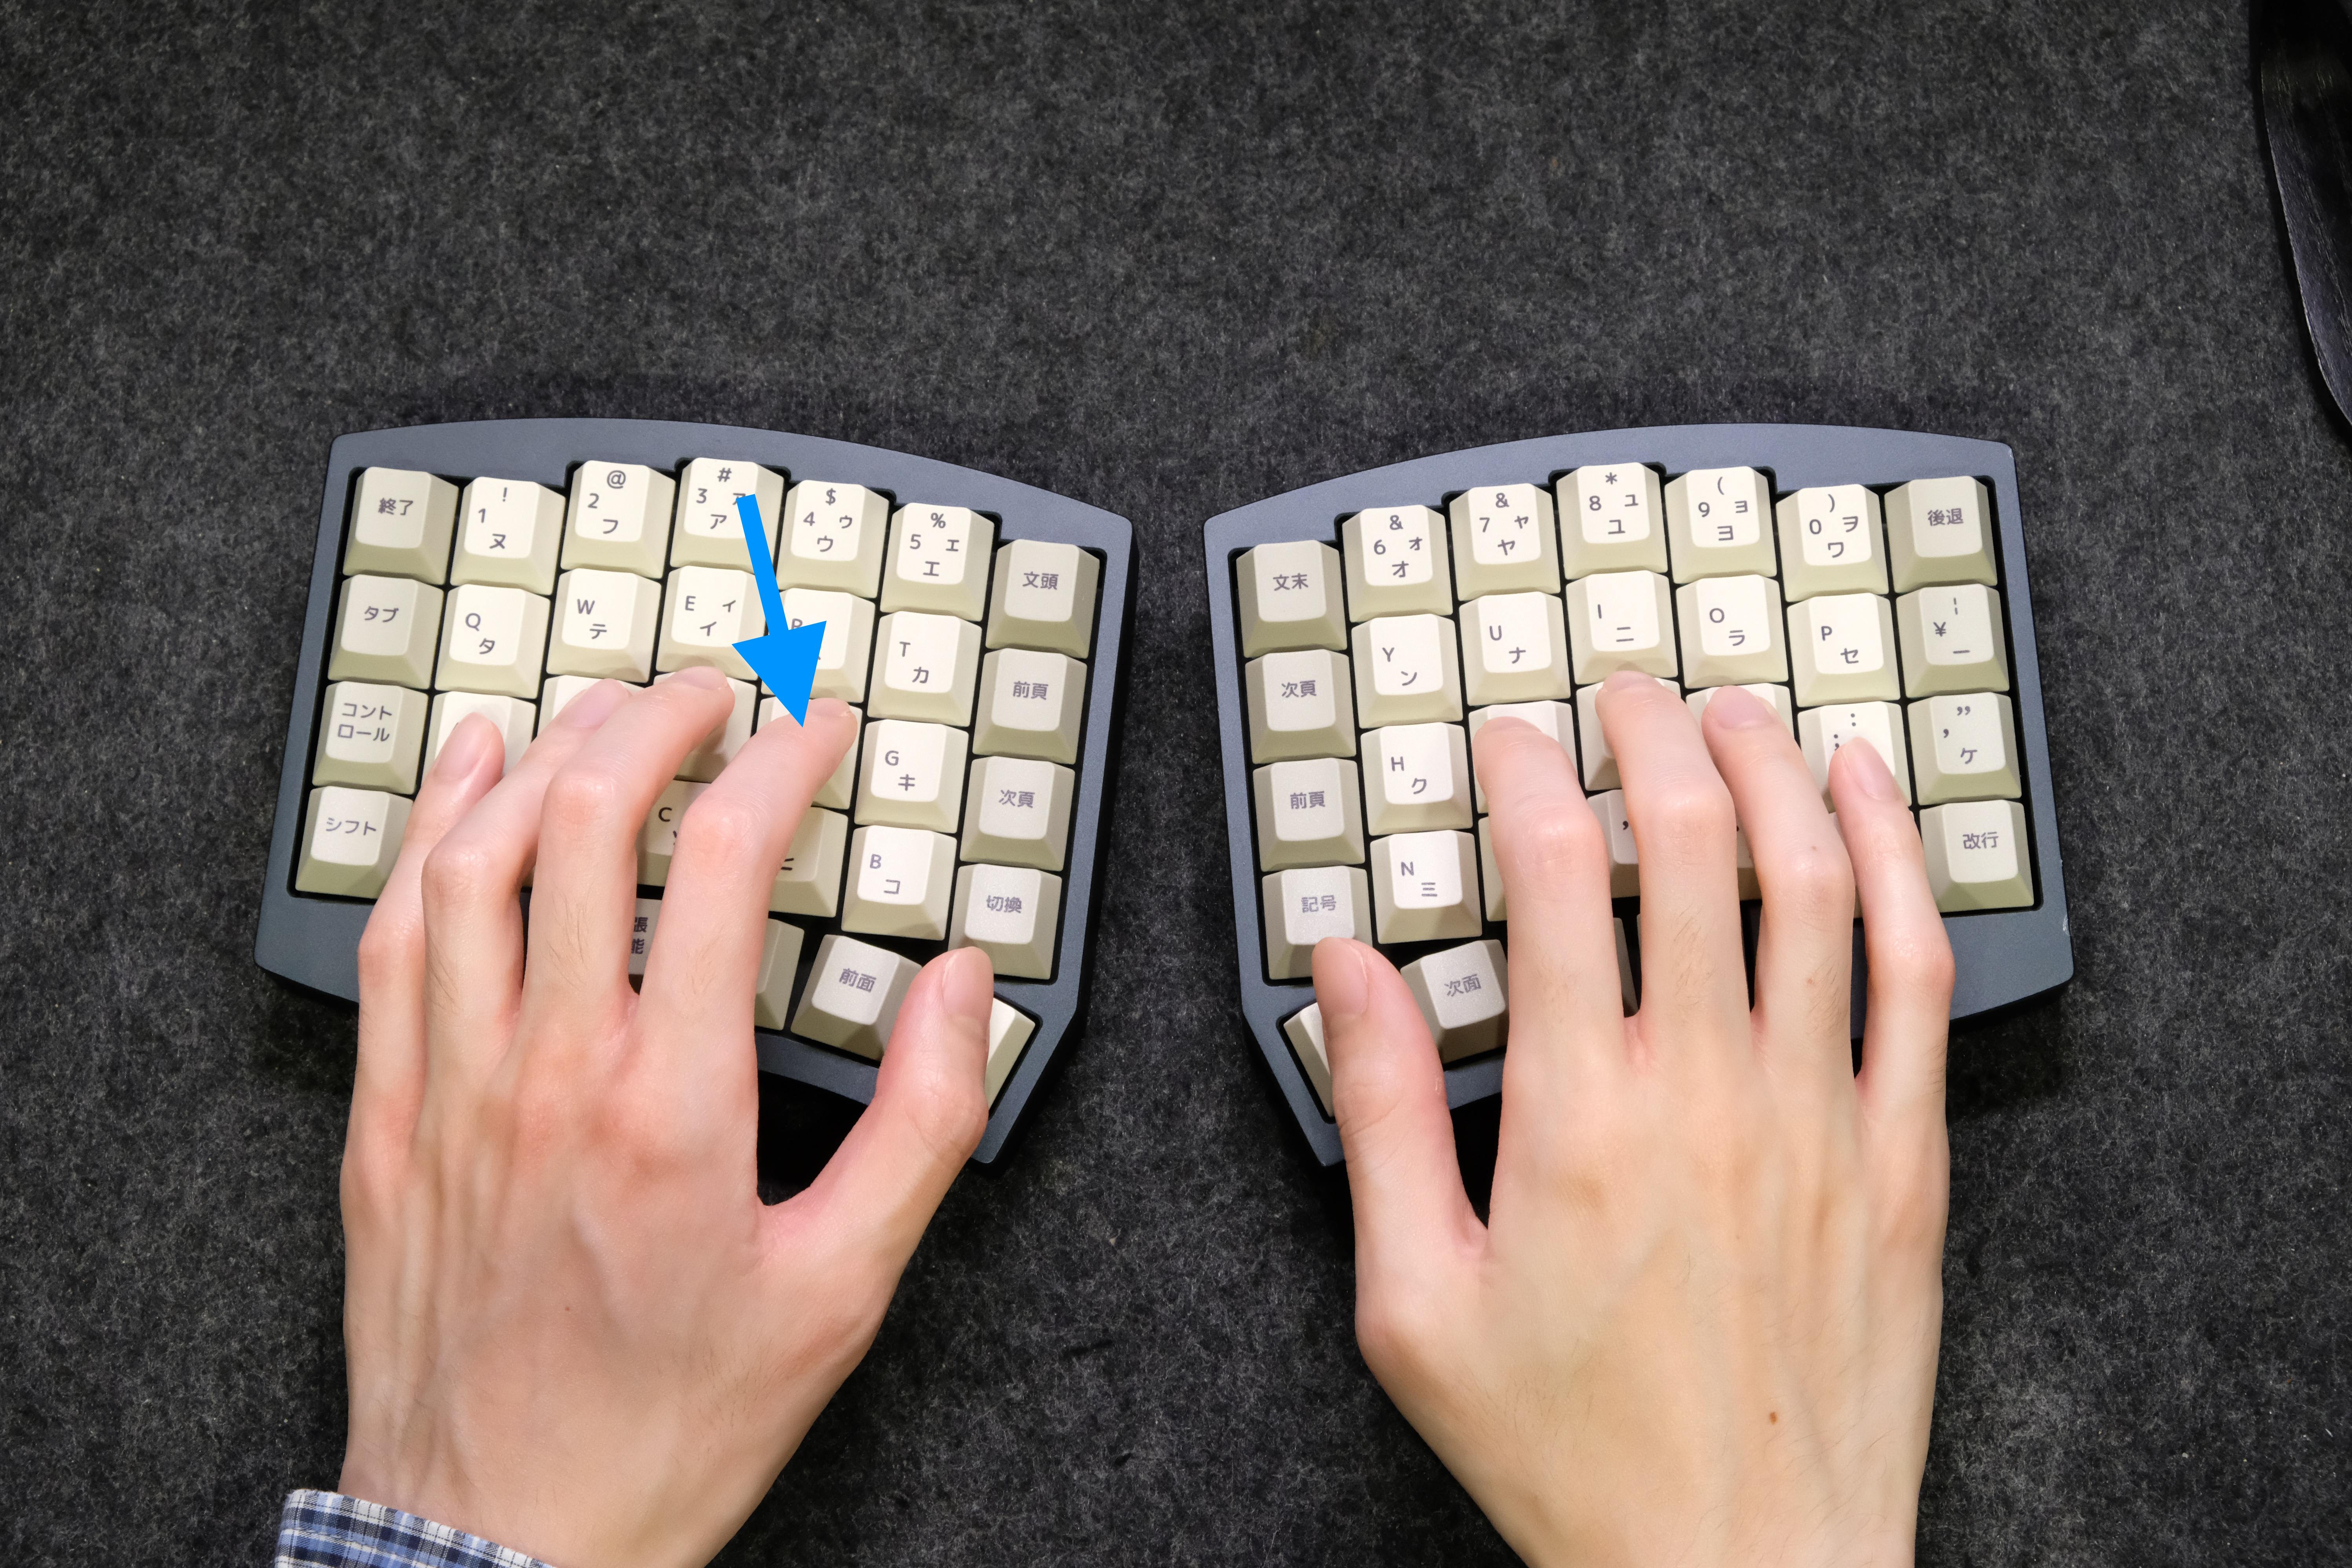
Then, try pressing the R key by uncurling the pointing finger upwards.
Try to uncurl the fingertips so that it moves roughly along the column of keys.
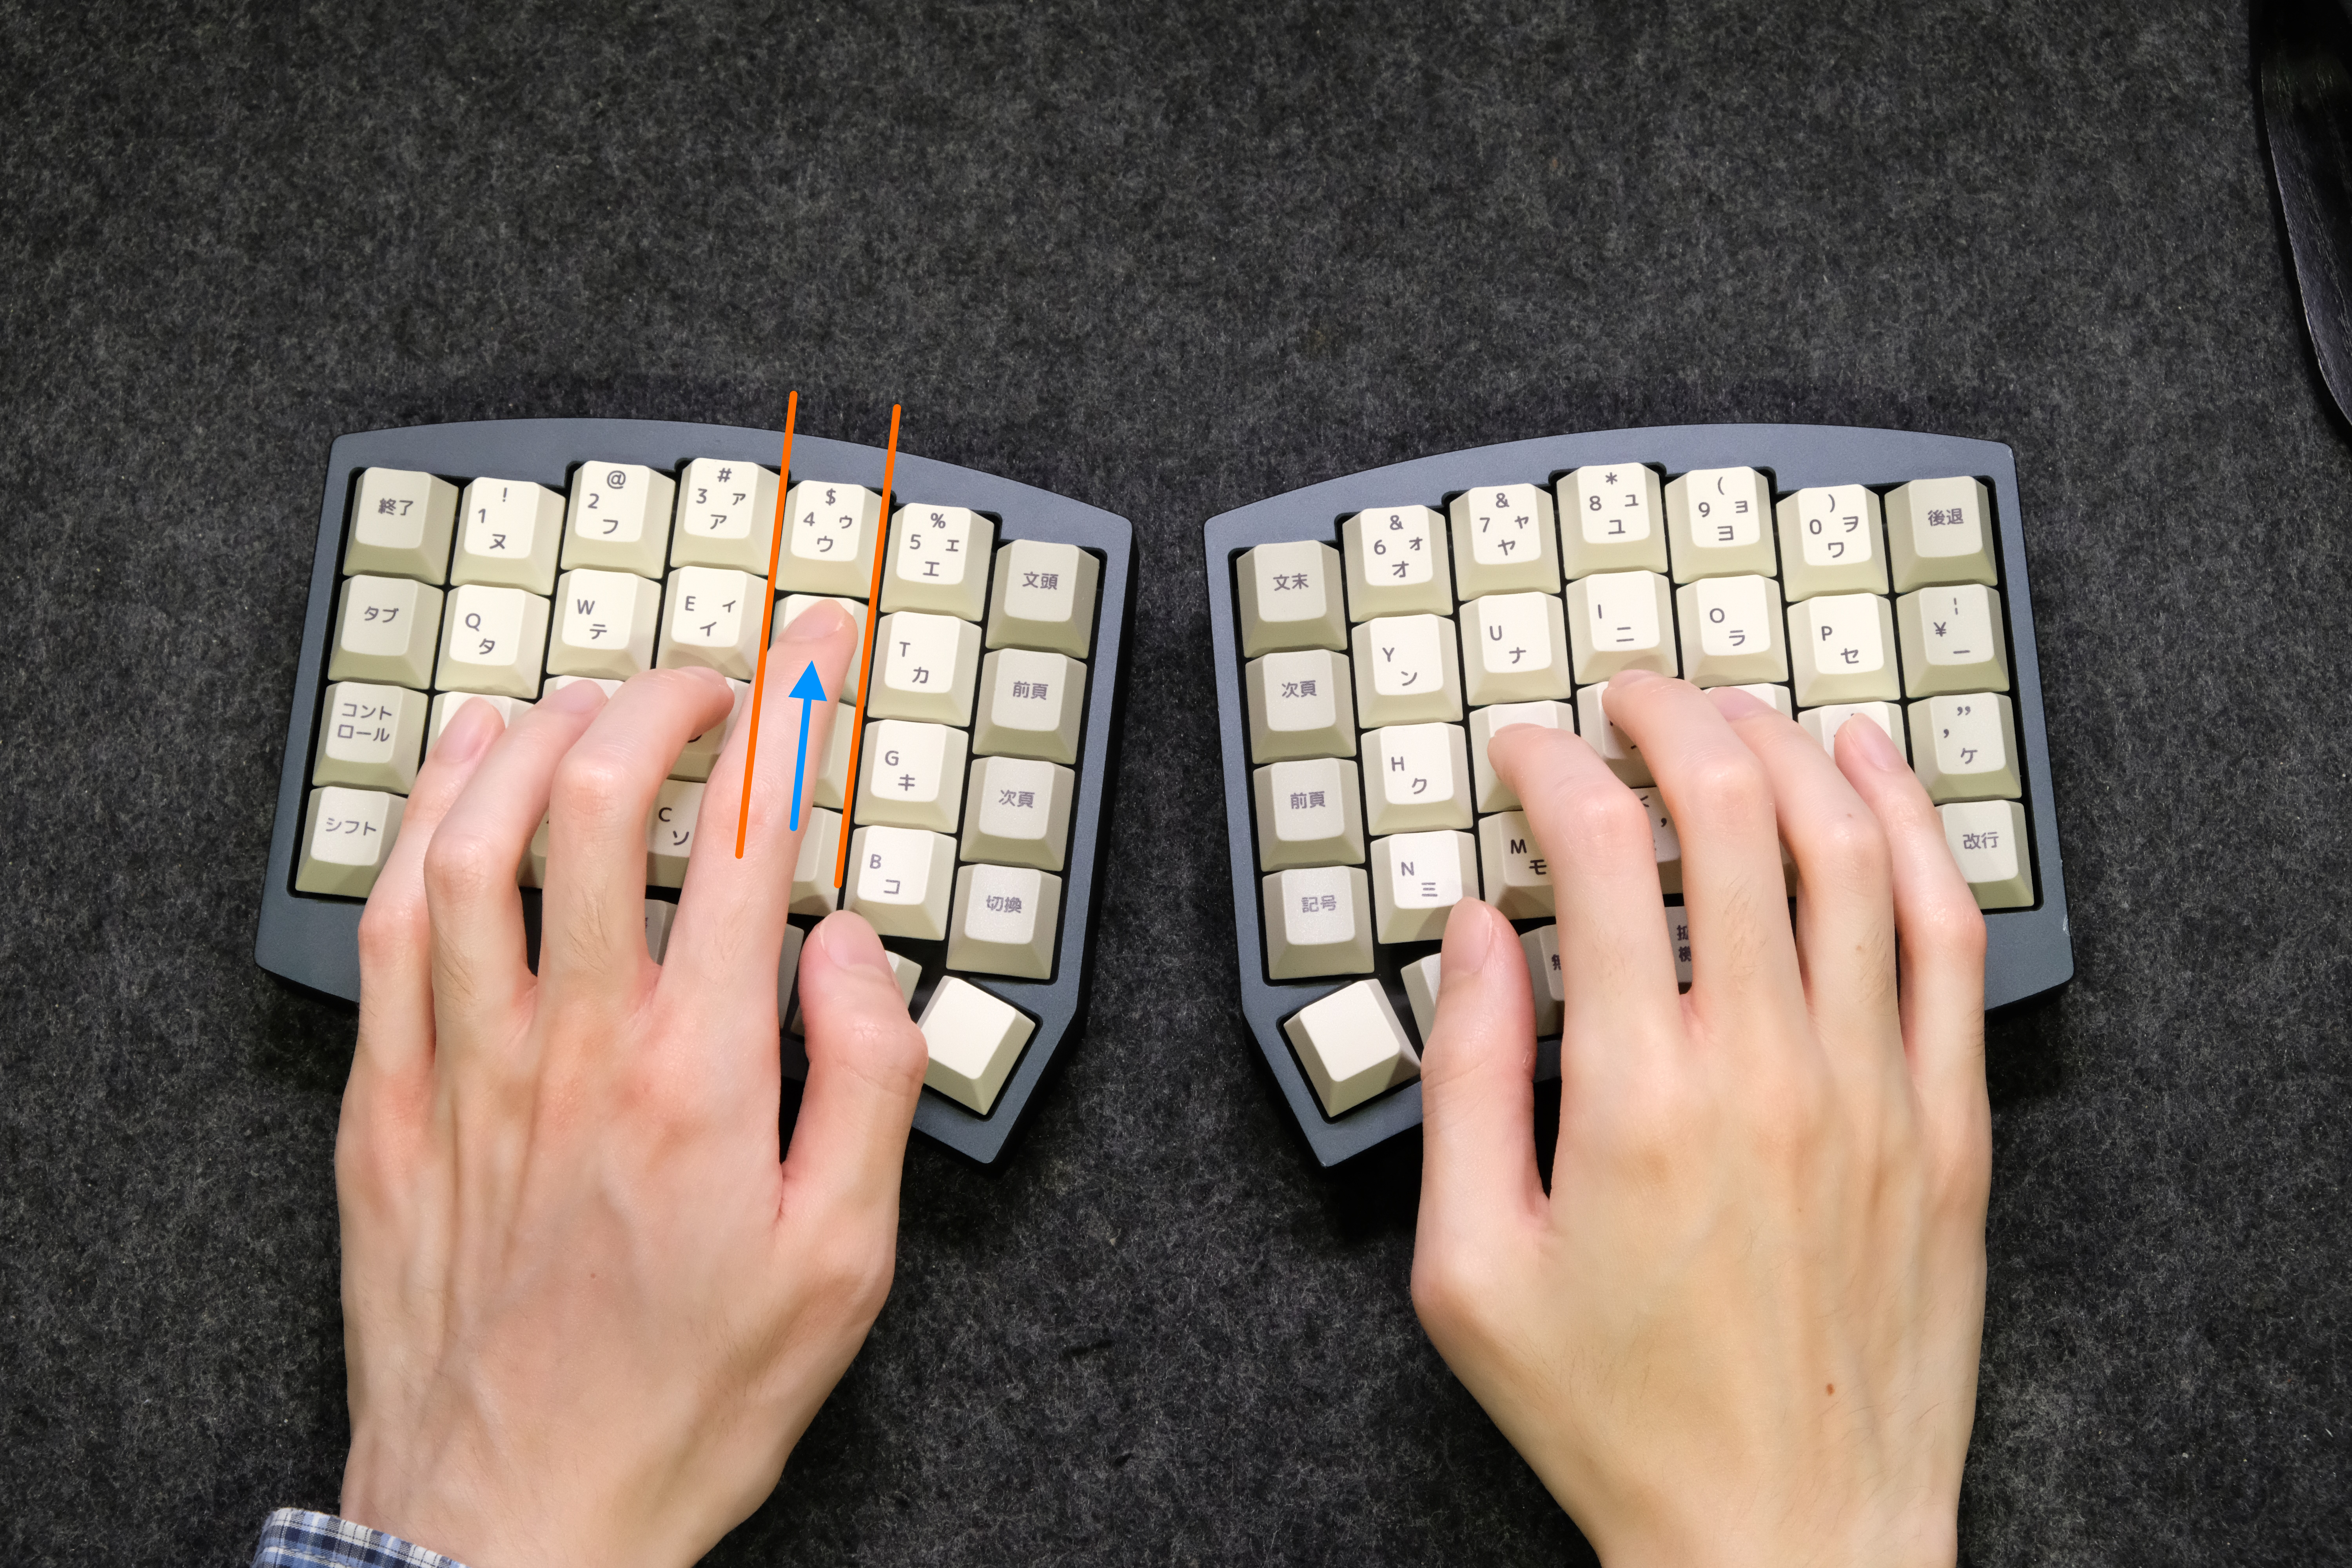
Then, try pressing the V key by curling the pointing finger downwards.
Similarly to last time, try curling in the finger so it roughly follows the column.
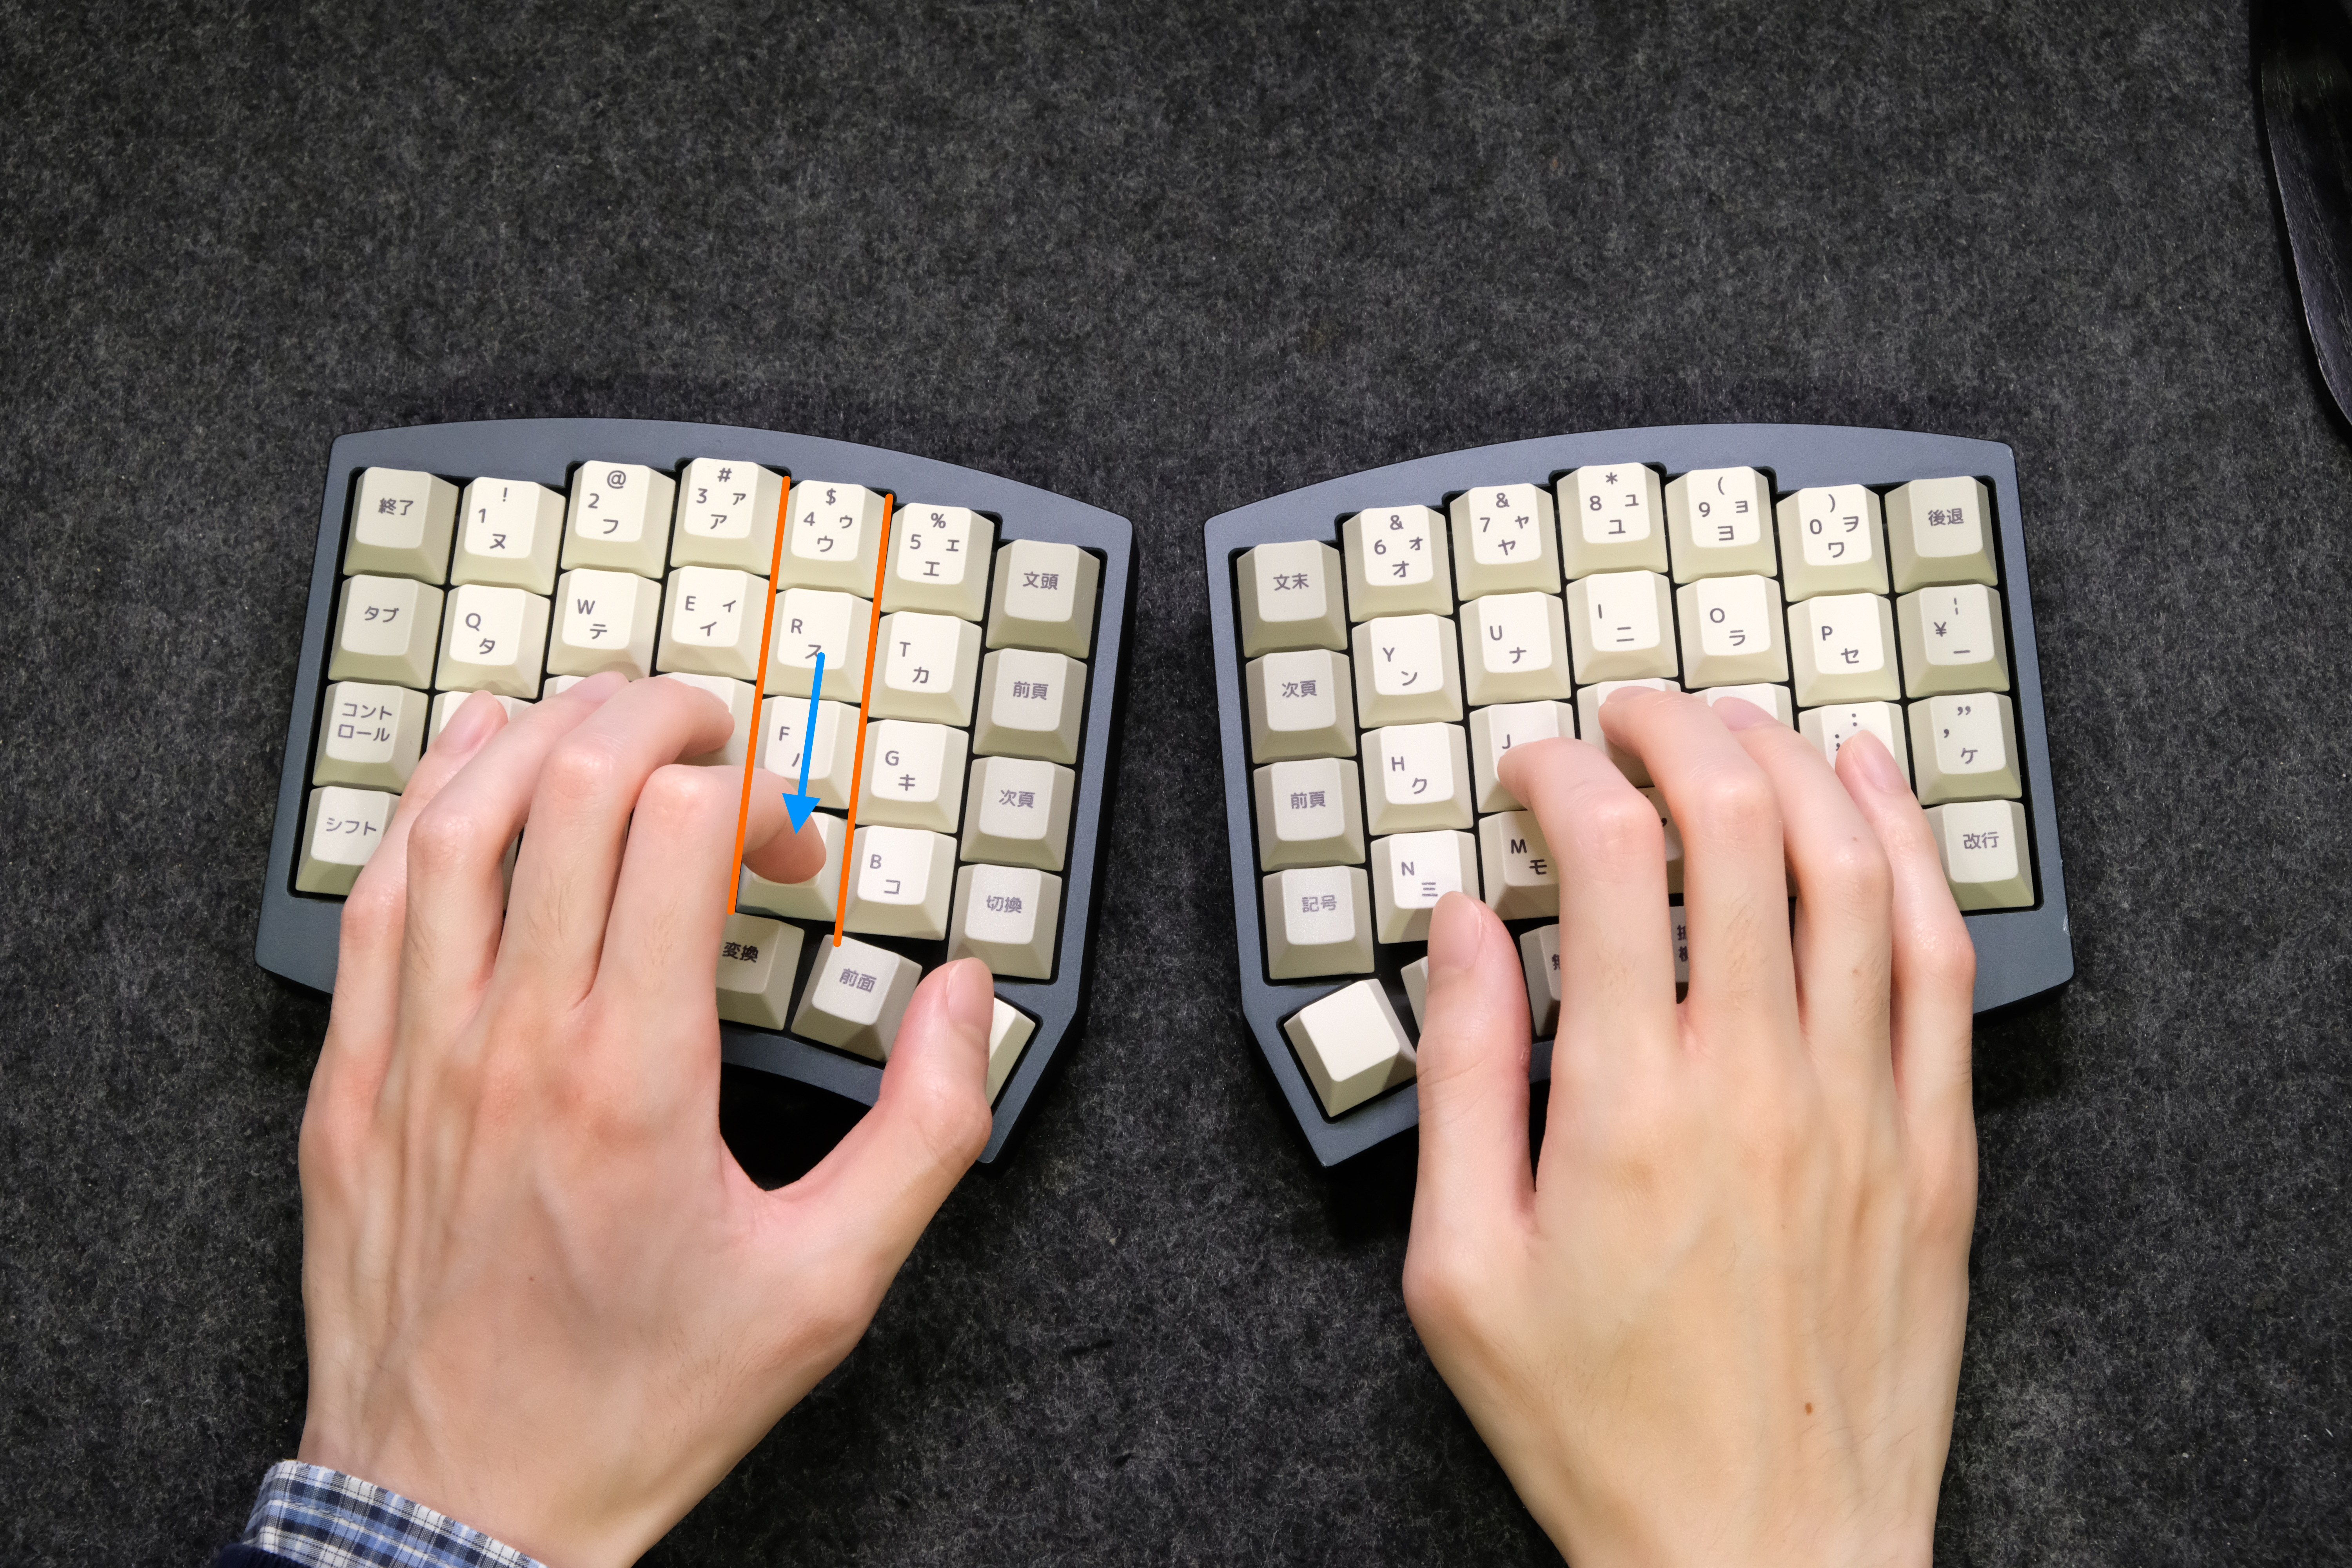
Repeat this motion a few times, jumping between home position and the key above/below in a sequence of “RR-FF-VV-FF-…“.
Soon, you’ll get used to roughly how far to move the finger up/down to press the keys above and below without even looking.
Note: Your other fingers don’t need to remain anchored at home position while you do this - feel free to let your other fingers gently hover up/down so this motion isn’t strainful.
Repeat this process with each finger, one at a time - at least from the index to ring fingers.
If your typing habits are similar to mine, you might find that it becomes more difficult to home downwards the further left you go - this is due to how the typical row-stagger layouts have the bottom row aligned exactly half a key staggered compared to the row above.
Don’t worry if you can’t get adjusted perfectly for now - muscle memory will only get dialed-in once you start typing anyways.
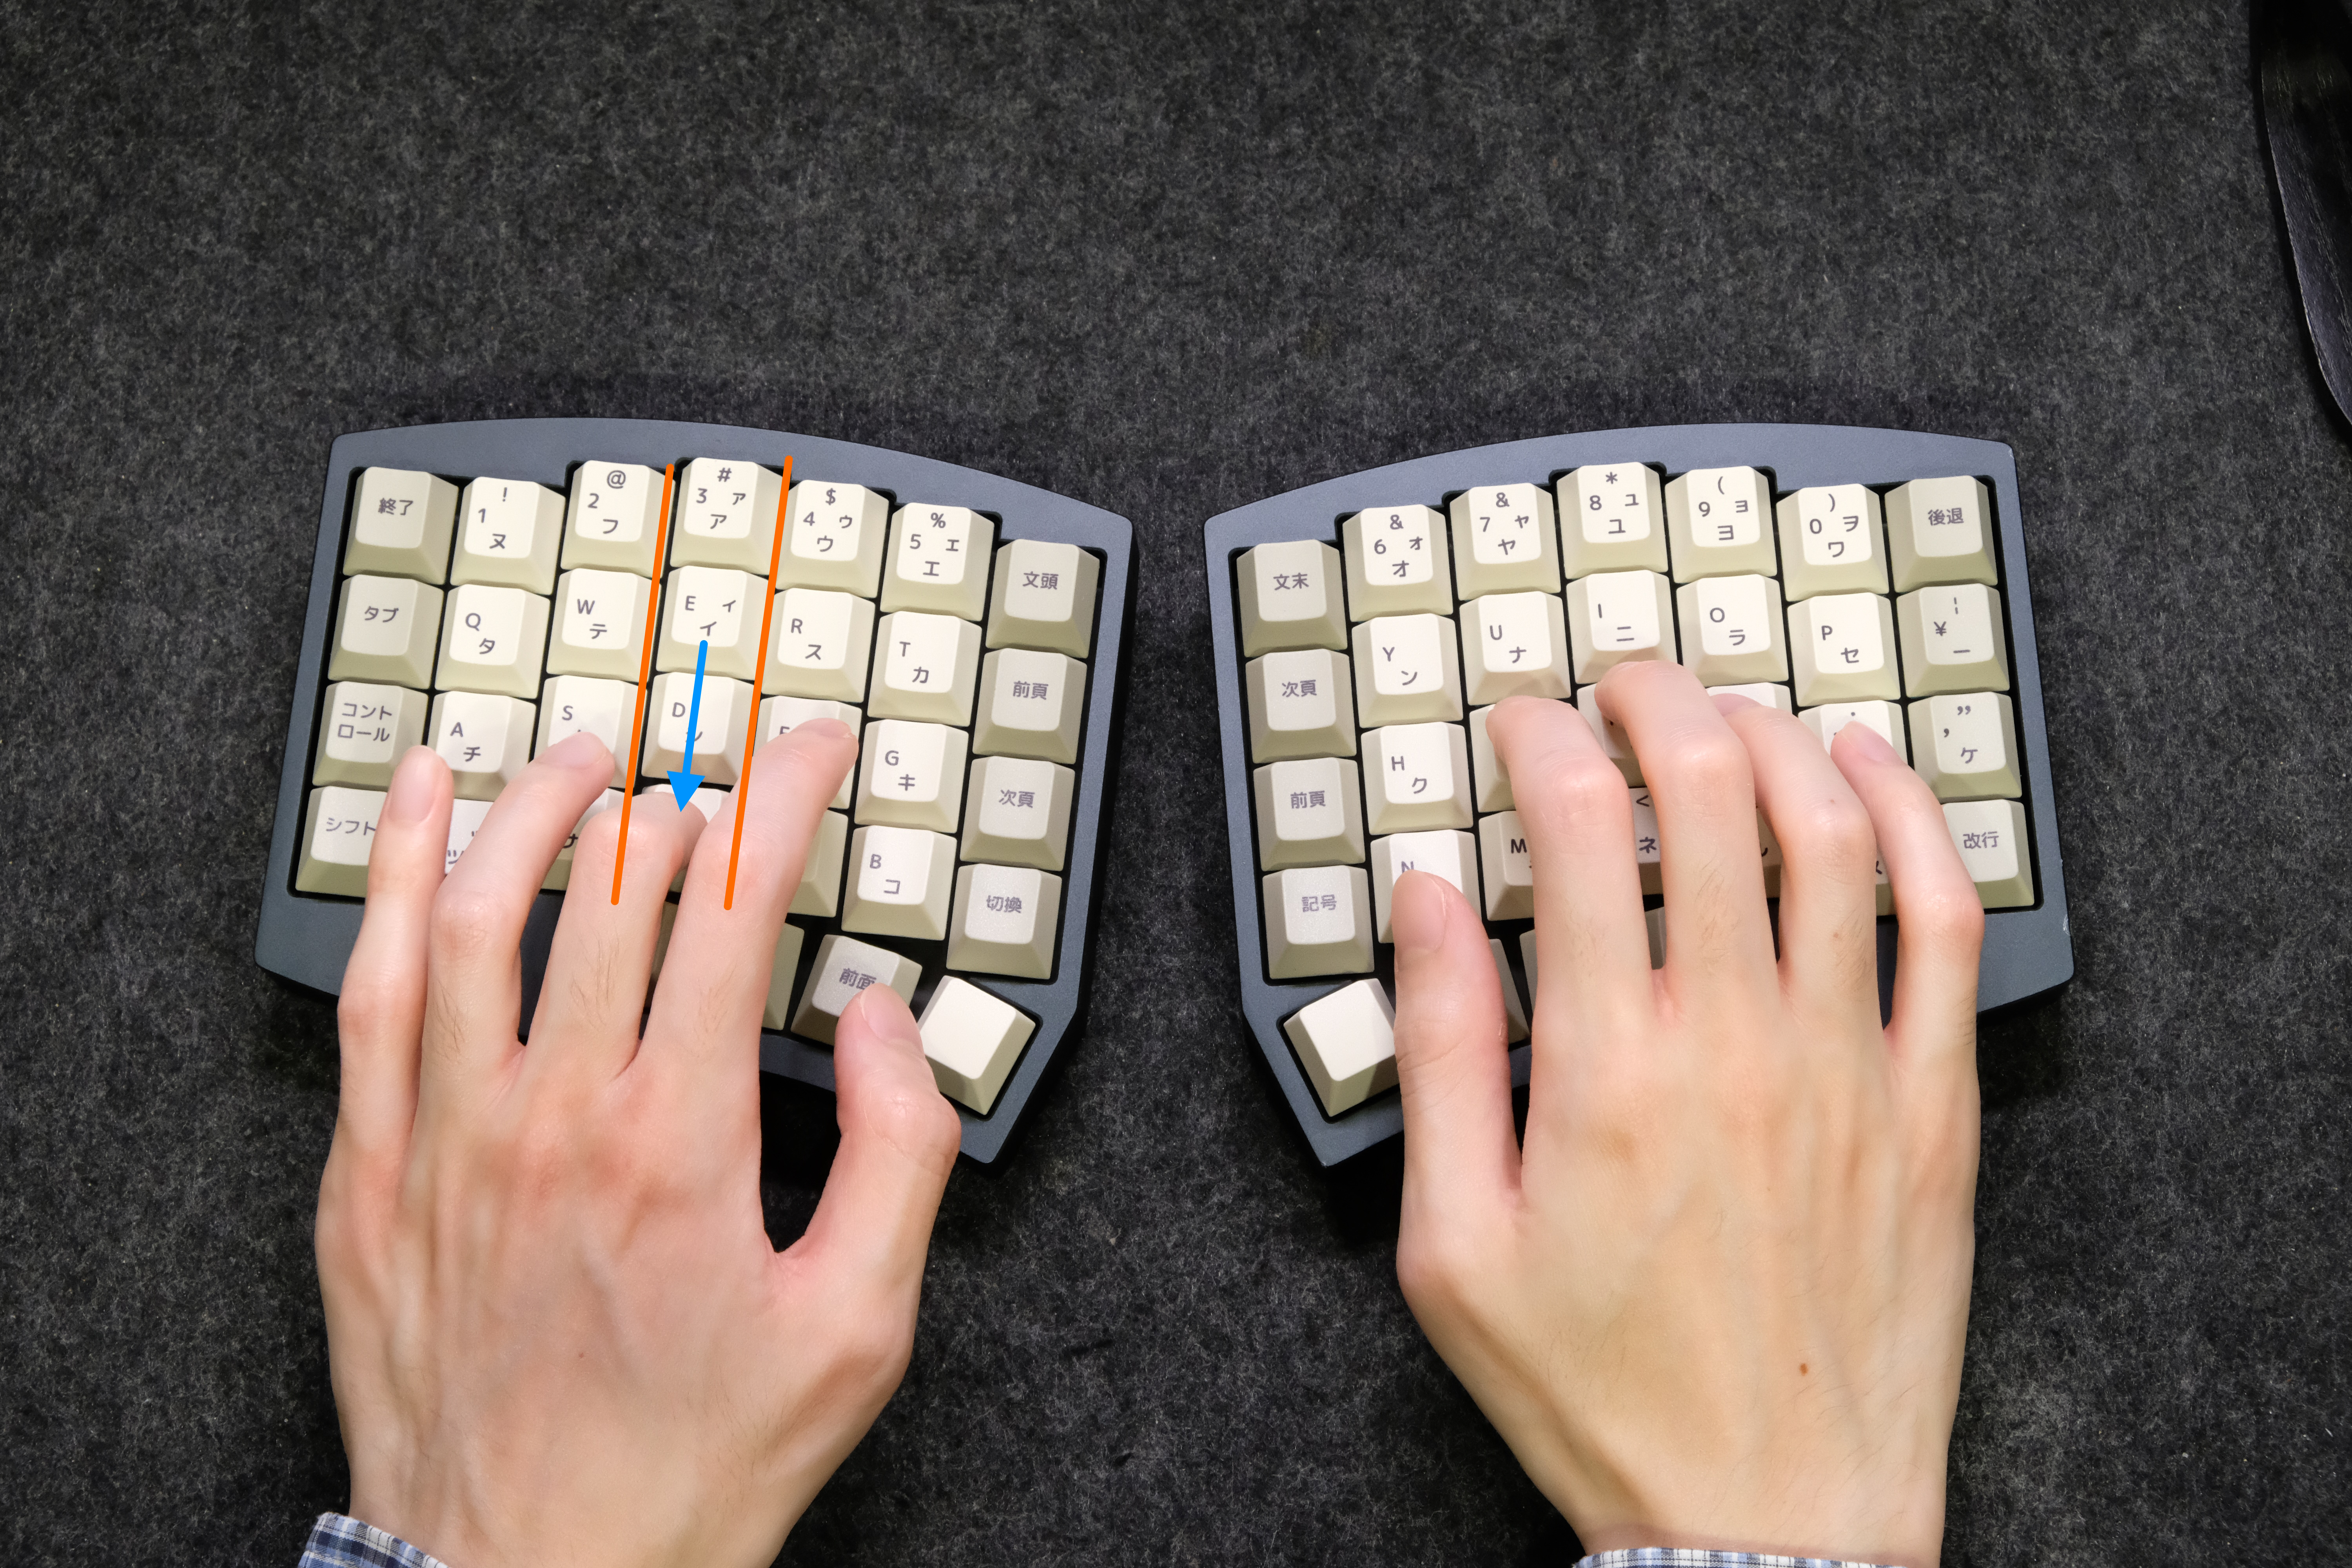
Finally once you reach the outermost column, you’ll likely run into a dilemma - the pinky is much shorter than the rest of the fingers, and despite the resting position matching to the home position, it can have a tough time reaching upwards to hit the Q key.
This bit is entirely dependent on your fingers’ lengths, but you might find it much less strainful to move the ring finger diagonally upwards to press it.
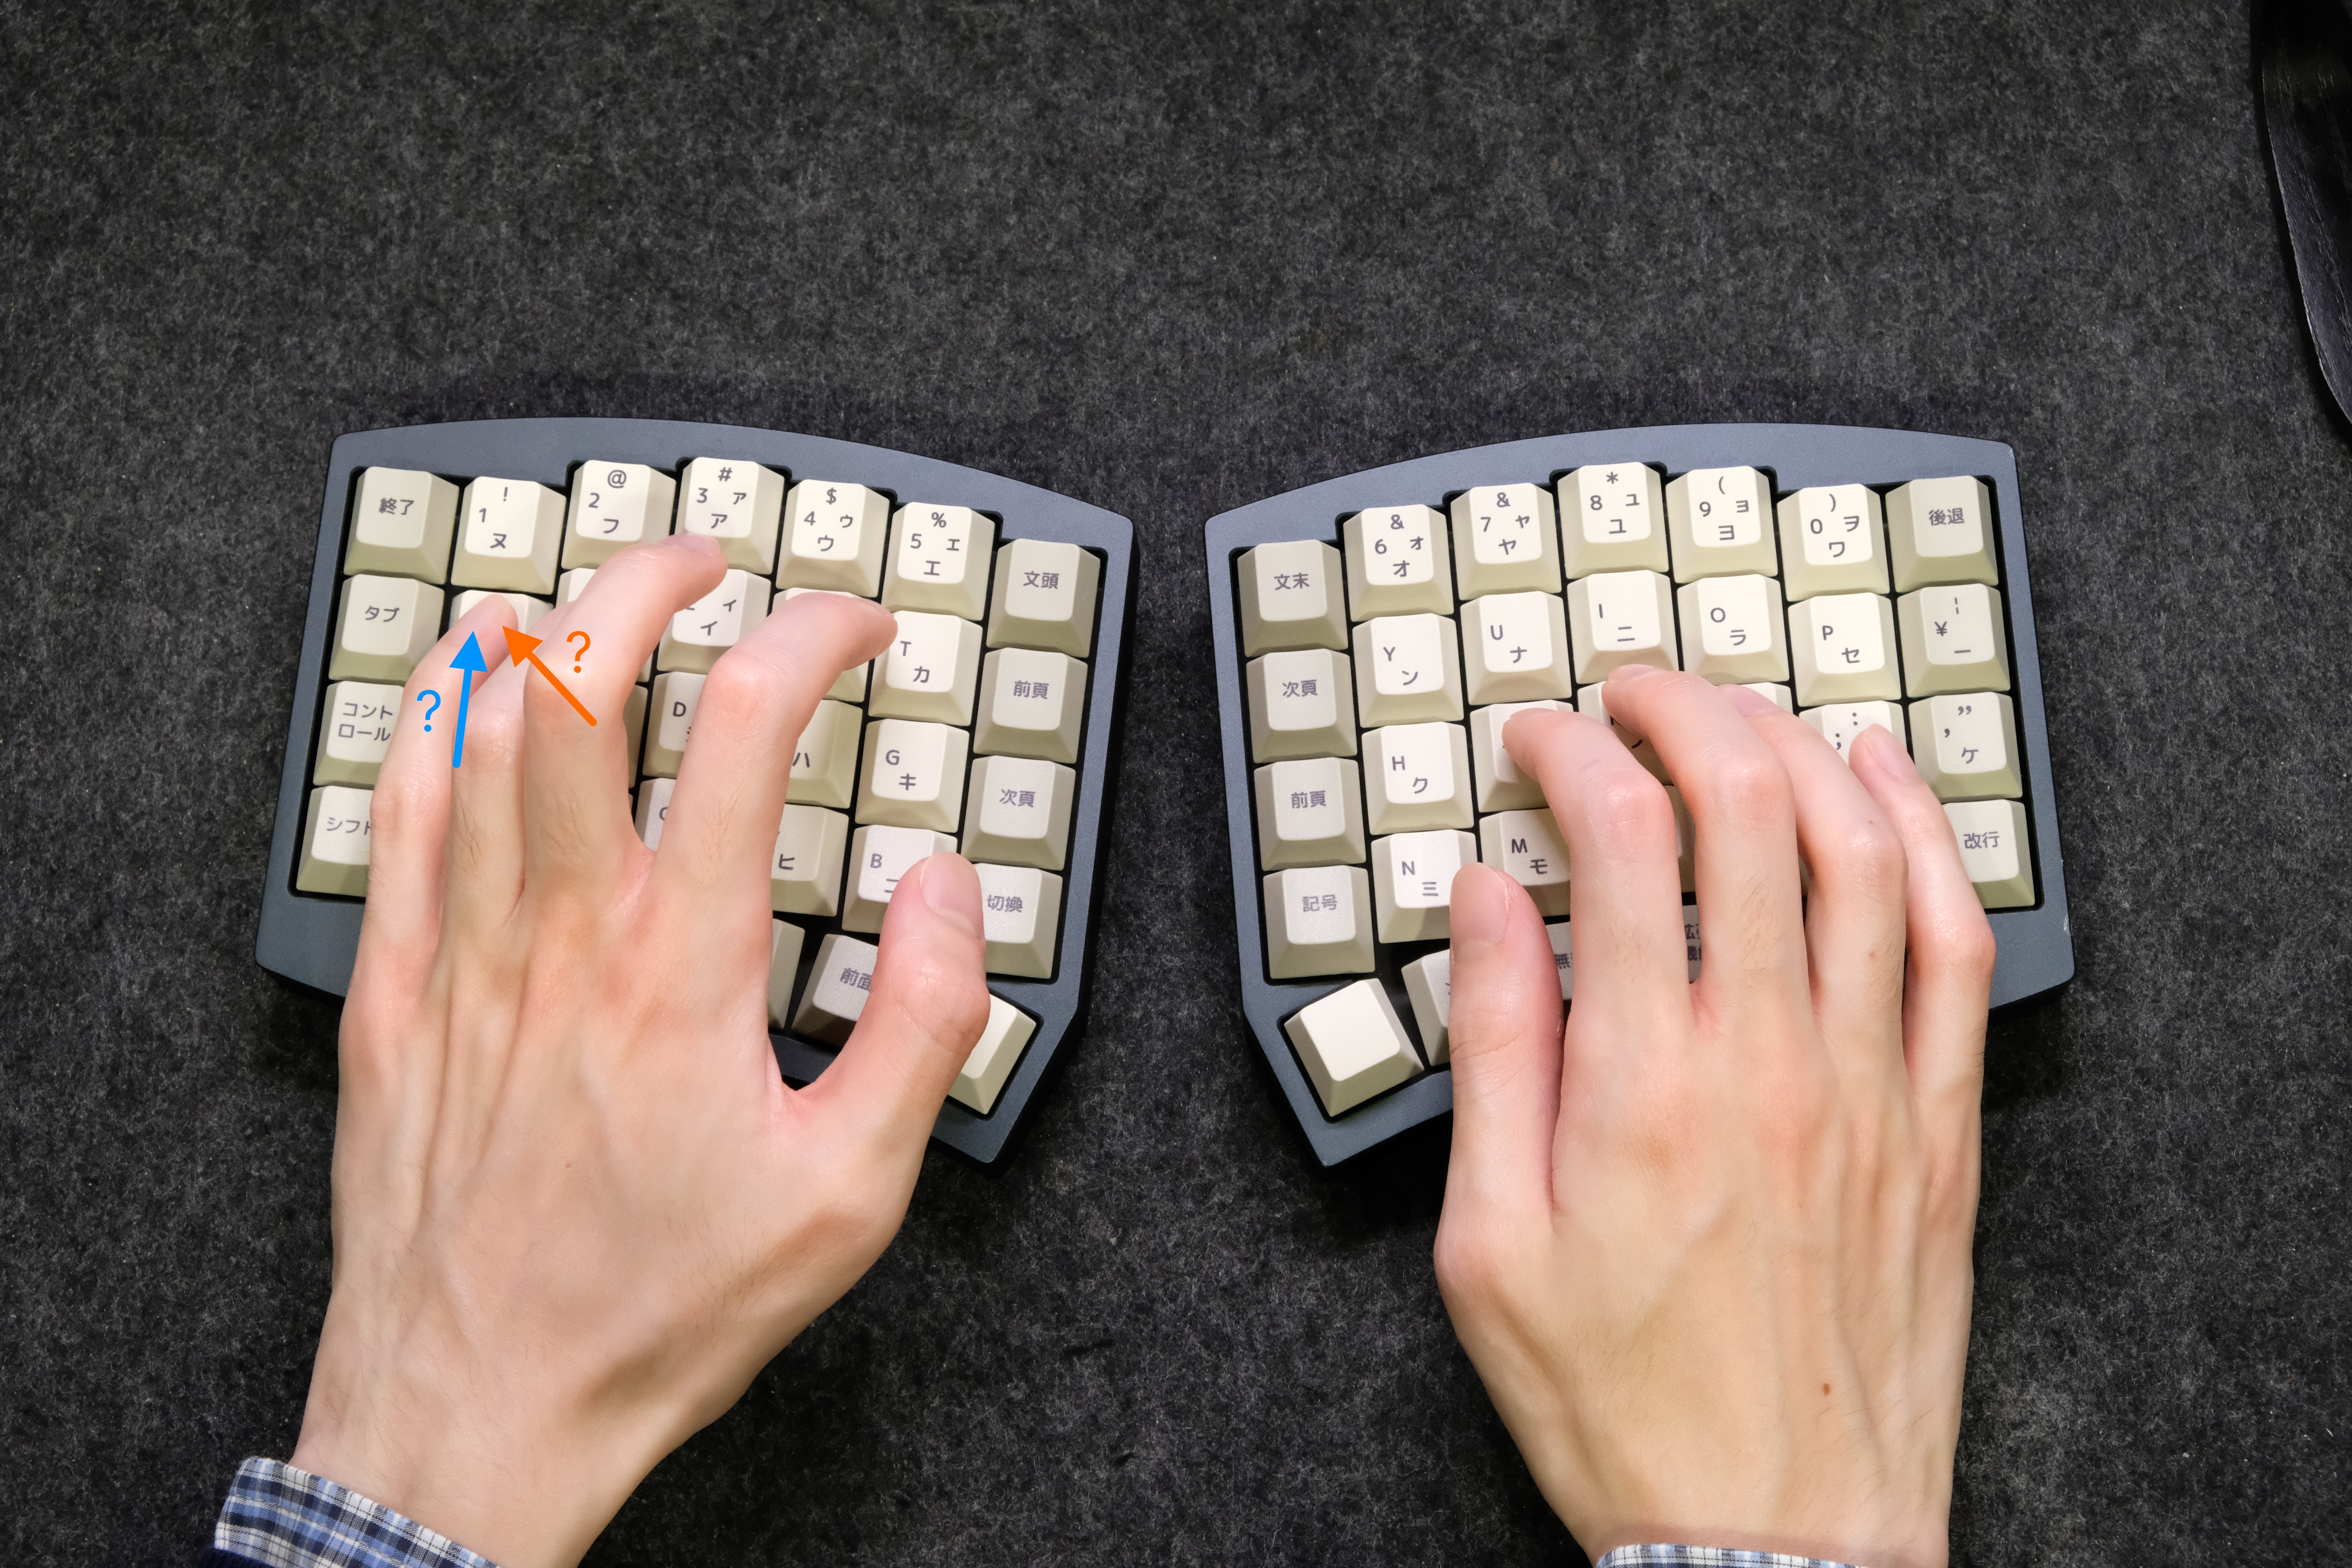
My personal recommendation is to pick whichever you find more comfortable and accurate - I personally use the ring finger for that key.
If using the ring finger, try to hit the Q key without massively swinging your wrist/hands to the side - that can throw off the alignment of the rest of your fingers.
A simple test is to see if you can do a “QQ-SS-XX-SS” sequence without the X misaligning.
For the other keys, try to stick to the same column - even if reaching downwards for Z, X, or C feels weird at first.
Finally, try reaching inwards to hit the T/G/B keys with the pointing finger, and practice hitting them a few times interchanged with the R/F/V column.
With this as well, try not to wildly swing the entire hand over to the right - just enough to comfortably reach those keys, not so far that all of your other fingers get thrown off.
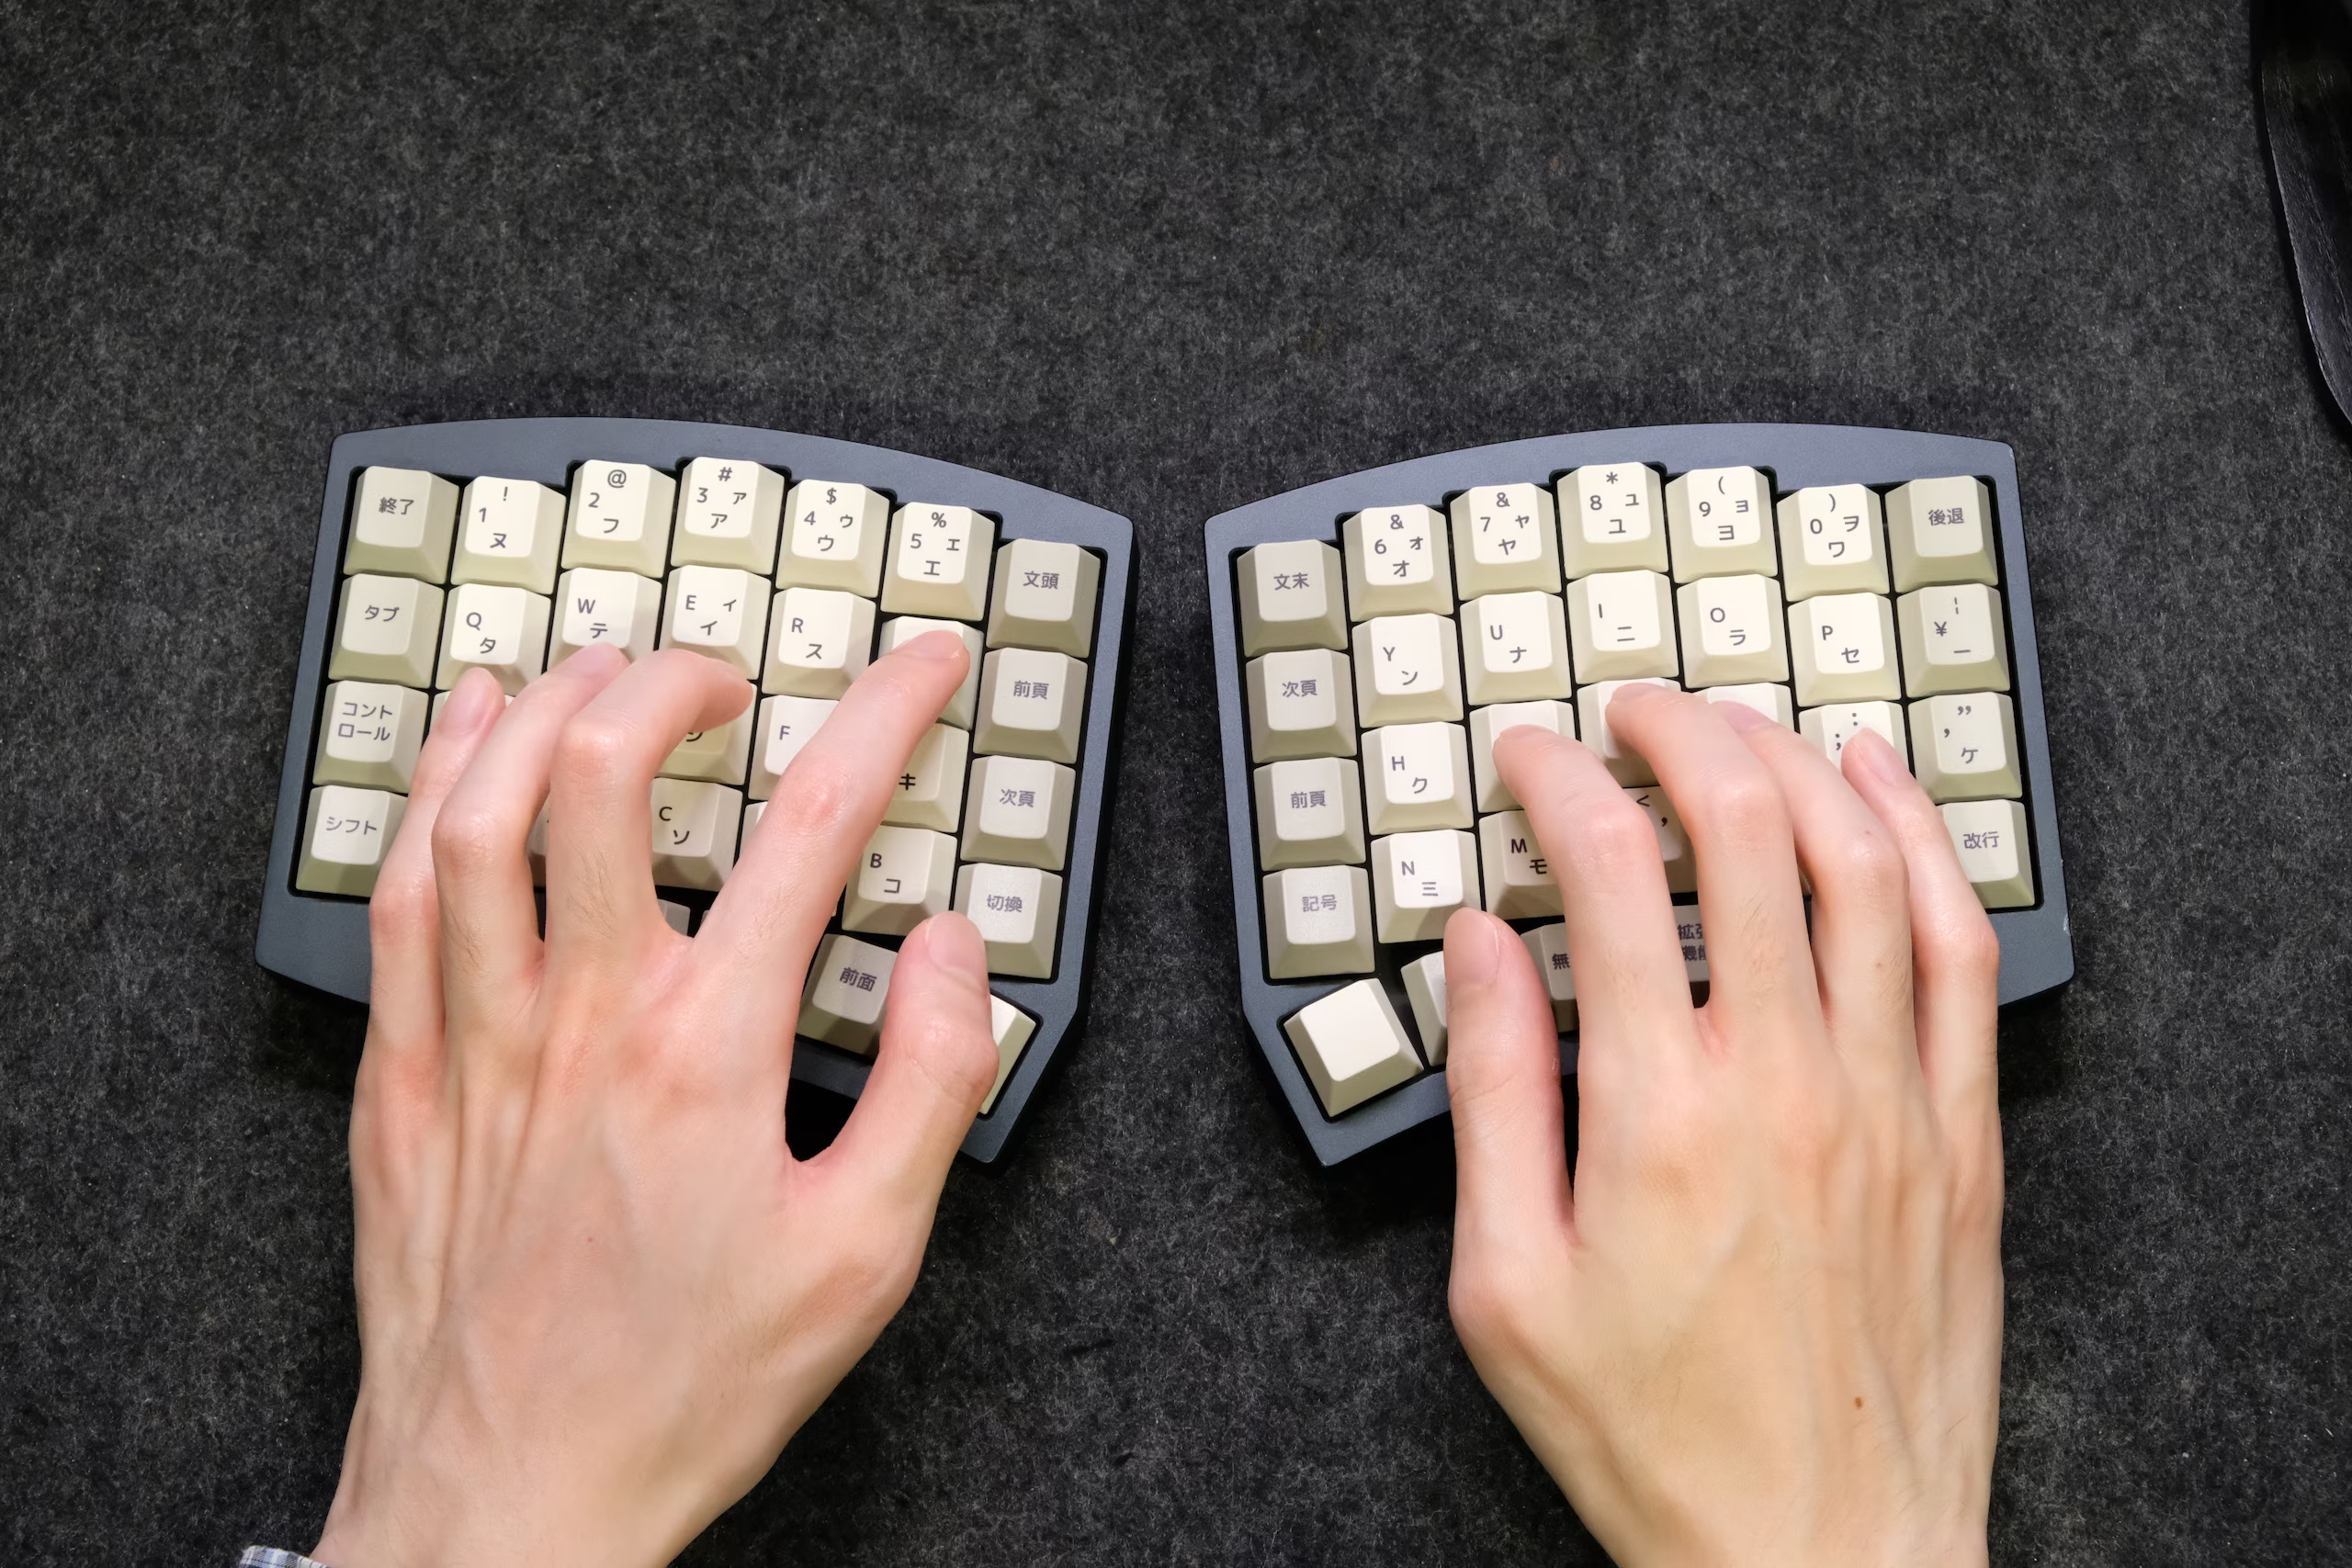
Congrats, you’ve already learned the left half.
Now, repeat the process for the other hand.
You’ll likely run into the same pinky dilemma with the P key, so for that key decide between the ring finger and pinky for comfortable keypress.
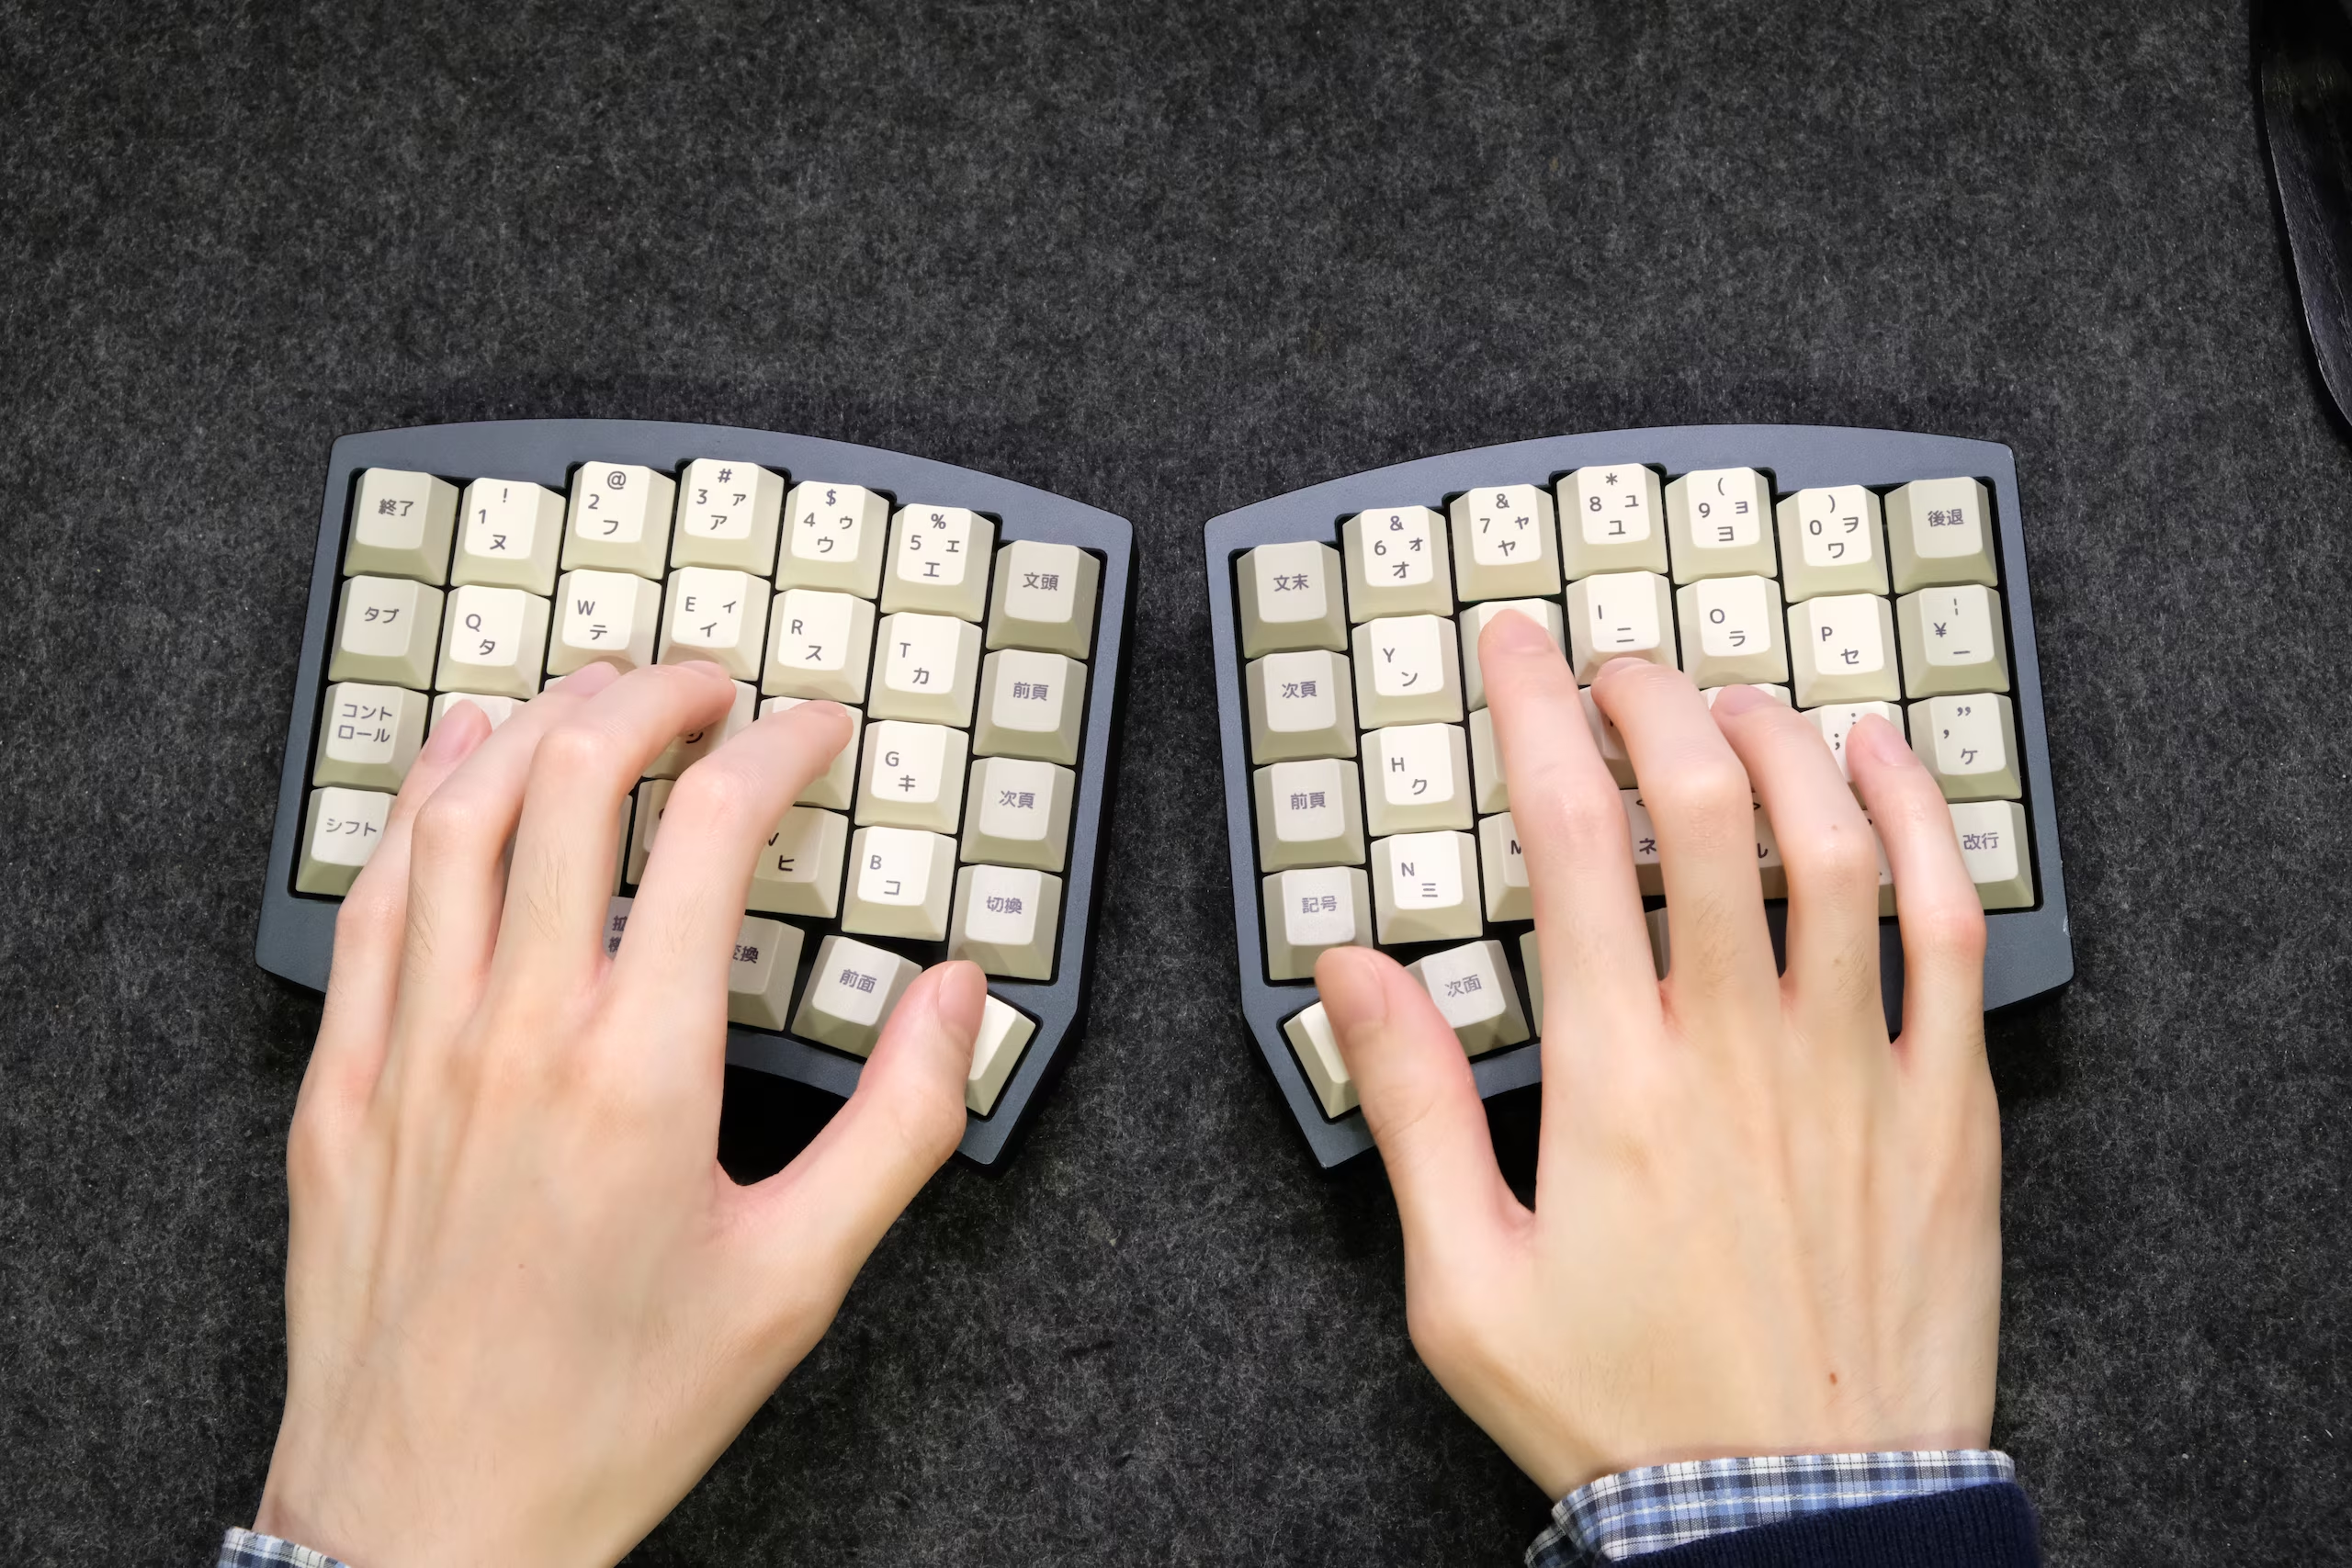
At this point, you’re ready to take on the first typing test.
Don’t worry about mistakes or speed - this is only practice for pressing the various alphabet keys, as well as for the first-time typing result screenshot for the giggles later once you’re used to the layout.
Here’s a typing test setting I recommend - alphabet and spacebar only, 60 seconds.
https://monkeytype.com?testSettings=NoIgLglgtgpiA0IBsAGBA7ArgG2-AZgIbYDOMBxZiM6A5thCQBYIjoD2ATlMRjtgF0gA
As you practice a few times, you’ll likely see your speed and accuracy slowly increase.
A few tips and tricks:
- The B key tends to be another of the difficult keys to get used to initially - I recommend just practicing until using the left hand is natural.
Absolute worst case the inner column extra keys could be used for a duplicate B key, but that wastes a convenient extra key that could be used for other purposes. - If you’re accidentally typing unused keys nearby by accident (for example the inner macro keys), you can remap them to blank keys in VIA configurator temporarily.
As stated earlier, no need for perfection this early on - once you’re excited and feeling up to the next step, let’s move on ahead.
Next, let’s learn the bits necessary for daily-driver use.
The Daily-Use Bar