How to Keyboard
Pages
How to Keyboard - Page 2
A Case Study
When you purchase a custom keyboard kit, it usually doesn’t come with everything you need to get typing - the switches and keycaps mentioned later will be purchased separately.
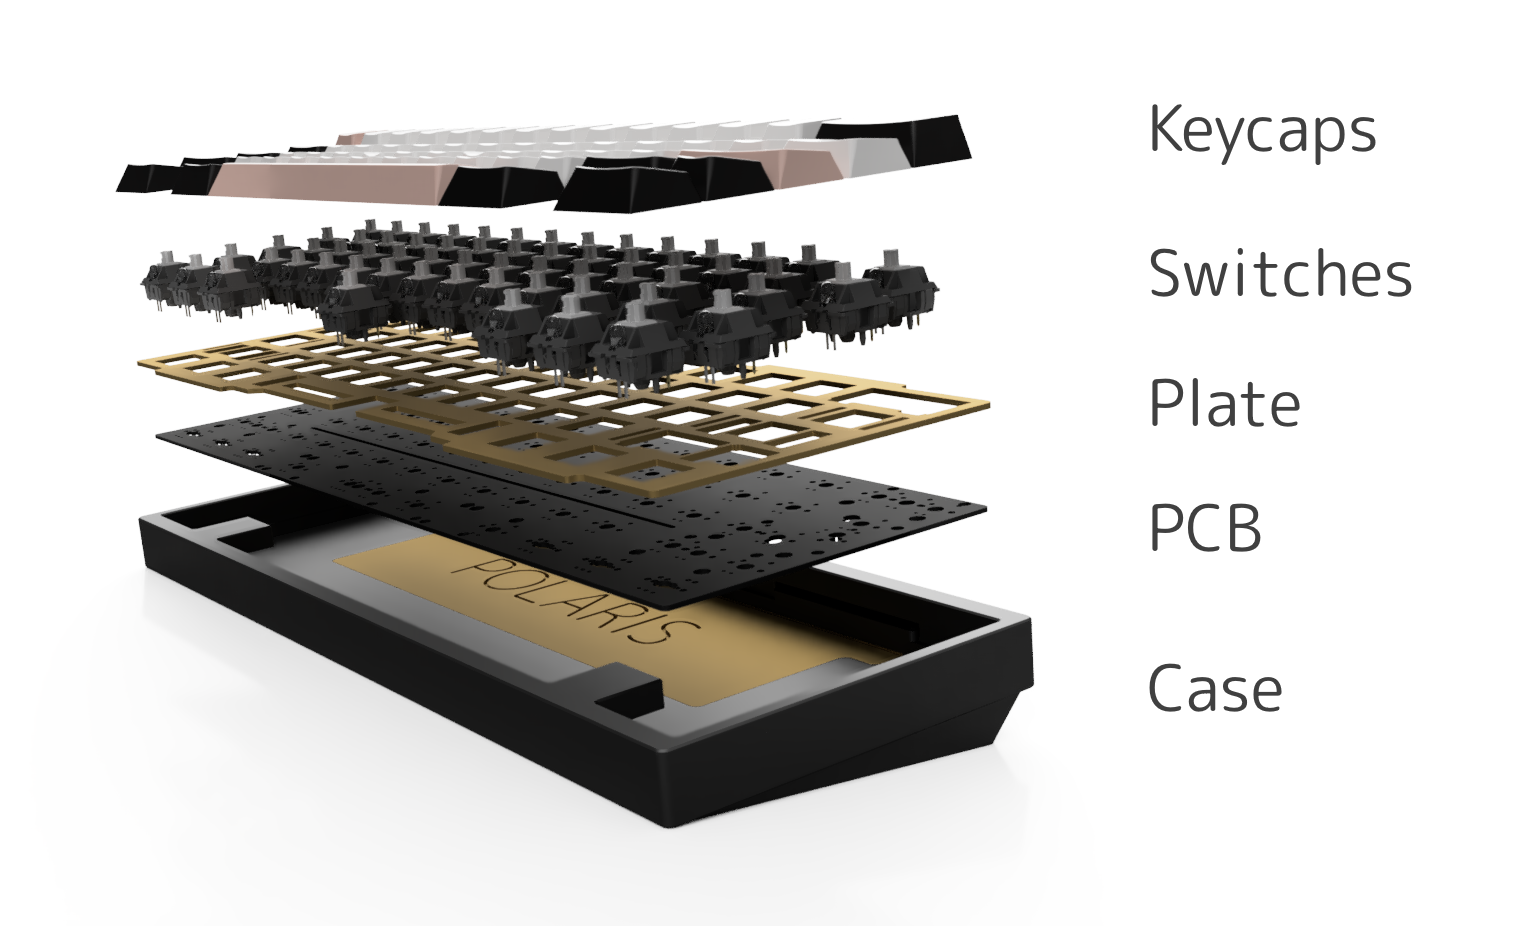
- Keycap - The plastic bits of the keys that you press.
- Switch - The bits below the keycaps that are part of the electronic circuit.
- Plate - What the switches snap in to. Usually secured to the case in one way or another.
- PCB - What does all the electronic work. Scans the switches for keystrokes.
- Case - The exterior. What you can see and touch from the outside that isn’t a key. Usually comprised of several parts.
The bolded parts are the parts that are usually referred to as “the custom keyboard”, and is usually what’s included in the box when purchasing one.
A case of preference?
At first glance, the case is easy to explain - it’s simply the outer shell of a keyboard.
The case dictates a significant part of the visuals of a keyboard - its manufacturing quality, visual language, and materials differ from design to design, and a huge part of deciding what keyboard to buy comes down to whether you like how it looks or not.
The designs can vary from mass-produced cost-effective ones to one-off hand-chiseled works - however, there’s more to the case than just how it looks.
Making noise
Especially in the COVID-era and beyond, acoustics - or how the keys sound to type on - have become a huge part of the custom keyboard craze.
It is all to be expected - besides visuals, it is the only element of a keyboard which can be shared and experienced online by means of typing videos; anything beyond visuals and sound must be touched in-person to fully understand.
Each and every part of the case’s design, geometry, and how the vibrations travel through its material as well as the air inside it can significantly sway sound one way or another - often in unpredictable ways that can’t be summarized as a simple “this sounds like that” type of way.
If you’re interested in a keyboard design and want to know how it sounds when typed on, search for “keyboard name typing test” on YouTube - you’ll likely come across at least one result, if not more.
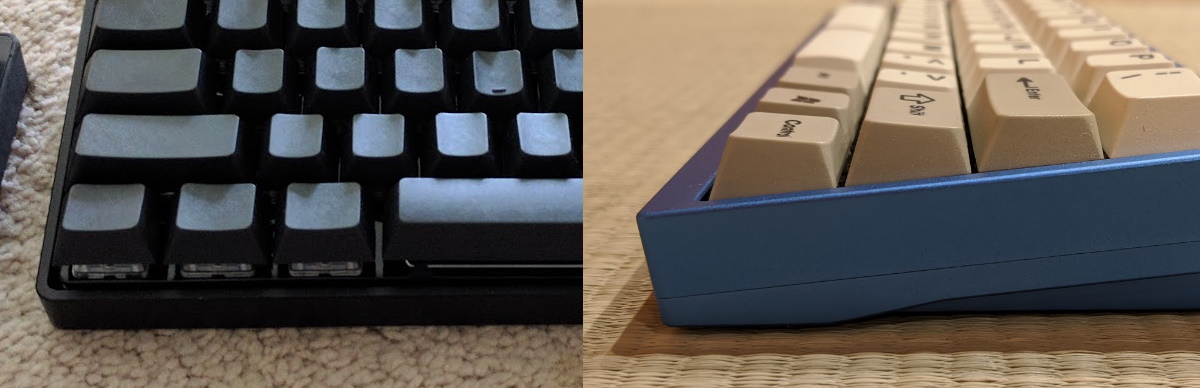
For acoustic reasons, most custom keyboard designs tend to be “high profile cases” - ones whose walls reach all the way up to the keycaps to hide the switches, with the effect of enclosing the space below the keycaps to contain the movement of sound.
The factors on the plate
Different keyboards behave differently as to how they handle the impacts from your fingers slamming the keys down - some act like a rigid wall, some bend internally and absorb the impact, some are even magnetically- or spring-loaded to bounce away when struck.
Two major aspects of this are plate material and mounting method - the former is the material the plate is made out of, and the latter is the mechanism by which the plate is connected to the rest of the case.
This is due to the switches and keys being physically supported by the plate - most of your typing impacts end up being absorbed by the plate after the forces travel through the rest of the components.
Material
In general, the common plate materials can be divided into the following:
- The plastics - Your typical plastic materials such as polycarbonate. These are the most adept at absorbing impact and deflecting away, reducing the stiffness and pain from long-term aggressive typing.
- The metals - The metals such as aluminum, brass, and steel. These tend to be significantly more rigid and stiff than the plastics, but their sheer mass and density can yield acoustic qualities one desires.
- The middle ground - Unique materials such as FR-4 (fiberglass sheets used for manufacturing PCBs) and carbon fiber, which sit somewhere in between the two categories above.
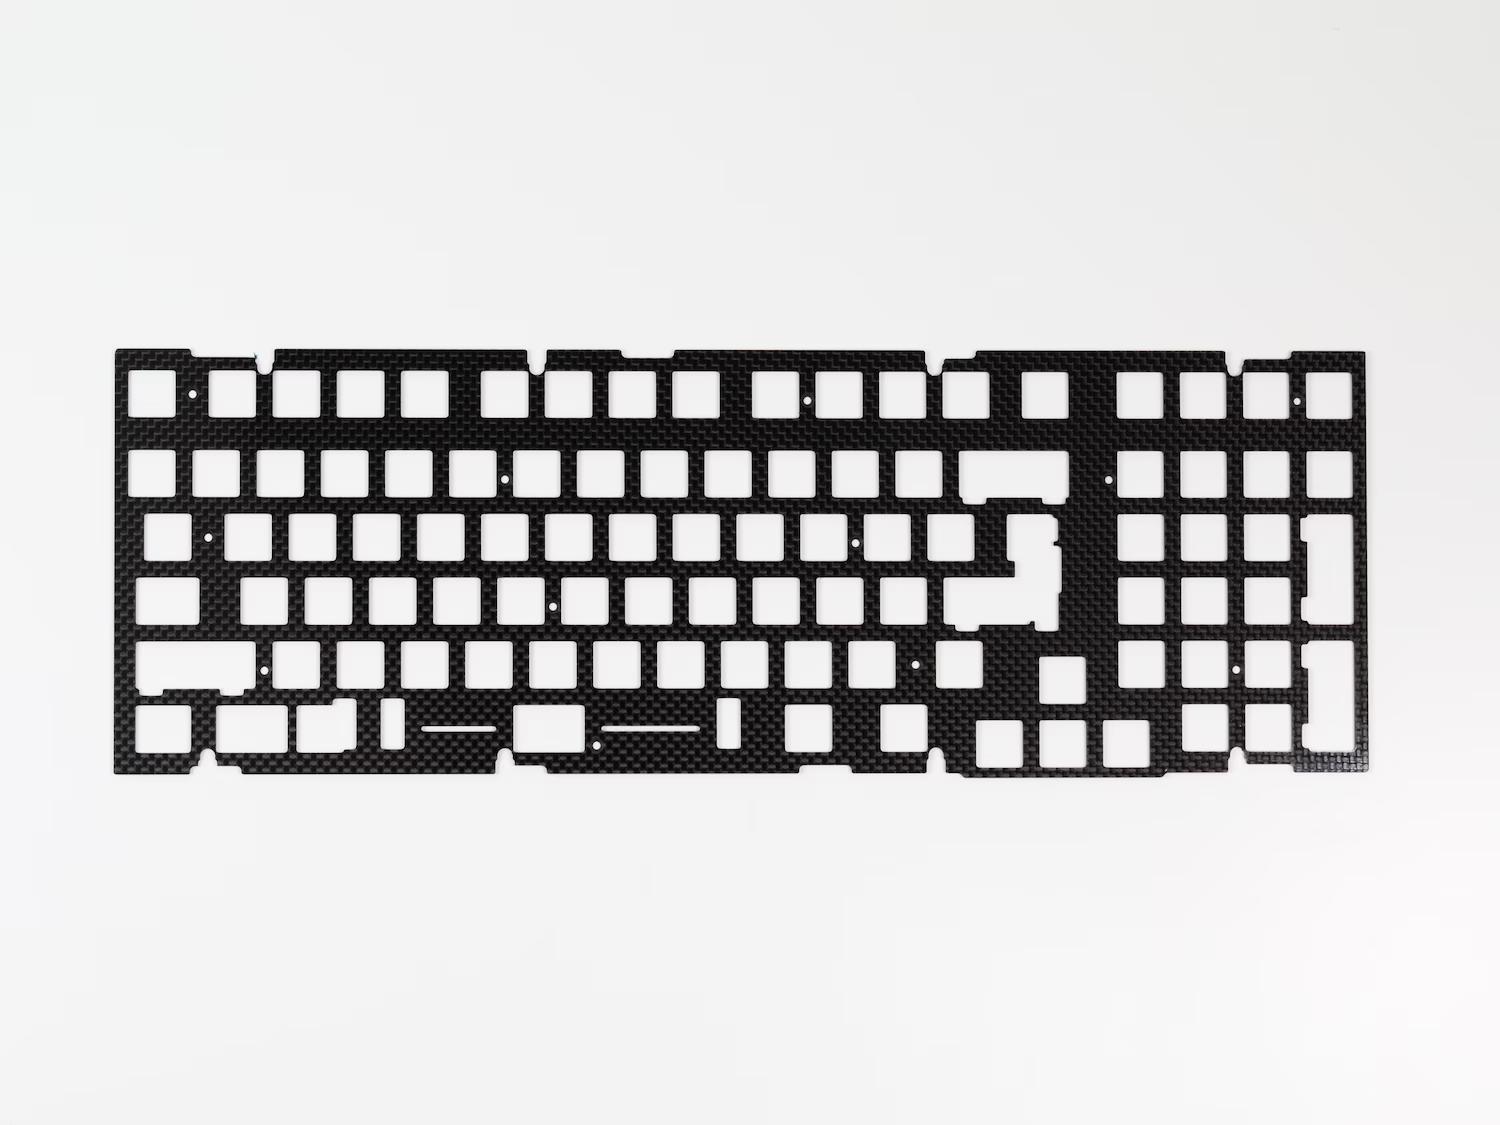
Plate trends come and go - in early custom keyboards, brass was all the craze; after that, polycarbonate was all the rage; nowadays it seems to be a mix of whichever one prefers.
Having been in keyboards both as a hobbyist and designer for over half a decade, here are my recommendations and findings:
- Polycarbonate tends to be a good plastic choice - it’s extremely durable, very flexible, temperature-stable, and looks pretty when sand-blasted for a frosted look.
- Aluminum tends to be a great metal choice - it’s much softer than the other metals, giving you the metal acoustic benefits without the severe metal plate stiffness. As an added bonus, it’s very corrosion-resistant for the accidental coffee spill situations.
- Stiffer metals such as brass and copper have declined in popularity - while they do offer acoustic benefits, their stiffness makes for a rigid typing experience which is uneasy on the fingers, and design technology has advanced to the point where the rest of the case design can compensate for acoustics without them.
- Avoid steel at all costs - it is by far the stiffest feeling of the plate materials, and can lead to immediate typing pain in a short span of use.
In the end, I recommend that you try a few based on your interests, and to form an opinion on what you prefer the most.
Mounting method
How the plate is connected to the case has a noticeable effect on the behavior of the keyboard itself.
This is a whole deep topic that deserves its own article, but the simple gist of it is controlling vibrations and controlling rigidity.
For example, if the plate is suspended in midair by soft cushions, that will reduce the vibrations and absorb some of the impact during use as the fingers strike the keys down into the plate.
Similarly, if the plate is secured to the case via screws, the quantity and location of the screws will define which keys feel stiffer than others.
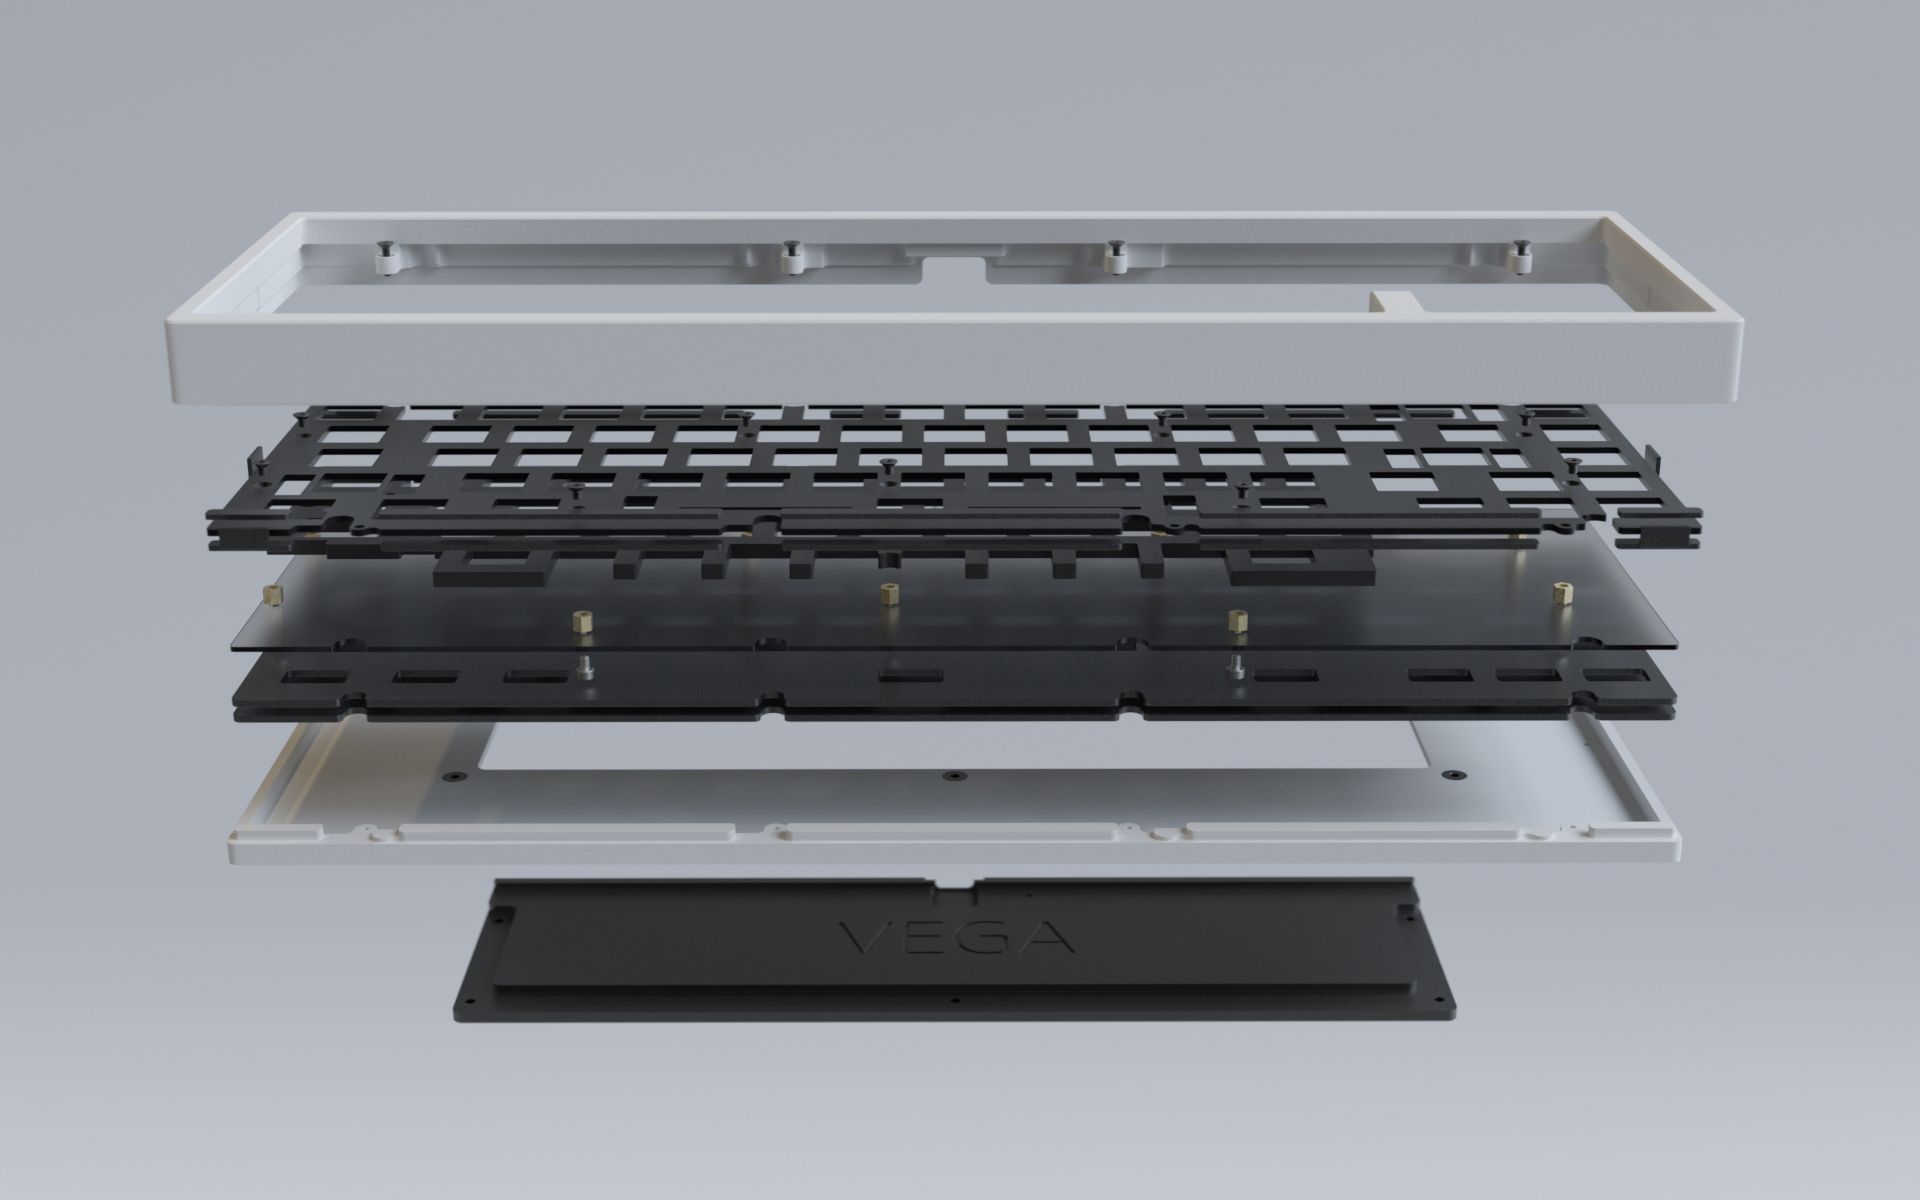
Some common mounting methods are as follows:
- Top mount - The plate is screwed into the top case half from below, allowing the plate to flex downwards wherever it’s distant from a screw. Simple, effective, and still performant over a decade since its introduction.
- Gasket mount - The plate is supported by “gaskets”, or foam pads that bridge the gap between the plate and case. Can easily absorb vibrations and impacts and is very popular, but when done incorrectly with too much compression on the gaskets, can lead to a very stiff experience.
- O-ring mount - The plate is supported by a rubber ring that goes around the switches below the plate - somewhat like the gasket mount above, but using a large glorified rubber band instead of foam pads.
- Tray mount - The whole internals drops into a case and gets supported from below by pillars or mounting posts. If done incorrectly, this can cause extreme rigidity where the internals are supported, making for one uncomfortable typing experience. If done correctly, it can yield a very cost-effective solution.
- Leafspring mount - The plate has thin “arms” cut into it, which behave like a linear spring and allow the entire internals to vibrate up and down.
New technologies and designs are invented all the time, so I’ll refrain from going into too much detail in this guide; simply knowing that there’s variety in this aspect and how it can affect both typing sound and typing feel is the important bit.
One very important thing to remember is that existence is not implementation - for example the gasket mount description above might sound enticing, but if poorly done, overly compressed gaskets can lead to a sound and feel worse than the rest.
For a quick reference, I recommend checking this diagram by Thomas Baart.
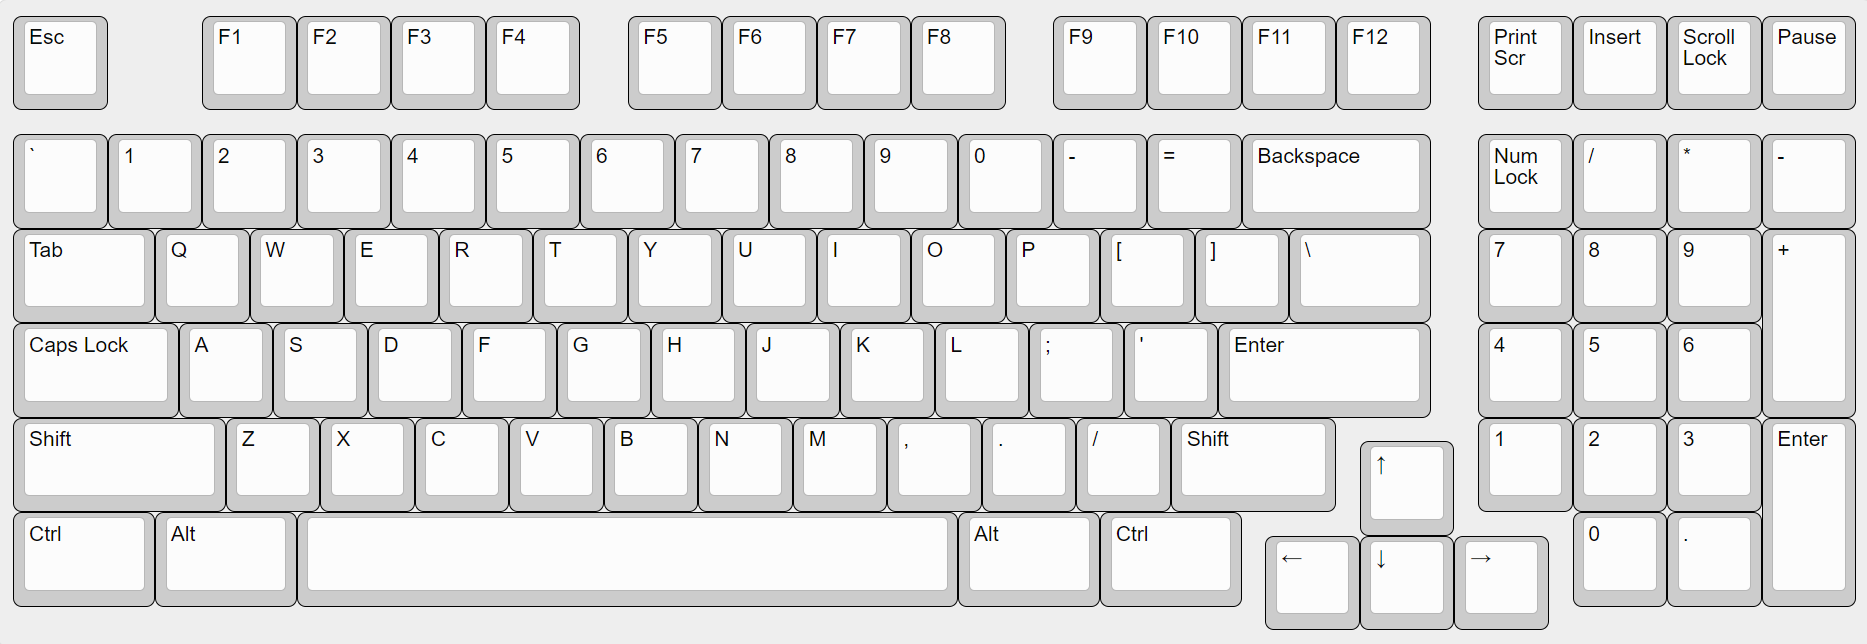
Layout decisions
The case is usually designed around a single general key layout - make sure you’re fine with the layout, or otherwise it won’t do you much good to own a keyboard that you can’t type on.
Some common layout names are as follows:
-
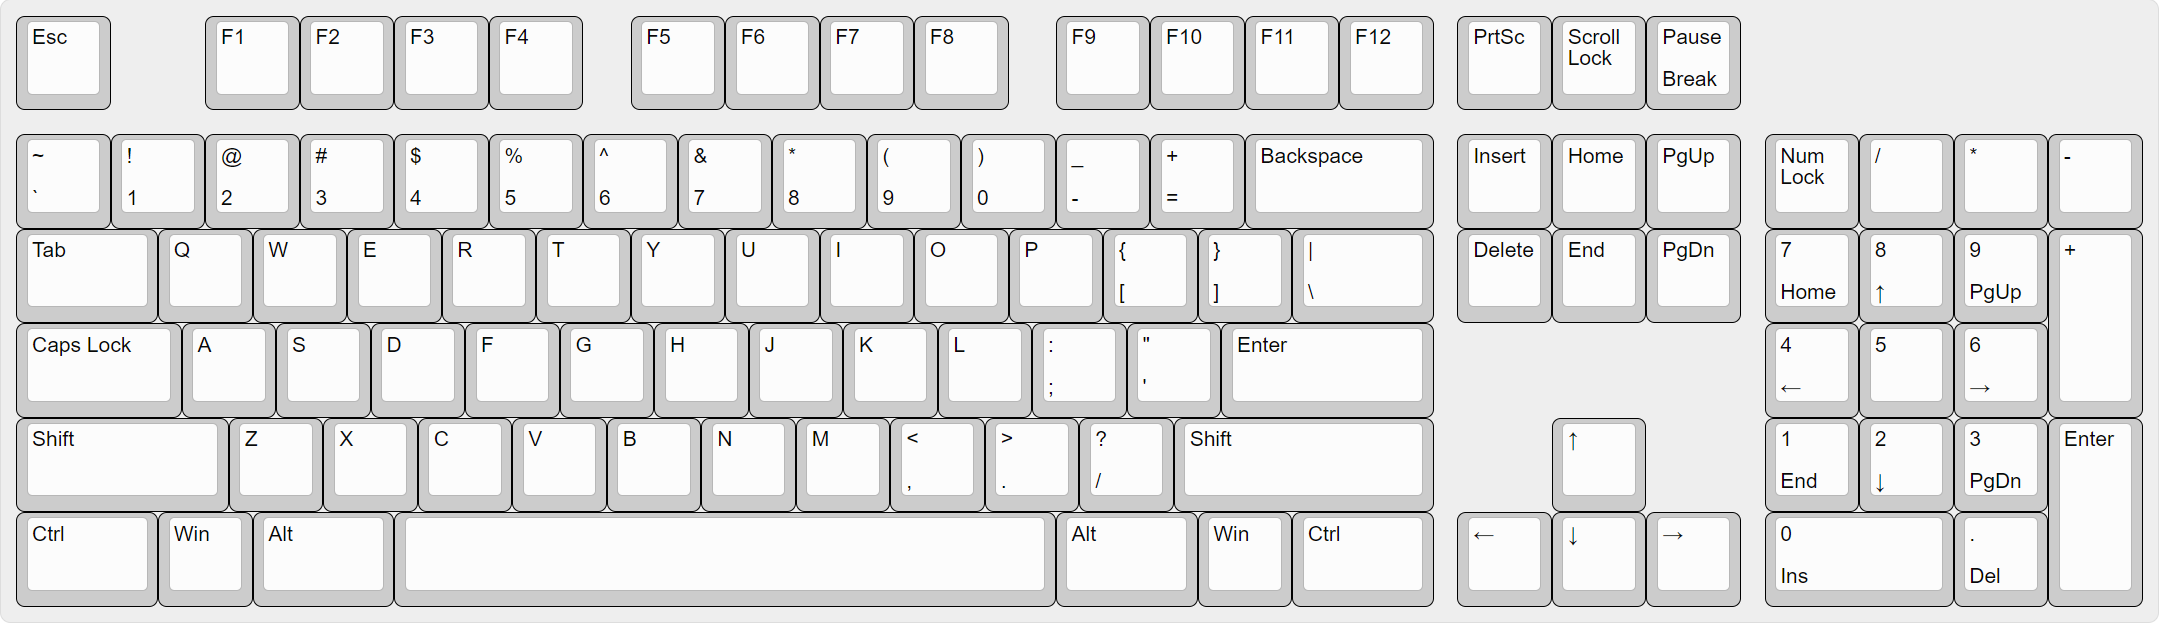
Fullsize. Very rare in the custom keyboard world due to the sheer size and cost of manufacture.
-
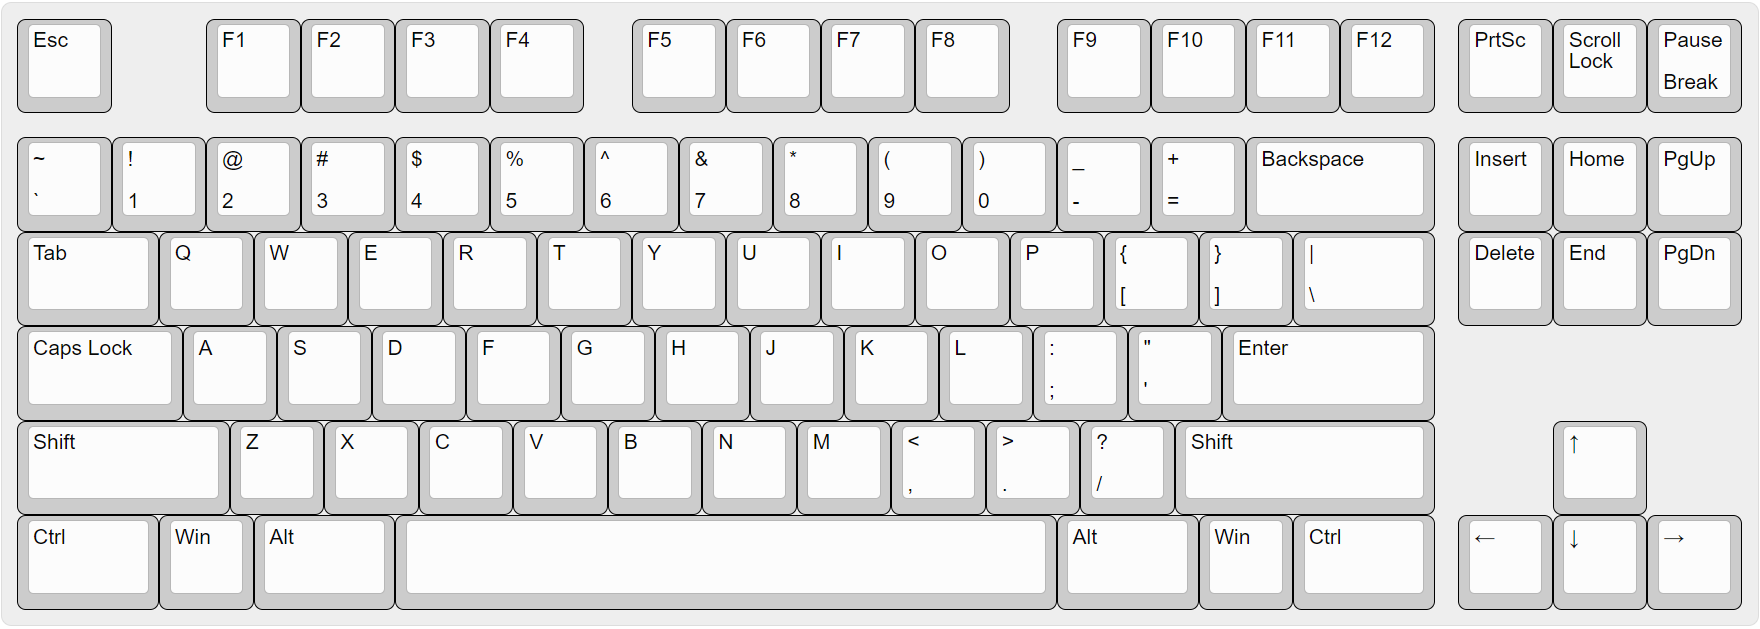
Tenkeyless (TKL). The tried-and-true compacted layout that’s been popular for years upon years.
-
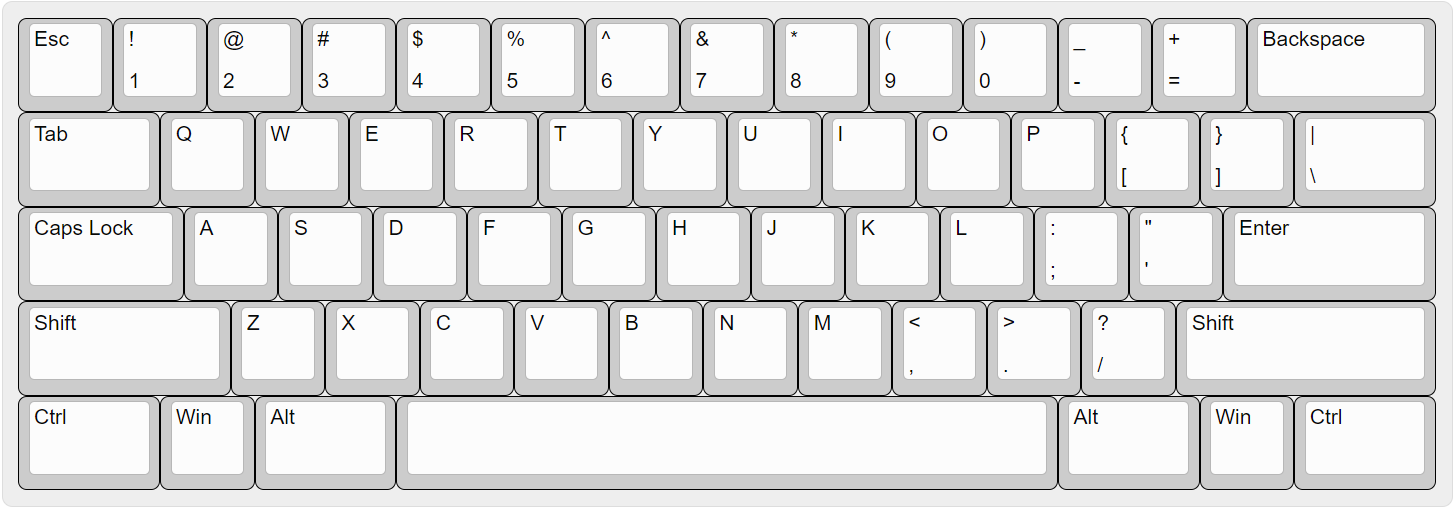
60%. Just the alphanumerics area of a fullsize or TKL. Yields a compact, portable board.
-
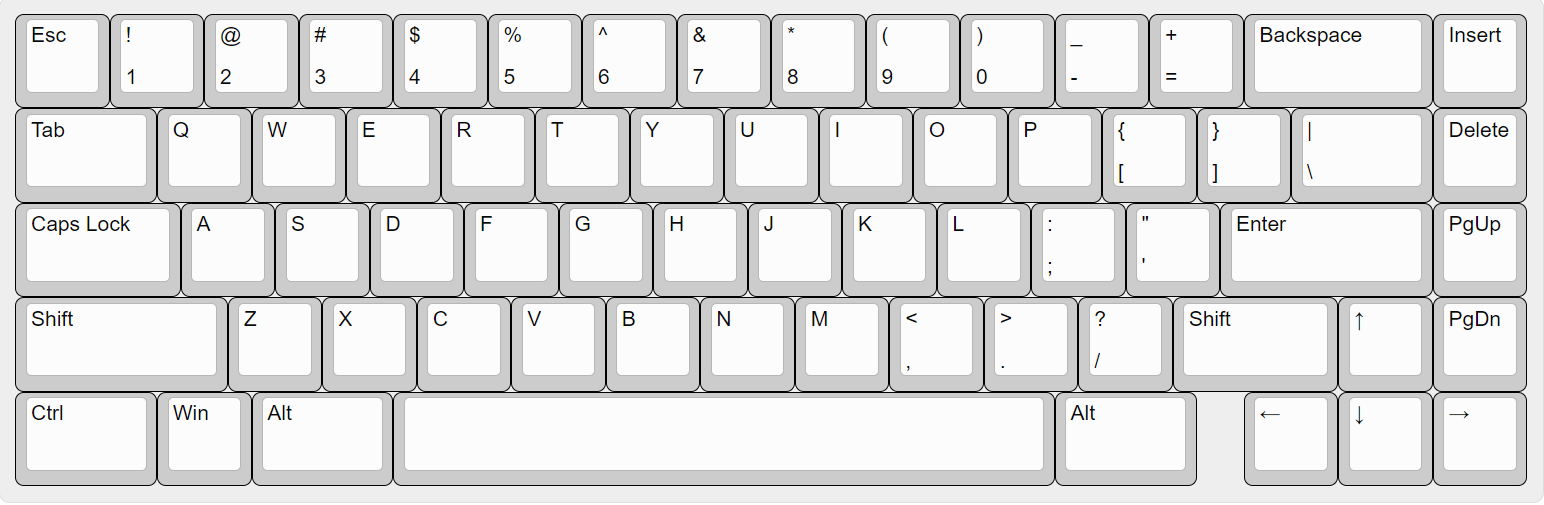
65%. The 60% layout with arrow keys added back in for convenience.
-
75%. More or less the 65% with function keys, yielding TKL-tier coverage in a smaller package.

-
1800. Named after the Cherry G80-1800 keyboard, has nearly all of the keys of a full-size in a smaller package.
-
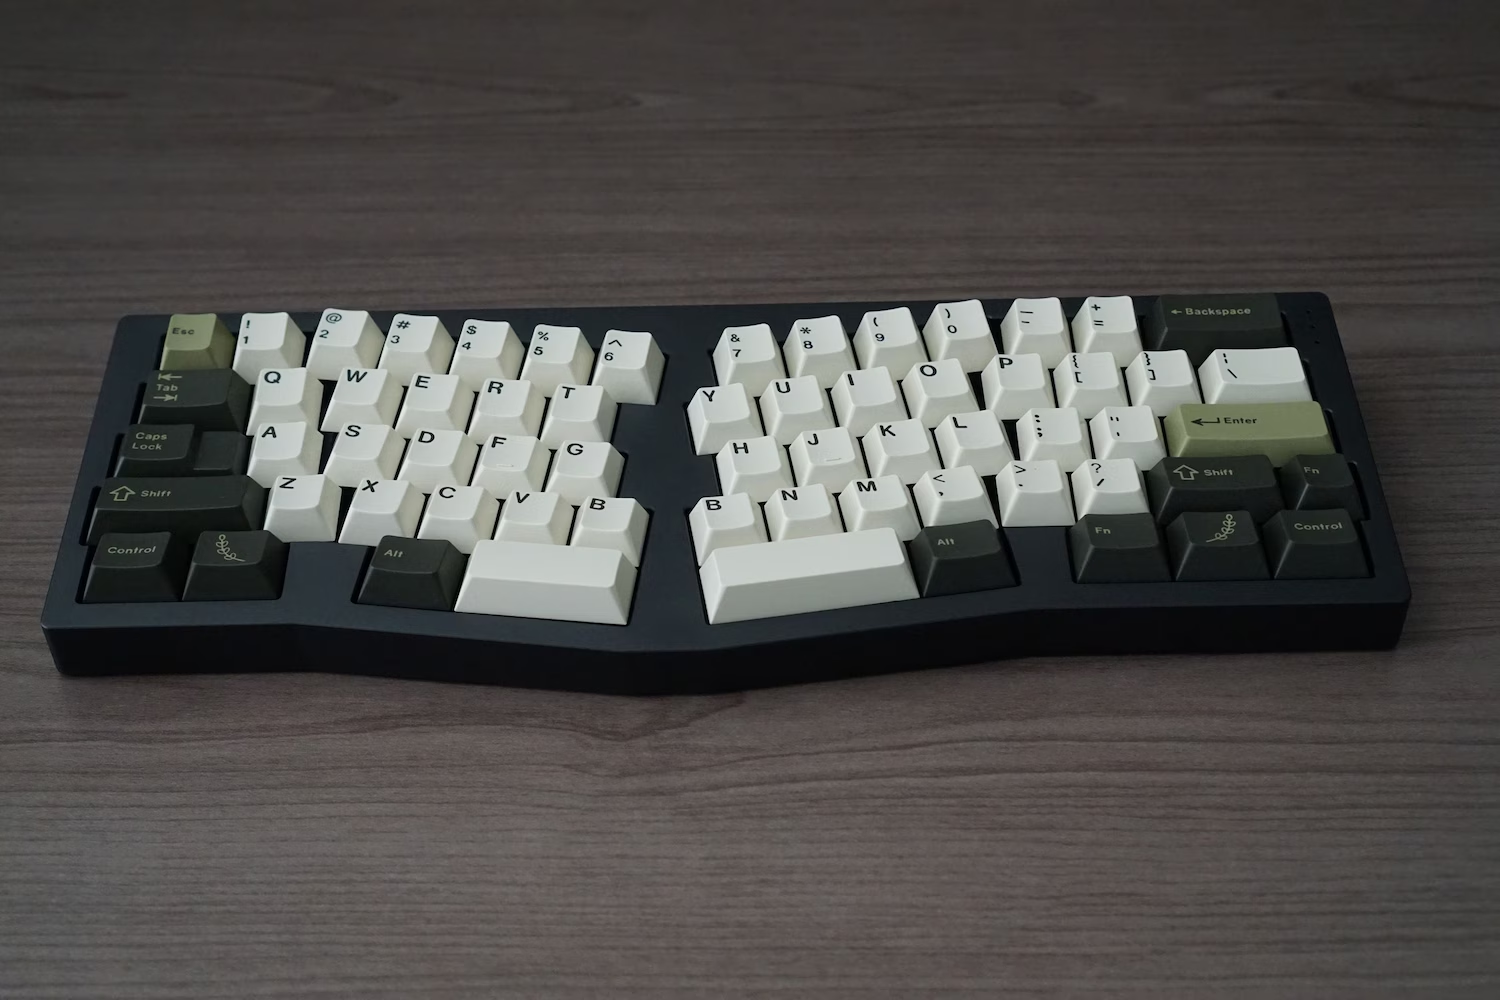
Alice/Alice-likes. Named after the TGR Alice keyboard, has the alphanumerics bending inwards for arguably better ergonomics.
-
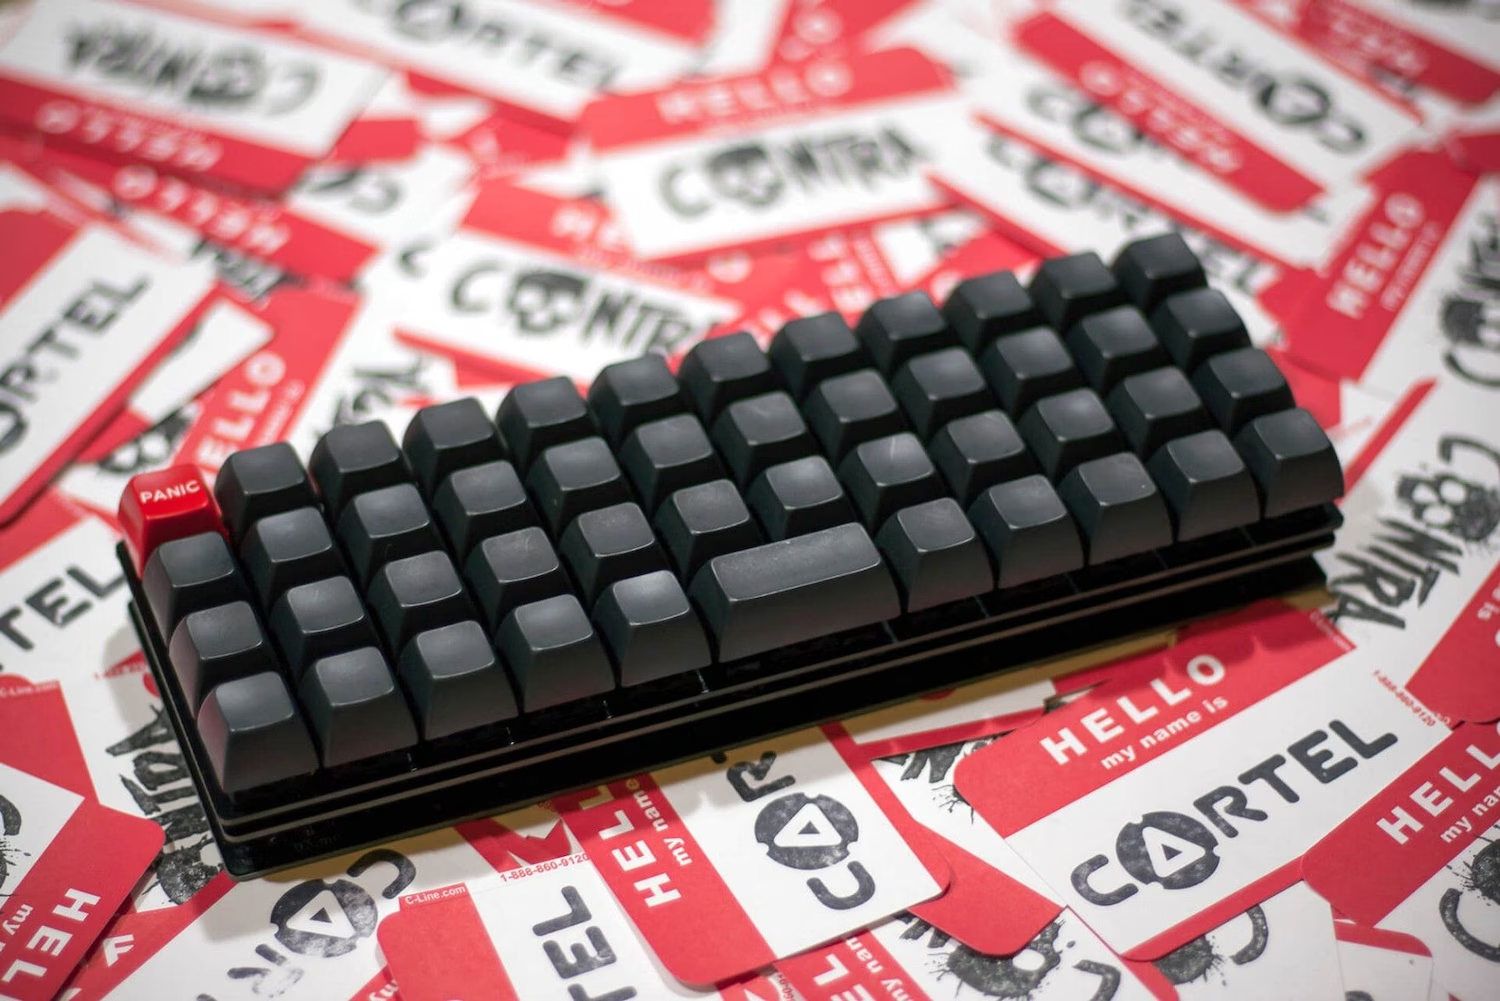
40%. Stuff smaller than a 60% lacking a number row.

-
Ortholinear. Keys aligned to a grid rather than staggered out per-row.
-
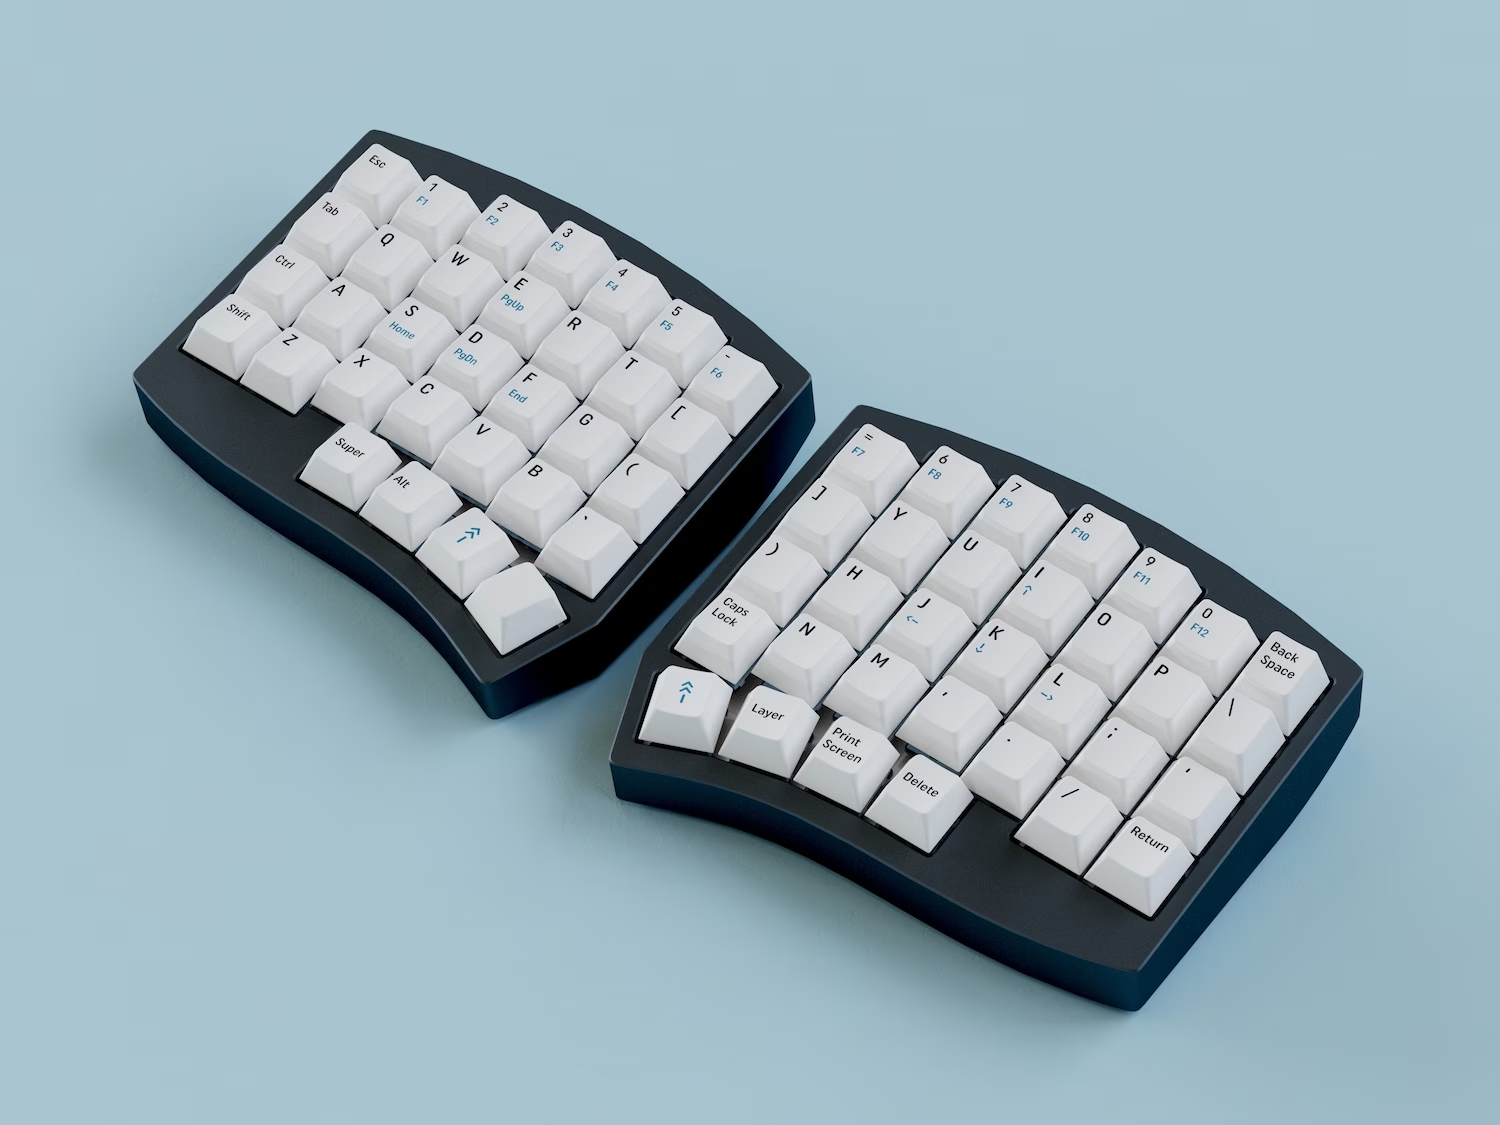
Column stagger/Ergonomic. Designs that break out from the rectangle and attempt to fit closer to the human hand.
Other layouts do exist, but this should cover the general popular categories.
The misc bits
PCB
One part of the custom keyboard case package is the printed circuit board or PCB - this is the circuitry that scans the keys and sends the signals to the computer.
One key element to look for with this part is whether it is hotswap - specifically, the ability to assemble the keyboard by just plugging parts in rather than having to bring out dangerous tools such as soldering irons.
Foams
Many keyboard designs nowadays include foam layers that go between different parts of the case - this can be for acoustic damping, vibration control, or whatever the designer feels like achieving with them.
Sometimes, foam is spammed mindlessly as a marketing feature - since foam can dullen the sound and make the board sound “foam-stuffed”, this may not be a desirable thing.
The wall of text
Yeah, that was quite a bit of info - you’ve powered through it, and this is basically everything you need to know to go buy a custom keyboard kit.
Considering it used to take months or years to scrape this information together off of random conversations and forum posts, you’ve gained quite the amount of knowledge already.
Next Page