Polaris Build Guide
Pages
Polaris Build Guide - Page 5
Putting it all together
-
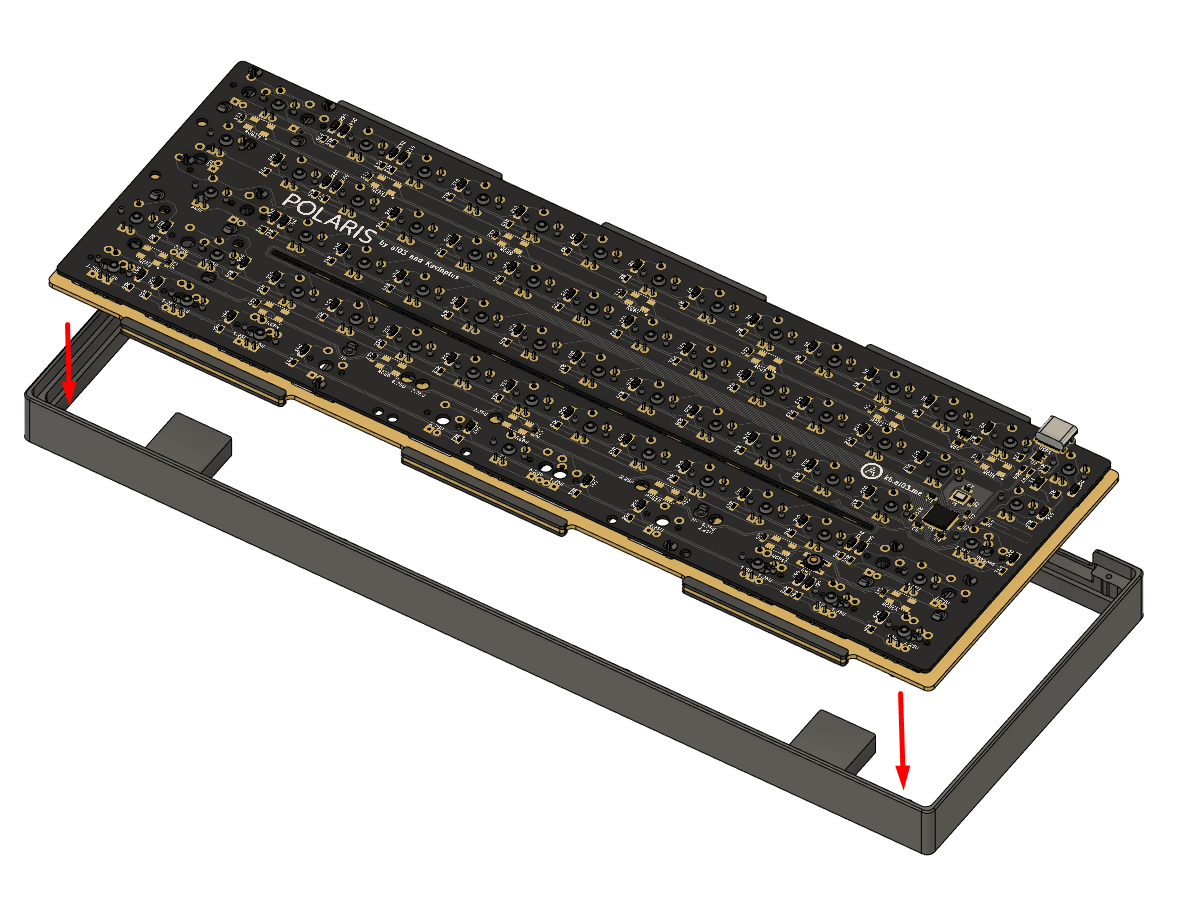
Insert the switch-plate-PCB assembly into the upper case half, so that the vertical gaskets installed onto the upper case half hold the plate in place from the sides. Be careful not to force the assembly in, for this can tear the vertical gaskets off the top case half.
-
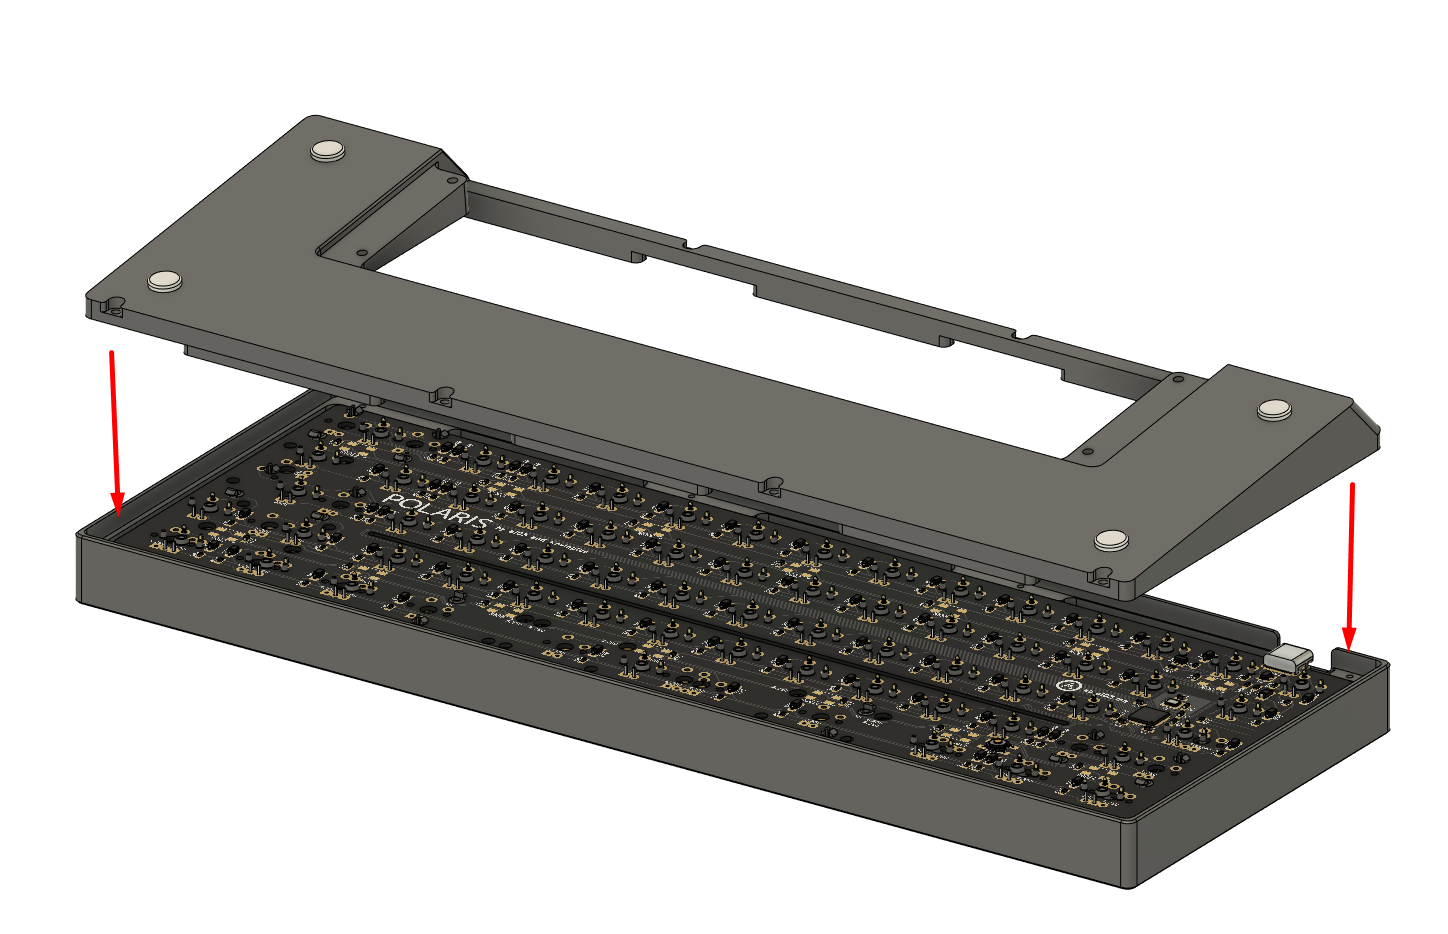
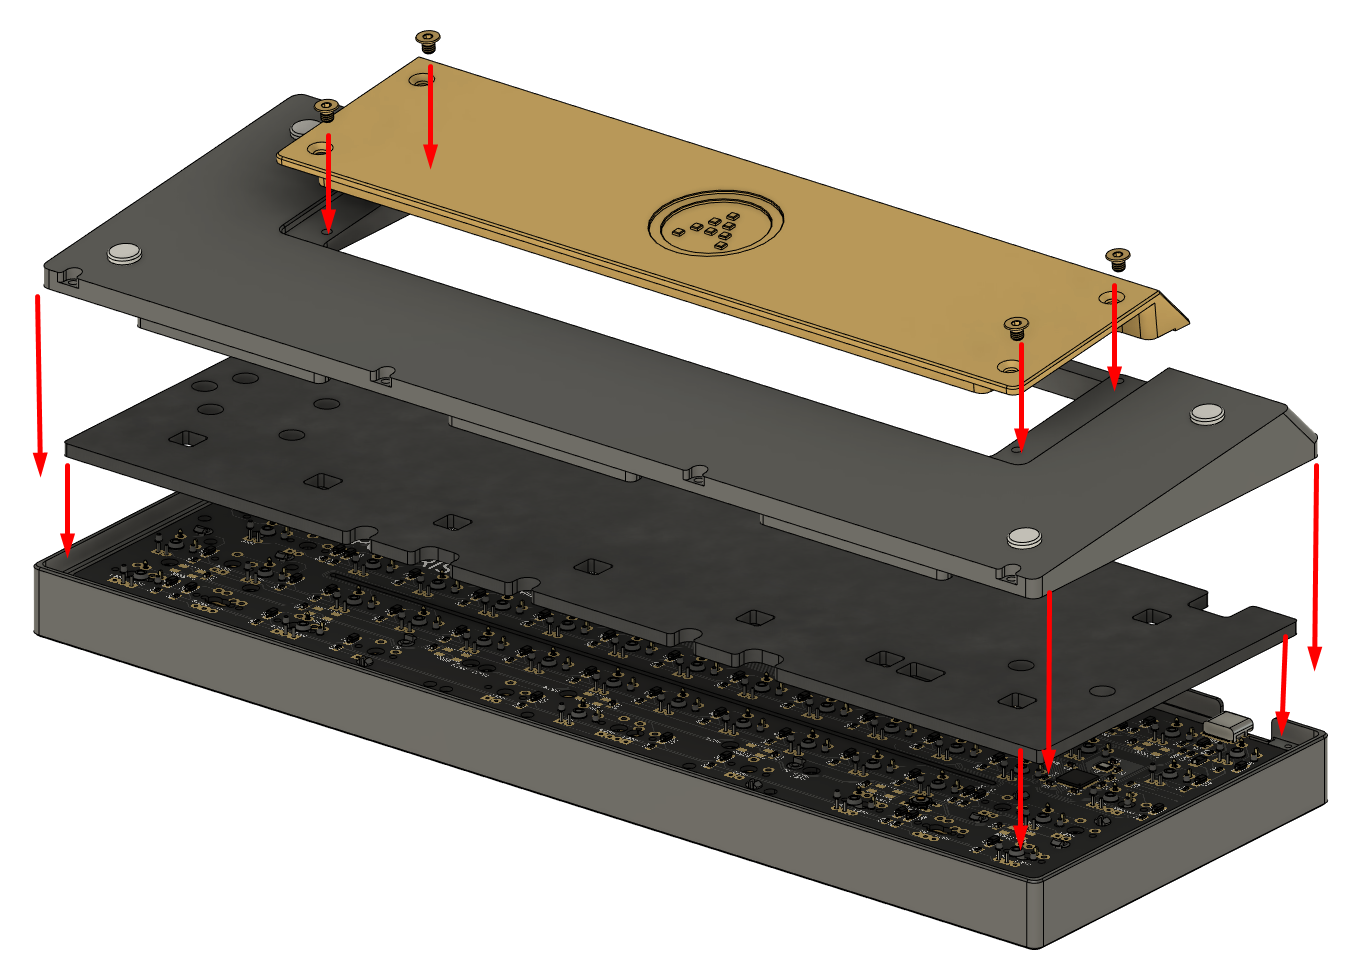
Carefully insert the bottom case half. Screw the case halves together with the eight small case screws using the smaller hex key.
-
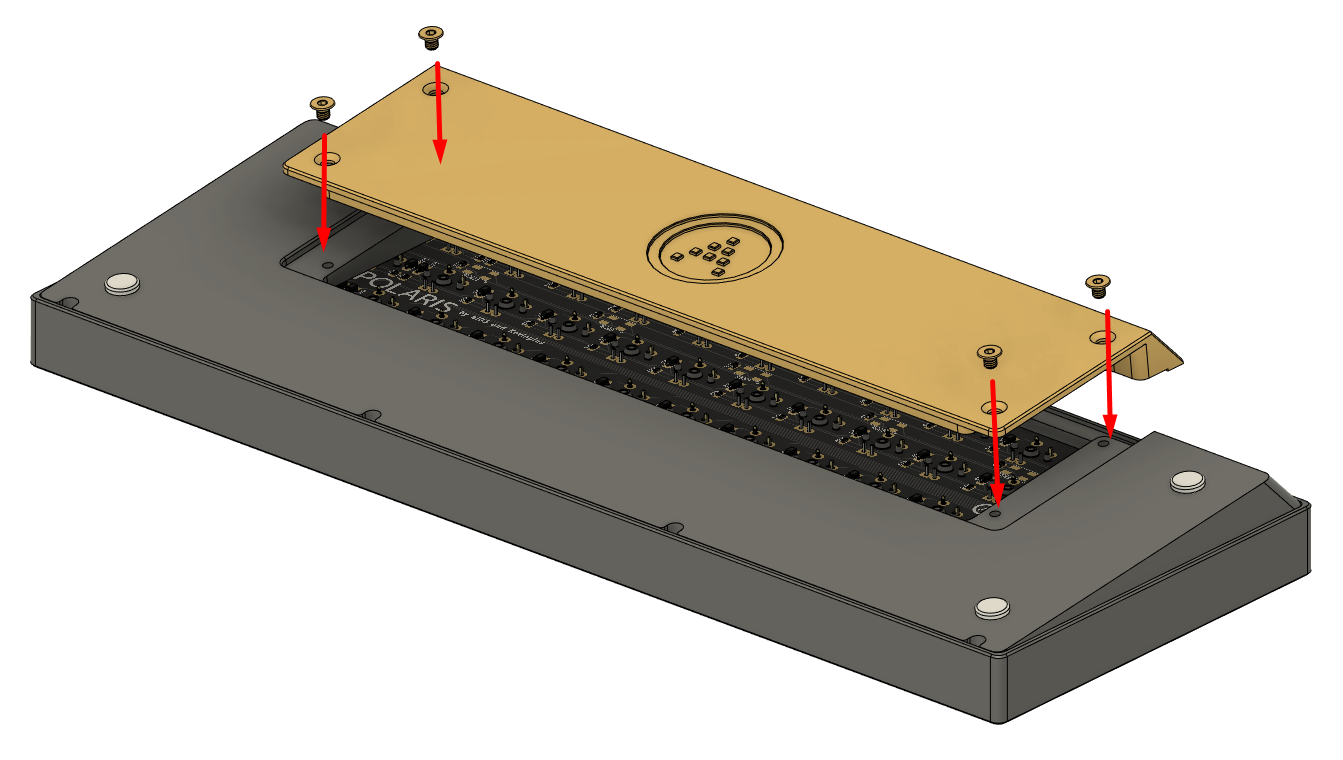
Carefully insert the weight. Screw the weight into place with the four weight screws of your preferred color using the larger hex key.
-
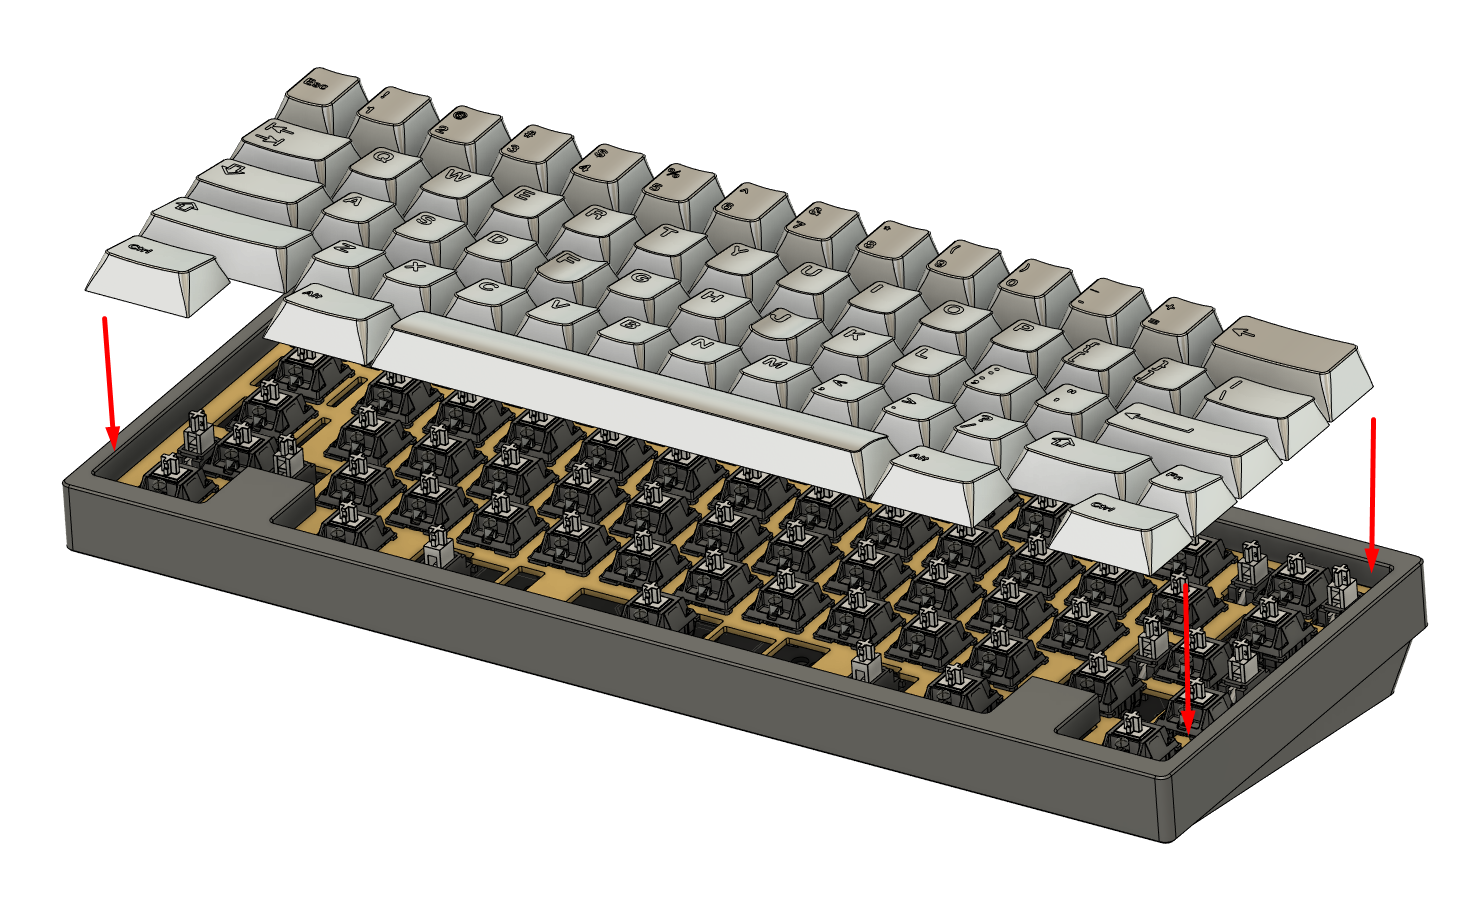
Set the keyboard upright, and verify that everything is in place. Install keycaps.
-
Give it a quick typing. Take the weight and lid off again, and this time insert the sub-PCB foam layer and reassemble. Go with whichever configuration you prefer for feel and sound.
-
Connect the board to a PC via USB-C cable, and verify that keystrokes are sent. You’ve now assembled a Polaris. Congratulations!
The board is now ready for keymap editing.
Next Page