Polaris Build Guide
Pages
Polaris Build Guide - Page 2
The PCB comes with a basic keymap that types, but likely isn’t ideal for your use case.
To get it functioning well, it’s necessary to install a more recent copy of the firmware that’s compatible with Via Configurator.
-
Unbox the PCB if not already done.
-
Download the via-compatible firmware hex file ai03_polaris_via.hex from here.
-
If you haven’t installed QMK Toolbox, Atmel FLIP, or a similar firmware flashing program before, do the following:
-
Grab the latest QMK Toolbox here.
-
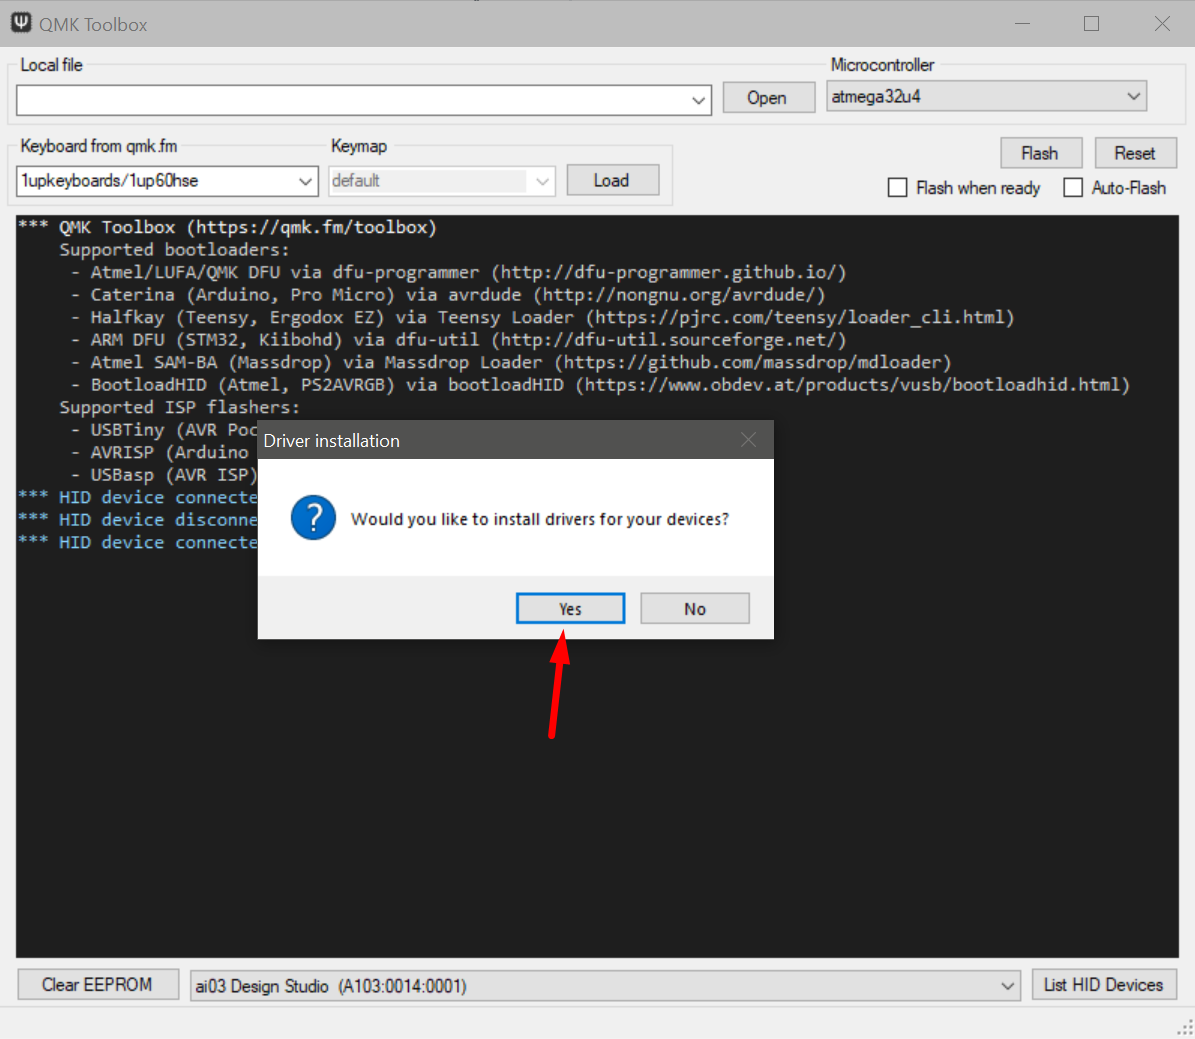
Run QMK Toolbox (or install and run if you grabbed the installer variant). It will ask you if you wish to install drivers; select yes.

-
The drivers will install slowly, then exit. After this, you may need to restart your PC to get the drivers loaded.

-
-
Flash the firmware. For QMK Toolbox users, do the following:
-
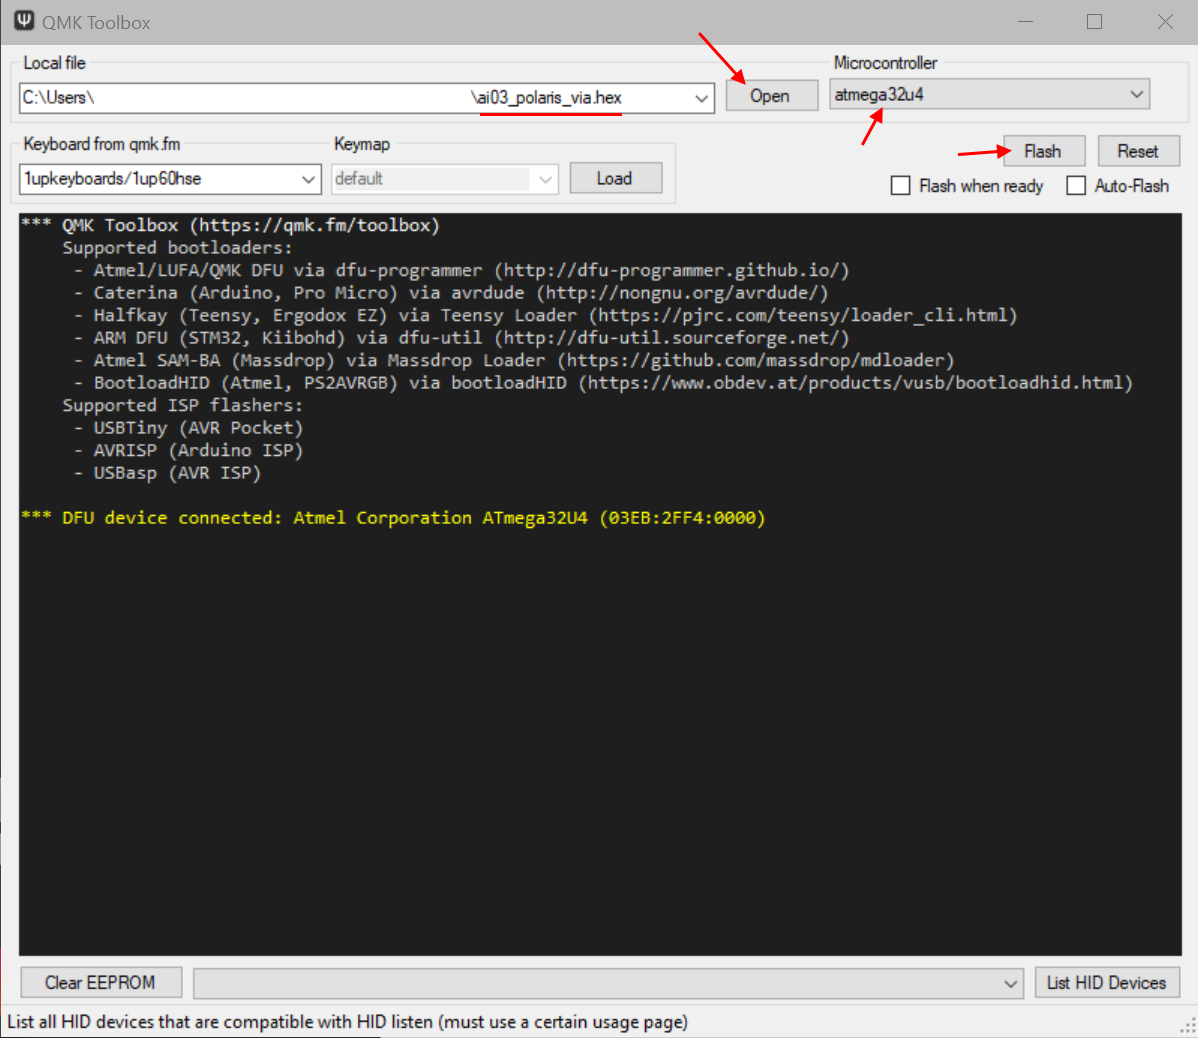
Launch QMK Toolbox. For the Local File field, press the Open button, and select the hex file that you downloaded at step 1.
-
Plug in your PCB, and press the reset button located near the left Win/Alt key location on the bottom. If the drivers are installed, you should see an ATMega32u4 Bootloader device show up.
-
Make sure that the option selected for Microcontroller is the atmega32u4, then press flash. The log should show the firmware being written successfully.

-
-
Replug the PCB once it’s done. It should now register as a functional keyboard and show up as Polaris in device manager or similar.
Next, we will prepare the case for assembly.
Next Page